

Ever lit a candle and felt that tiny spark of magic, wondering if you could boost it even more?
If you’ve ever asked yourself, “can you put crystals in candles,” you’re not alone. We’ve heard that question a lot while hand‑pouring our Glow‑n‑Grow candles, and honestly, it’s a curiosity that blends a love for scent with a dash of intention.
Here’s the thing: crystals are solid minerals, so they don’t melt like wax. That means you can safely nestle a small stone in the wax—just make sure it’s big enough to stay put but not so big that it blocks the flame.
Picture this: you’re prepping a cozy night in, you drop a smooth amethyst chip into the center of a soy‑wax candle, light it, watch the gentle crackle of the wood wick. The crystal sits there, soaking up the warm glow, and you get that subtle boost of calm that amethyst is known for.
But there are a few practical tips we’ve learned over twenty years of crafting. First, always choose crystals that are free of cracks or sharp edges—nothing you’d want to chip off onto a tablecloth. Second, position the stone away from the wick; the flame needs room to breathe, and the crystal should sit near the edge where the wax melts evenly.
And what about safety? Keep the candle on a stable surface, never leave it unattended, and make sure the crystal isn’t too close to the flame. If the wax pools around the stone, it can create a little “hot spot,” so a quick trim of the wick before each burn helps the wax melt smoothly.
So, can you put crystals in candles? Absolutely—just do it mindfully. By treating the crystal like a tiny, decorative anchor, you get both the visual charm and the subtle energy boost without compromising the candle’s performance.
Ready to try it yourself? Grab a favorite stone, pick one of our soy candles, and let the glow do the rest. You might just discover a new ritual that feels both soothing and a little bit sparkly.
TL;DR
Yes—you can safely put crystals in candles, and doing so adds a subtle energy boost and a decorative sparkle to your glow‑n‑grow soy candles.
Just choose a smooth, crack‑free stone, position it away from the wick, trim the wick each burn, and enjoy a calming, crystal‑infused ambiance at home.
Step 1: Choose the Right Crystals for Candle Embedding
So you’ve decided to sprinkle a little extra magic into your candle ritual, but you’re staring at a bag of raw quartz and wondering, “Which stone actually belongs in the wax?” Let’s be real—choosing the right crystal is a blend of aesthetics, energy, and good old‑fashioned practicality.
First thing’s first: look for a stone that feels smooth to the touch, with no cracks or sharp edges. A jagged piece can chip off into the wax, and nobody wants a surprise glitter‑bomb on their tablecloth. Think of it like picking a dinner fork—you want something that slides through the wax without snagging.
Next, consider the crystal’s size. A good rule of thumb is to pick a piece that’s about the size of a grape or a small marble. Anything larger risks blocking the flame, while a teeny‑tiny chip can get lost in the melt pool and never really show off its sparkle. If you’re working with a standard 9‑oz soy candle, a ½‑inch to ¾‑inch stone fits perfectly.
Now, let’s talk vibe. Amethyst for calm, citrine for sunny optimism, rose quartz for a touch of love—each stone carries its own subtle energy. We’ve seen a lot of customers reach for moss agate when they want balance, or tiger’s eye when they’re after a grounding boost. The key is to pick a crystal that resonates with the intention you set for the candle.
In our Glow‑N‑Grow candles, we hand‑select stones that are both visually striking and energetically aligned, so you get a beautiful centerpiece that also supports your mood.
When it comes to placement, set the crystal near the edge of the wax pool, not directly in front of the wick. This gives the flame room to breathe and lets the wax melt evenly around the stone. A simple trick is to press the crystal into the wax when the candle is still liquid but has cooled just enough to hold its shape—think of it as tucking a tiny friend into a warm blanket.
Here’s a quick visual guide to help you picture the perfect spot:
Notice how the crystal sits just off‑center, allowing the flame to dance around it without interference. This positioning also helps the stone absorb the gentle heat, which some believe enhances its vibrational properties.
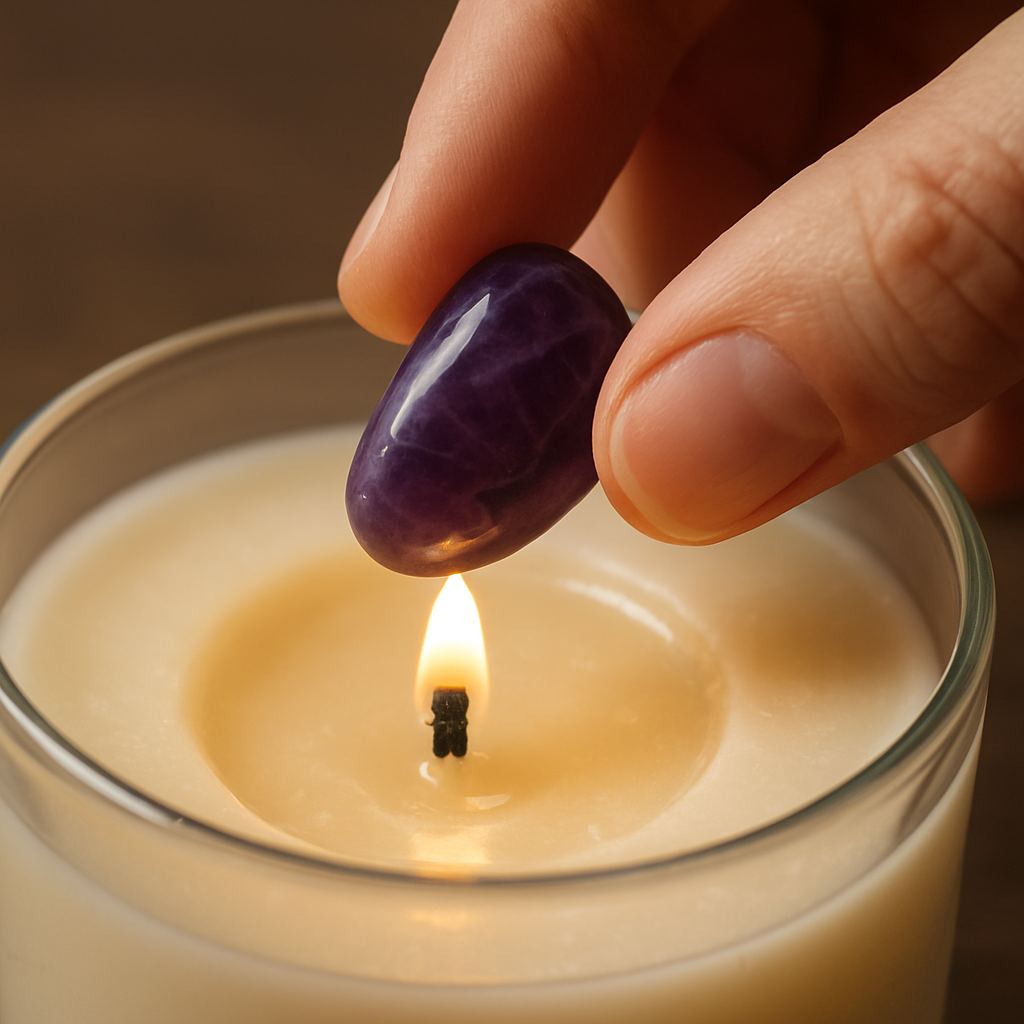
If you’re looking to deepen the relaxation factor, you might pair your crystal‑infused candle with a calming CBD product. A soothing blend of aromatics and a gentle CBD tincture can turn a simple evening into a full‑body unwind session. Check out Iguana Smoke CBD products for options that complement the mellow vibe of a lavender‑scented candle.
For those who enjoy weaving spirituality into their daily routine, consider pairing your candle practice with a reflective read. A thoughtfully chosen book can amplify the intention you set while the crystal glows softly beside you. One resource we’ve found inspiring is a practical guide to choosing a Christian self‑help book, which offers a gentle framework for meditation and personal growth.
Actionable checklist:
- Pick a smooth, crack‑free stone (≈ grape‑size).
- Match the crystal’s energy to your candle’s intention.
- Press the stone into the wax pool near the edge while the wax is still warm.
- Trim the wick before each burn to keep the flame steady.
- Enjoy the glow, and experiment with complementary wellness tools.
Give it a try tonight—choose a stone that calls to you, embed it carefully, and watch how the simple act of lighting a candle becomes a mini ritual of intention and calm.
Step 2: Prepare Your Candle Wax Safely
Now that you've picked the perfect crystal, it's time to get the wax ready without turning your kitchen into a mini‑lab disaster.
Measure, melt, and mind the heat
Start by measuring the amount of soy wax your jar needs. A good rule of thumb is to fill the container about three‑quarters full, then add a little extra for top‑off after the first pour. Got a kitchen scale? Use it – it takes the guesswork out of “just enough”.
Next, set up a double boiler or a dedicated wax melter. We love the classic pot‑and‑bowl method: bring a few inches of water to a gentle simmer, then place a heat‑proof bowl on top. The wax should melt slowly; stirring too vigorously can introduce air bubbles that later show up as cracks.
Here's where the candle wax melting temperature guide comes in handy. Soy wax typically melts between 120°F and 180°F (49°C‑82°C). Aim for the sweet spot around 150°F (65°C) – hot enough to flow smoothly, but not so hot that it burns the fragrance or stresses the crystal.
Does it feel like too much science? Think of it like cooking pasta: you want the water just right, not boiling over or lukewarm.
Temperature check – your new best friend
Grab a digital thermometer and keep an eye on the wax. Once you hit that 150°F mark, turn off the heat and let the wax sit for a minute or two. This “cool‑down” window is perfect for adding fragrance oils without vaporizing them.
Pro tip: if you’re using a wood wick (like the ones we hand‑craft at Evolve Botanica), a slightly lower pour temperature helps the wick stay centered as the wax solidifies.
Fragrance and pour – the aromatic finish
Now’s the moment to stir in your chosen scent. Add about 6‑8% fragrance oil by weight – too little and the candle will smell faint, too much and you risk a soggy top.
Stir gently for 30 seconds, then let the wax settle for another minute. This brief pause lets any tiny air bubbles rise to the surface where you can skim them off with a spoon.
Ready to pour? Position your prepared crystal (we’ll get to that in a second) near the edge of the jar, then slowly stream the wax in a steady, thin ribbon. Pouring in a spiral helps the wax coat the sides evenly and reduces the chance of a “tunnel” where the center stays unmelted.
Take a breath. You’ve just turned raw wax into a glowing canvas for your crystal.
Slip the crystal in without a scorch
While the wax is still liquid but cooling (around 130°F/54°C), gently lower the crystal onto the surface. If it’s a small amethyst chip, you can rest it on a spoon and let it settle into the wax. The goal is to have the stone sit just below the surface, not floating on top where the flame could lick it.
Some makers like to “anchor” the stone by first pouring a thin “puck” of wax, letting it harden, then adding the main pour around it. This trick gives you a stable base and avoids the crystal drifting as the wax cools.
Finally, let the candle cool completely – at least three hours for a 12‑oz jar. Resist the urge to move it while it’s still soft; even a tiny nudge can cause cracks that later become uneven burns.
Quick safety checklist
- Use a thermometer; don’t guess the temperature.
- Keep the wax below 180°F to protect fragrance and crystal.
- Place the crystal away from the wick, preferably near the jar wall.
- Allow the candle to cool undisturbed for 3‑4 hours.
- Trim the wick to ¼‑inch before lighting.
And there you have it – a safe, scent‑filled wax bed ready to showcase your crystal. Light it, breathe in, and watch the calm unfold. Ready to give it a try?
Step 3: Embedding Crystals – Techniques and Safety Tips
Now that your wax is at that sweet spot – around 130°F (54°C) – it’s time to give your crystal a home. If you’ve ever wondered “can you put crystals in candles” and worried about a melt‑down, this is where the magic happens without the mess.
Pick a placement method that feels right
One way is the straight‑forward “direct drop.” You simply rest the stone on a spoon and let it sink into the liquid wax. It’s quick, it’s tidy, and it works great for small, dense chips like amethyst or rose quartz.
Another favorite among our makers is the “wax puck anchor.” First you pour a thin disc of wax, let it harden, then nestle the crystal in that little nest before you pour the rest of the candle. This gives the stone a solid foothold and stops it from drifting as the wax cools.
If you’re feeling a bit more decorative, try a “layered pour.” Start with a thin layer of wax, place the crystal, then gently add a second layer. The result is a subtle halo of wax around the stone – perfect for a visual reveal when the candle burns down.
So, which method sounds like you? Think about the size of your stone, the jar shape, and how much visual drama you want.
Safety first – a quick sanity checklist
We’ve all seen a crystal melt or a jar crack because someone ignored a simple rule. Keep these in mind every time you reach for a stone.
- Temperature matters: never exceed 180°F (82°C). Anything hotter can scorch the fragrance and weaken the crystal.
- Keep the crystal away from the wick – at least a half‑inch gap is ideal.
- Use a thermometer; guessing leads to hot spots.
- Let the candle cool undisturbed for 3‑4 hours before moving it.
- Trim the wick to about ¼‑inch before lighting to prevent a flame that’s too big.
And remember, the jar itself is part of the safety system. A thick‑walled glass or ceramic container can handle a little extra heat, but thin “budget” jars are a no‑go for crystal work.
Hands‑on tips you can try right now
Grab a small amethyst chip, a spoon, and a digital thermometer. Heat your wax to 150°F, turn off the heat, and watch the thermometer dip into the sweet zone. When it’s steady at 130°F, lower the spoon and let the stone settle. If you’re using the puck method, pour just enough wax to cover the bottom of the jar, let it set for five minutes, then place the crystal and finish the pour.
Feel that slight resistance as the stone meets the wax? That’s the right amount of friction – you don’t want it to bounce around, but you also don’t want it stuck too tightly, or it could crack the glass when it expands.
Once it’s solid, give the surface a quick visual check. No bubbles? No cracks? You’re good to go. Light the wick, and watch the flame dance around the facets. If the flame flickers oddly, trim the wick a touch more and let the candle settle for another hour.
Quick reference table
| Technique | Best For | Quick Note |
|---|---|---|
| Direct drop | Small, dense stones | Fast, minimal prep |
| Wax puck anchor | Medium stones, jar with curved walls | Extra stability, prevents drift |
| Layered pour | Show‑case stones, visual effect lovers | Creates a halo, needs patience |
There you have it – a handful of techniques, a safety checklist, and a table you can print out next time you’re at the kitchen counter. Embedding crystals is less about wizardry and more about a few mindful steps. Give one of these methods a try, and you’ll see why the answer to “can you put crystals in candles” is a confident yes.
Step 4: Enhance the Candle Experience with Aromatherapy and Crystal Energy
Now that your crystal is snug in the wax, it’s time to turn the simple candle into a mini‑ritual. Think of the scent as the soundtrack to the visual and energetic performance you just set up.
Pick a fragrance that talks to your intention
Do you want calm, focus, or a little lift? Pair amethyst with lavender for bedtime serenity, or match citrine with citrus notes for a morning boost. The scent you choose will mingle with the crystal’s vibration, creating a layered experience.
When you combine a soothing essential oil with a crystal, the warmth of the flame actually “activates” the stone’s energy, according to practitioners who’ve tried the blend. Crystal candles combine the natural energy of crystals with the calming glow of candlelight, so you’re not just adding fragrance—you’re amplifying intention.
How to infuse the aroma without overheating
After you’ve measured your fragrance oil (about 6‑8 % of the wax weight), let the melted wax cool to around 150°F (65°C). That temperature is low enough to keep the scent profile intact but still fluid enough for a smooth pour.
Stir gently for 30 seconds, then pause and watch the surface. If you see any bubbles, the tiny air pockets can mute the scent later.
Position the crystal for optimal flow
Place the stone near the jar wall, just below the wax surface. When the candle burns, the melt pool will travel around the crystal, letting the fragrance circulate evenly. You’ll notice the scent spreading more quickly once the wax reaches the stone’s edge.
And here’s a quick tip: if you’re using a wood wick, the crackle adds a subtle “white noise” that can make meditation feel deeper. Just trim the wick to a quarter‑inch before each lighting.
Light it, breathe, and set your intention
Light the wick, take three slow breaths, and focus on a single word – “peace,” “focus,” or “joy.” Visualize the flame hugging the crystal, and let the aroma fill the room. The combination works like a sensory anchor that brings you back to the moment whenever you’re feeling scattered.
Want a repeatable routine? Light your candle at the same time each day, maybe after your morning coffee or right before bedtime. Consistency trains your brain to associate that scent‑crystal combo with the desired state.
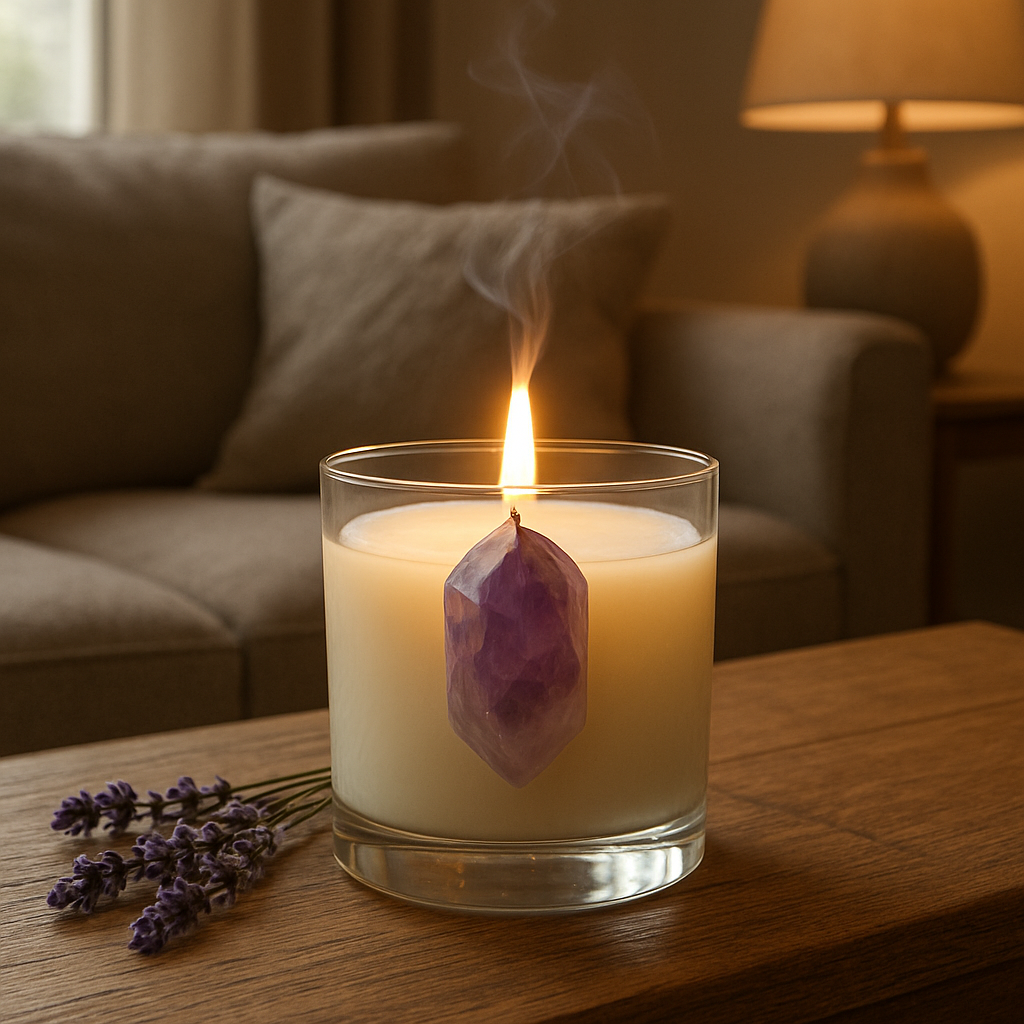
Safety and upkeep checklist
- Never leave the candle burning longer than four hours.
- Trim the wick to ¼‑inch before each use.
- After the candle’s done, let the wax cool completely, then remove the crystal with a spoon.
- Clean the stone gently with mild soap and water before re‑using it in a new candle.
- Store your scented candles away from direct sunlight to preserve fragrance strength.
By weaving aromatherapy into your crystal candle, you answer the lingering “can you put crystals in candles” question with a full‑sensory experience. It’s not just a pretty glow—it’s a purposeful, fragrant, and energetic ritual you can tailor to any mood.
Try this combo tonight and notice how the scent lingers even after the flame’s out—your space stays gently charged, ready for the next meditation.
Step 5: Troubleshooting Common Issues and Best Practices
So you’ve poured, set the crystal, and lit the wick. Suddenly the flame flickers, the wax pools oddly, or the scent seems weak. Sound familiar? It’s the part of the process where a few tiny missteps can turn a serene ritual into a frustrating mess.
Why the flame might misbehave
First thing to check: the wick. If it’s too long, the flame will roar and create a mini‑tornado of wax, which can push the crystal out of place. Trim it to about ¼‑inch before every burn. If the wick is too short, the flame won’t reach the wax evenly, and you’ll get a weak glow that barely heats the stone.
Second, look at the crystal’s position. Remember the golden rule we’ve mentioned: keep the stone at least a half‑inch away from the wick. Too close, and the heat can cause the crystal to crack or create a hot spot that melts the glass.
Lastly, temperature matters. Pouring wax that’s hotter than 180°F can scorch the fragrance and weaken the crystal’s surface. If you notice a burnt smell or a dull flame, you’ve probably overshot the temperature.
Wax pooling problems
Ever poured a candle only to see the wax pool in a thin ring, leaving a tunnel in the center? That usually means the wax was poured too hot or the jar was too cold. Give the jar a quick warm‑up in warm water before you pour, and aim for a pour temperature around 130‑140°F. The wax will set more evenly and hug the crystal nicely.
If the wax pools around the stone and creates a “bubble” that lifts it, you’re likely dealing with a stone that’s too dense for the container size. Switch to a smaller chip or choose a jar with a wider base so the stone sits snugly without forcing the wax to bulge.
Fragrance fading fast?
A weak scent often traces back to one of three culprits: temperature, fragrance load, or wax cooling too quickly. Keep the wax at 150°F when you add the fragrance oil, and stir gently for 30 seconds. Then let the mixture sit for a minute before pouring – this lets the fragrance bind to the wax instead of evaporating.
Also, store your finished candles away from direct sunlight. UV light breaks down essential oils faster than you’d think, and a candle that once smelled like fresh lavender can turn bland in a few weeks.
Quick troubleshooting checklist
- Trim the wick to ¼‑inch before each lighting.
- Verify the crystal is at least ½‑inch from the wick.
- Pour wax at 130‑140°F for even cooling.
- Add fragrance at 150°F and stir gently.
- Warm the jar briefly before pouring.
- Store candles in a cool, dark place.
Best‑practice habits to adopt
Make a habit of noting the temperature each time you melt wax. A simple kitchen thermometer becomes your best friend and saves you from guesswork. Write down the pour temperature, the size of the stone, and the wick type in a quick log – over time you’ll spot patterns that make future candles more reliable.
When you’re experimenting with new crystals, do a “test puck” first. Melt a tablespoon of wax, embed the stone, let it harden, and then burn it for a few minutes. If the stone stays stable and the flame stays steady, you’re good to go for a full‑size pour.
Finally, trust your senses. If the candle smells off, the flame looks hungry, or the crystal feels unusually warm after a short burn, extinguish it, let everything cool, and reassess. A small adjustment now prevents a broken jar later.
Does this all feel a bit overwhelming? Take it one step at a time. Start with the wick, then the temperature, then the crystal placement. Before you know it, you’ll have a smooth, fragrant, crystal‑infused candle that lives up to the question “can you put crystals in candles” without any hiccups.
Conclusion
So, after all the trial and error, does the question “can you put crystals in candles” finally feel settled? The short answer is yes—just treat the stone like a tiny, steady anchor and respect the wax’s temperature limits.
Remember the three pillars we’ve walked through: pick a smooth, non‑porous crystal the size of a pea, keep it at least a half‑inch from the wick, and pour the wax at a cool‑down temperature around 130‑150°F. When those basics are in place, the flame stays steady, the scent stays strong, and the crystal stays intact.
We’ve also seen that a quick “test puck” before a full pour saves headaches later, and a simple temperature log turns guesswork into repeatable success. Those habits turn a hobby into a reliable ritual you can share with friends or gift during the holidays.
What’s next for you? Grab a favorite stone, set up your double‑boiler, and give the process one more go. If you enjoy the result, swing by our booth at Etowah Mills or the Hanukkah Bazaar—our crystal‑topped candles are there, ready to inspire your next creation.
And remember, every candle you craft is a small experiment in light and intention—keep exploring, note what works, and let each glow teach you something new.
FAQ
Can I safely embed crystals in a candle without ruining the wax?
Yes, you can embed a crystal as long as you choose a smooth, non‑porous stone about the size of a pea, keep it at least a half‑inch away from the wick, and pour the wax at a cool‑down temperature of 130‑150 °F. This prevents the stone from cracking or creating hot spots, and the wax will set evenly around the crystal, giving you a stable, decorative finish.
What kinds of crystals should I avoid when making candle embeds?
Skip any crystal that’s porous, cracked, or has a high water content—think raw quartz, turquoise with natural fissures, or stones that feel damp to the touch. Moisture can turn into steam, creating bubbles or even cracking the glass jar. Also stay away from soft minerals like calcite or gypsum, because they soften at candle‑burn temperatures and can discolor the wax or release unwanted odors.
How close can the crystal be to the wick before it becomes a fire hazard?
We recommend keeping the stone at least ½ inch (about 1.3 cm) from the flame. That distance gives the wax enough room to melt evenly while the heat dissipates before reaching the crystal. If the stone gets too close, the wax can form a “hot spot” that may cause the crystal to crack or the glass to stress, potentially leading to an uneven burn or a safety issue.
Do different wax types affect how crystals behave in a candle?
Absolutely. Soy wax cools more slowly than paraffin, giving the crystal extra time to settle without shifting, which is why we favor soy for our Glow‑N‑Grow line. Beeswax burns hotter, so a stone that’s fine in soy may overheat in beeswax. If you experiment with palm or coconut wax, test a small “puck” first to see how the stone reacts to the melt point.
Can I reuse the crystal after the candle has burned down?
Yes, once the wax has fully hardened and the candle is cool, you can gently lift the stone with a spoon. Clean it with mild soap and warm water to remove any residue, then dry it thoroughly before placing it in a new candle. Reusing the crystal keeps the energy intention intact and lets you experiment with different scents without buying a new stone each time.
What should I do if the crystal causes the candle to tunnel?
If you notice a tunnel forming around the stone, it usually means the wax pool isn’t reaching the edges. First, trim the wick to about ¼ inch and let the flame burn a bit longer on the first night to melt the wax evenly. You can also warm the glass jar briefly in warm water before pouring, which helps the wax flow around the crystal more smoothly.
Is it okay to add fragrance oils when the crystal is already in the wax?
It’s best to add fragrance before you place the stone. Once the wax cools to around 150 °F, stir in the oil, then let the mixture sit a minute so the scent binds. After that, lower the temperature to 130 °F and embed the crystal. Adding oil after the stone is in place can trap bubbles around the crystal and weaken the scent throw.
Additional Resources
Still wondering can you put crystals in candles without a hitch? Below are a few go‑to references that helped us fine‑tune our Glow‑N‑Grow line.
Safety checklists
We keep a printable PDF of temperature limits, wick trimming tips, and stone‑placement guidelines. It’s the kind of cheat sheet you can stick on your kitchen counter.
Crystal‑and‑candle pairings
Our blog series explores which gem vibes match popular scents – amethyst with lavender, citrine with orange zest, rose quartz with vanilla. Each post includes a quick “why it works” note.
Community Q&A
Got a weird scenario? Our Facebook group is a low‑key hub where makers swap photos, troubleshoot tunneling, and celebrate successful pours. It’s a friendly place to ask “is this stone safe?” and get real‑world feedback.
Take a moment to bookmark these resources, print the checklist, and experiment with confidence. The more you explore, the easier it becomes to answer the question “can you put crystals in candles” with a solid “yes, safely.”p>
0 comments