

Ever noticed the difference between that silky, bubbly bar you get from your local artisan shop and the thick, matte ones that come out of a soap‑making kit? Most people think it’s just a texture thing, but it’s actually a whole different chemistry behind the soap‑making process.
It starts with the question: is it cold or hot? The “cold process” is all about letting the ingredients mingle at room temperature. Think of it as a slow, patient dance—no heat, no rush. The result is a bar that can be softer, more moisturizing, and often has a vibrant color palette thanks to natural plant pigments. We’ve seen customers rave about our lavender‑infused cold‑process bars, especially during the chilly winter months.
Hot process, on the other hand, throws a little heat into the mix. The soap saponifies faster, and the extra warmth helps the lather settle into a firmer, more stable shape sooner. That’s why hot‑process bars tend to have a darker tone and a slightly denser feel. A few of our goat‑milk hot‑process soaps keep that rich, creamy scent locked in even after a few washes.
So, why does this matter to you? If you’re buying soap for a gift, cold process might give you a softer, more fragrant bar that feels like a spa treat. If you’re looking for a product that holds its shape on a shelf or in a travel bag, hot process offers that extra firmness.
And here’s the kicker—both methods are 100% natural, no synthetic dyes or preservatives. Whether you choose a cold‑or hot‑process bar, you’re getting a product that respects the skin and the planet.
Next up, we’ll break down the pros, cons, and what each process does for the ingredients inside. Stick around, because knowing the difference can help you pick the perfect bar for your skin or your next holiday gift.
TL;DR
Cold process vs hot process soap means the difference between a silky, aromatic bar that ages gracefully and a dense, fast‑curing bar that stays firm in travel bags or on shelves. Choose cold process for a spa‑like scent that melts skin, or hot process when you need a bar that holds its shape through holiday gifting or long shelf life—both stay 100 % natural and cruelty‑free.
Core Differences: Cold Process vs Hot Process Soap – A Quick Reference Table
When you first stumble into the world of soap‑making, the cold‑process vs hot‑process debate feels like picking sides in a culinary duel. It’s not just about heat; it’s about the story each bar tells—from aroma to shelf life to the way it feels on your skin.
Think about the last bar you used: that silky, fragrant bar that melts into a gentle lather versus the dense, matte bar that feels solid in your palm. The differences come down to temperature, timing, and a handful of ingredients that react differently under heat.
So, what’s the real deal? Below is a quick reference table that cuts through the jargon and shows you the core distinctions at a glance. Grab a cup of coffee—yes, the same one that might be brewing on your counter—because we’ll keep it real and practical.
| Feature | Cold Process | Hot Process |
|---|---|---|
| Temperature | Room temperature (20–25 °C) | Elevated (40–55 °C) |
| Curing time | 4–6 weeks to fully saponify | 1–3 days, then short cure (1–2 weeks) |
| Texture & Lather | Soft, silky, rich lather | Firm, dense, less fluffy lather |
| Color & Aroma retention | Bright, vibrant pigments; scents bloom over weeks | Muted, darker tones; scents lock in quickly |
| Ideal for | Gift‑ready, aromatic bars, delicate botanicals | Travel packs, holiday tins, high‑durability use |
Now that the numbers are out, let’s add some flavor. In a cold‑process batch, you’re essentially letting the fats and oils mingle with the lye at a gentle pace. That slow dance means you can toss in fresh herbs, dried flowers, or even tiny pearls of beeswax without fearing a runaway reaction. The result? A bar that can keep its moisture and fragrance intact for months.
Hot‑process is the opposite of that slow‑simmer. Heat speeds up the saponification reaction, so you see the soap “cook” and set faster. The heat also drives off more moisture, which gives you a bar that’s noticeably firmer and less likely to crumble in a suitcase. Think of it like baking a loaf of bread: the longer, slower rise gives you a tender crumb, while a quick bake results in a denser loaf.
Do you know why some artisan brands lean toward hot‑process? It’s all about shelf life and stability. If you’re sending a gift to a friend overseas, or stocking up for a holiday sale, a hot‑process bar can survive the trip without losing shape or losing its essential oils to evaporation.
On the flip side, if your goal is to create a spa‑like experience, the cold‑process is your go‑to. You can layer essential oils that are heat‑sensitive—like frankincense or certain citrus notes—without breaking them. Over time, those oils diffuse into the bar and release their aroma with each use.
But what about the ingredients you love? Suppose you’re a fan of goat milk or honey. In a cold‑process batch, the raw actives remain largely untouched, which can leave a gentler, more moisturizing bar. Hot‑process, while slightly harsher, can actually help lock in certain fats, giving you a richer feel that’s perfect for very dry skin or for a luxurious, travel‑friendly bar.
So, how do you decide? Think of the end user and the context. Want a bar that’s as pretty on the shelf as it is on your hand? Hot‑process. Need a fragrance that unfurls over time? Cold‑process. Or, if you’re experimenting, try a hybrid: start with a hot‑process to set the base, then let it cool to room temperature before adding a few drops of essential oil for that final aromatic touch.
Want to see the difference in action? Check out this quick video that shows the two processes side by side, highlighting the texture and scent differences.
In the end, whether you choose cold or hot, you’re still working with the same fundamental ingredients: oils, water, and lye. The choice is what shapes the character of the final bar. Play around, taste the differences, and let your skin and your gifting needs guide you.
Choosing the Right Process: How to Decide Between Cold and Hot Process Soap
We’ve already mapped out the quick reference table, but let’s dig into the decision‑making a bit deeper. It’s like picking the right seasoning for a dish—you want the flavor to shine without overpowering the base.
First, ask yourself: what’s the main goal of your soap? If you’re baking a bar for a holiday gift, the story you tell matters. A sturdy, glossy shape feels like a gift card, while a silky, fragrant bar whispers “spa day at home.” That small difference can sway a buyer’s choice.
Here’s a step‑by‑step guide to help you decide:
1. Identify the Usage Context
Think of where the bar will live. A travel kit, a hotel amenity set, or a pantry shelf needs a bar that won’t crumble or soften too quickly. Hot‑process bars finish curing faster, so they stay firm for longer. If you’re gifting a bar that will be handled a lot—say, a birthday present that someone will pass around—hot process is your friend.
2. Consider Ingredient Sensitivity
Some botanicals love to keep their color and aroma. Lavender, chamomile, or delicate citrus extracts can bleach or lose potency when exposed to heat. If you’re aiming for a vibrant, scent‑heavy bar, cold process keeps those molecules intact. Hot process can melt or break down certain essential oils, but it’s forgiving with heavy butters that need heat to melt evenly.
3. Evaluate Shelf Life Needs
Cold‑process bars typically need 4–6 weeks to cure fully, especially if they’re super‑fatty or loaded with butters. That extended cure time allows glycerin to bind, reducing harshness. Hot‑process bars can be used after just 2–4 weeks, so if you want a product that can ship or stock quickly, go hot.
4. Think About Texture and Finish
Cold process gives you that airy, almost powdery lather that feels luxurious on skin. Hot process bars are denser, sometimes with a matte finish. If you’re marketing a “rich, creamy” line, a hot‑process bar might reinforce that narrative.
5. Superfat Control and Moisture
Hot process allows you to add extra oils after the reaction, giving you a custom‑tuned moisturizing punch. Cold process relies on the oils you start with; superfat is built in, but you can’t tweak it on the fly. If you’re aiming for a high‑moisture bar, think hot.
Now, let’s play the “what if” game. Imagine you’re planning a Christmas market stall. You want bars that look polished, hold up on a wooden crate, and don’t melt in the January chill. Hot process bars will stay firm and give you that premium look. On the other hand, if you’re selling a “spa gift basket” with a lavender‑infused bar that smells like a garden, cold process is the way to go—your scent stays bright, and the bar feels soft and indulgent.
Quick Checklist to Decide
- Goal: Gift vs. everyday use?
- Ingredient sensitivity: heat‑tolerant or delicate?
- Desired shelf life: quick cure or long patience?
- Texture preference: dense or silky?
- Moisture control: need custom superfat?
Answering these questions in order will give you a clear picture. If the majority of answers lean toward “fast, firm, heat‑friendly,” choose hot process. If they lean toward “fragile scent, gentle lather, extended cure,” cold process is the better bet.
Remember, there’s no one‑size‑fits‑all. Both processes can produce beautiful, natural soaps. It’s about aligning your product’s story with the chemistry that brings it to life.
Curious to see how the heat works in real time? Check out this quick demo that walks you through a hot‑process batch: Hot‑Process Soap Video.
Safety First: Essential Equipment and Temperature Controls
Before you even think about measuring oils and lye, let’s talk gear. You’re not a chef in a fancy kitchen, you’re a soap‑maker, and the tools you choose can mean the difference between a smooth batch and a sticky, dangerous mess.
1. The Thermometer that Saves Lives
Temperature is the heartbeat of soap. A good digital thermometer that reads to the nearest 0.1 °C is your best friend. Without it, you’re guessing, and that’s a recipe for over‑lye or under‑lye. Stick it in the pot, tap the side, and read. The sweet spot for hot‑process is 80–90 °F (27–32 °C) once you’ve stirred in lye. For cold‑process, keep everything between 70–80 °F (21–27 °C). If you don’t have a thermometer, buy one. It’s a small price for peace of mind.
2. Heat‑Resistant Pots and Molds
Glass or stainless steel pots are standard, but if you’re using a slow cooker, make sure the lid fits snugly to keep heat in. For the mold, silicone is flexible and easy to release, but a wooden or plastic mold works too – just make sure it’s food‑grade and won’t warp under heat.
3. Personal Protective Equipment (PPE)
In the world of lye, a splash can be a burn. Wear nitrile gloves, eye protection, and a face shield if you’re handling concentrated lye. Even if you’re only doing small batches, a little precaution goes a long way. Think of it as a safety net that lets you focus on the art without worrying about accidents.
4. Lye Solution Control
Mixing lye and water is the first step in any soap recipe. Do this in a well‑ventilated space, and always add lye to water, never water to lye. Use a sturdy stainless steel or heat‑resistant plastic container that can stand a splash. If you’re using a scale, keep your kitchen counter clear of any utensils that could get splashed.
5. Monitoring the Saponification Process
In hot‑process, the soap cooks for 1–2 hours, so keep the pot on low heat and stir every 15 minutes. Use a thermometer to watch for a “plateau” – when the temperature stops climbing. That’s the point to turn off the heat and let it cool. In cold‑process, you’ll “trace” the soap after 20–30 minutes. Trace is that stage when the mixture leaves a visible line on the surface when you drizzle some back onto itself. It signals the reaction is close to complete.
6. Safety Checklist Before You Start
- Have your thermometer ready and calibrated.
- Check that your pot, mold, and containers are clean and heat‑resistant.
- Wear gloves, goggles, and a face shield.
- Work in a well‑ventilated area, preferably with a small fan.
- Keep a bowl of cold water and a towel handy for accidental splashes.
- Never leave a hot pot unattended.
- Keep a small container of water nearby to dilute spills.
Now that you’ve got the gear sorted, the next step is all about controlling the temperature throughout the process. Whether you’re a seasoned bar‑maker or a weekend hobbyist, the right equipment and careful monitoring keep your soap safe and your hands happy.
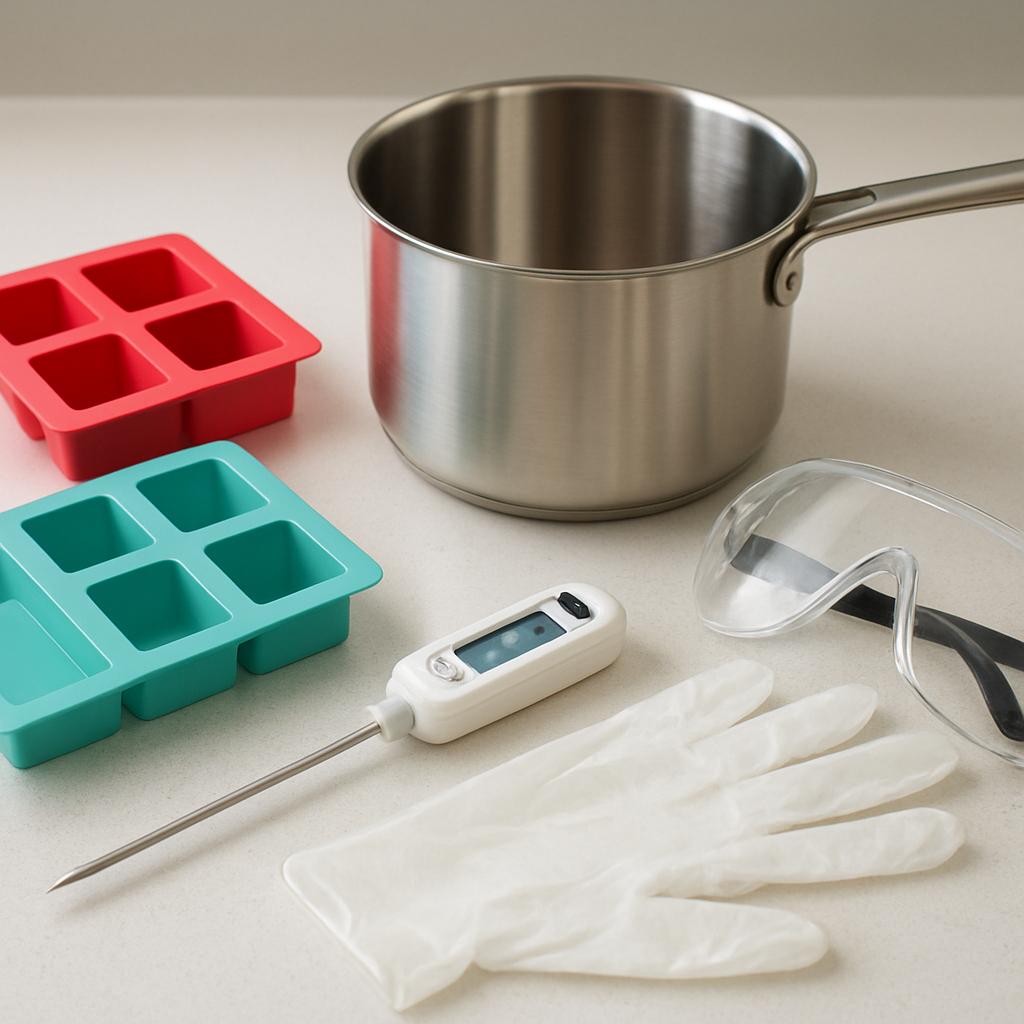
So, what’s the takeaway? Equip yourself with the right tools, respect the temperature, and treat the lye like a respected partner. With these precautions in place, you’ll spend less time cleaning up and more time creating bars that shine.
7. Cooling and Curing: The Final Stretch
After the pot is done, don’t just dump the soap on the counter. Let it sit in the mold for a couple of hours, then pop it out and lay it flat to cool. This helps prevent a soft, crumbly bottom and keeps the surface smooth.
Once it’s fully cooled, wrap each bar in a thin cloth and store them in a dry, airy place. Avoid plastic bags until the bar is fully cured; moisture trapped in plastic can cause mold or a mushy texture.
If you’re shipping or giving a gift, a small paper tube or a biodegradable pouch works great. You’ll keep the scent sealed and the bar protected.
Remember, the temperature you set during cooking and the way you cool can influence how long the bar stays firm. A quick chill in the fridge after 24 hours can help lock in the shape for a few extra weeks.
Step‑by‑Step Cold Process Soap Recipe for Beginners
Ready to make your own bar that feels like a spa‑level indulgence? Let’s walk through the cold‑process journey from kitchen counter to cured bar, one easy step at a time.
1. Gather Your Gear
First things first: line up a sturdy pot (a stainless‑steel or heavy‑duty silicone container works great), a heat‑proof mixing bowl, a stick blender, a digital thermometer, and your mold. Don’t forget gloves, goggles, and a long‑sleeve shirt—lye can be unforgivable if you’re careless.
2. Weighing the Oils and Lye
Use a kitchen scale for accuracy—precision is your best friend. For a simple 12‑oz batch, try 4 oz coconut oil, 4 oz olive oil, and 4 oz shea butter. That ratio gives a balanced lather and a forgiving cure. You’ll need about 1.5 oz of lye (1.4 g per gram of oil) and 3.8 oz of distilled water. Remember: always add lye to water, never the reverse.
3. Mixing the Lye Solution
Pour the water into your heat‑proof bowl, then slowly whisk the lye in. Don’t splash—use a slow, steady stir. As the mixture turns clear and starts to steam, it’s ready. Let it sit while you melt the oils.
4. Combining Oils and Lye
Heat the oils gently in the pot until fully liquid, then allow them to cool to about 110‑115 °F (43‑46 °C). Pour the lye solution into the oils while whisking continuously. Bring it to a gentle stir, then engage the blender for 2‑3 minutes. You’re looking for the trace—when a drop of soap drips back into the mix and leaves a visible line.
5. Adding Color, Fragrance, and Extras
Once you see trace, it’s safe to stir in colorants, essential oils (about 0.5‑1 % of the oil weight), or dried botanicals. Keep the temperature below 120 °F (49 °C) so the aroma doesn’t evaporate. If you’re adding clays for color, mix them in after the initial blend to avoid clumping.
6. Pouring Into Molds and Curing
Gently pour the batter into your mold. Tap the mold lightly to release air bubbles, then cover it with a towel and let it sit in a warm spot for 24‑48 hours. When the surface feels firm but still has a slight give, you can pop the bar out. Place it on a rack or flat surface, wrapped in a cloth, and allow it to cure for 4–6 weeks—this is where the pH mellows and the texture softens.
7. What to Do After Unmolding
Remove the cloth, then check the bar for any rough spots. A quick rinse under cool water can smooth the finish. Store the cured soap in a dry, airy place. If you’re looking for ready‑made bars to test your craft, Standard Soaps - Evolve Botanica offers a range of textures and scents that can inspire your own recipes.
Curious about how professional skincare can enhance your soap‑making journey? Sade Skin offers expert treatments that can deepen the benefits of natural ingredients—perfect for those who want to pair homemade soap with post‑use care.
Step‑by‑Step Hot Process Soap Recipe for Beginners
Ever wondered how a hot‑process bar ends up firmer than its cold‑process cousin? The trick is heat—controlled heat that speeds up the reaction and lets you finish the soap sooner. Let’s walk through a simple, crock‑pot‑friendly batch that’s easy enough for a first‑time maker.
1. Gather the Essentials
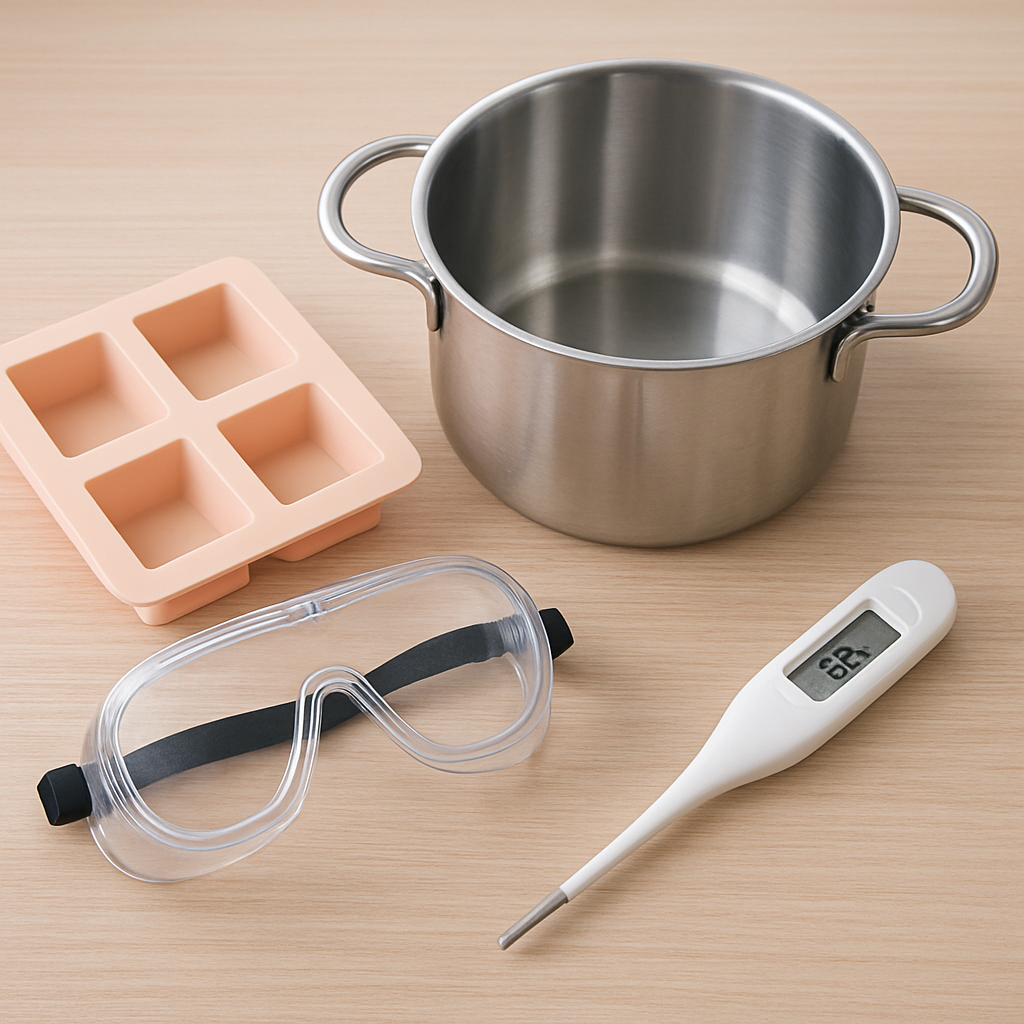
First, line up a sturdy pot (a stainless‑steel saucepan works great), a heat‑proof bowl, a stick blender, a digital thermometer, and a silicone mold. Grab a pair of nitrile gloves and goggles—lye is sharp, so safety matters. If you’re new, keep the pot size small so you can watch the temperature closely.
2. Weigh Oils and Lye
Use a kitchen scale for precision. For a 12‑oz batch, mix 4 oz coconut oil, 4 oz olive oil, and 4 oz shea butter. That blend gives a balanced lather and a forgiving cure. You’ll need about 1.5 oz of lye (roughly 1.4 g per gram of oil) and 3.8 oz of distilled water. Remember: always pour lye into water, not the other way around.
3. Create the Lye Solution
Pour the water into your heat‑proof bowl and slowly whisk in the lye. Keep the stir gentle to avoid splashing. As the mixture turns clear and emits a mild steam, set it aside to cool a few minutes; the lye solution will heat up quickly.
4. Melt the Oils
Place the oils in the saucepan and heat over low until fully liquid—aim for 120–130 °F (49–55 °C). A lower temperature keeps the fragrance intact and prevents the soap from getting too hot when the lye is added.
5. Combine and Blend
Slowly pour the lye solution into the warmed oils while whisking continuously. Once mixed, use the stick blender on low for 1–2 minutes until you see trace—tiny ribbons that linger on the surface before sinking.
6. Add Color and Fragrance
Now’s the time to stir in colorants, essential oils (0.5–1 % of oil weight), or dried botanicals. Keep the temperature below 120 °F to lock in scent. If you’re experimenting, start with a single fragrance to gauge how the soap reacts.
7. Cook the Batch
Cover the saucepan with a lid or foil and let the soap cook on low for 30–45 minutes. Stir every 10–15 minutes to keep the mixture even and to break up any surface film. The soap should begin to thicken like a thickened custard.
8. Check for Completion
Use your thermometer to confirm the mixture has cooled to about 80–90 °F (27–32 °C). If it’s hotter, let it sit until it drops. At this stage, the soap is ready to be poured into molds.
9. Pour and Set
Gently ladle the batter into your silicone mold, tapping the sides to release air bubbles. Cover the mold with a towel and let it sit in a warm spot for 24–48 hours until the surface feels firm but still has a slight give.
10. Unmold, Cure, and Store
Pop the bar out and place it on a rack. Wrap it loosely in a cloth and let it cure for 4–6 weeks at room temperature. This curing time allows the pH to settle and the texture to soften.
Once cured, store the soap in a dry, airy place. If you’re looking to keep the scent locked, use a breathable pouch or a small paper tube. A well‑trimmed bar will stay crisp for weeks on a shelf or in a travel kit.
Want to dive deeper into the science behind hot‑process soap? The Soap Guild’s guide offers a great primer on the chemistry and safety tips for beginners.
The Soap Guild’s resource explains how the temperature curve affects saponification, and it lists recommended safety practices when cooking at higher heat.
FAQ
1. How does the texture of a cold‑process bar compare to a hot‑process bar?
Cold‑process soaps finish softer and often feel silky to the touch. That’s because the glycerin stays locked in, giving a plush lather that’s easy on the skin. Hot‑process bars, on the other hand, tend to be denser and matte. The heat speeds up saponification, so the soap hardens faster and holds its shape, making it great for gift sets or travel kits.
2. Can I add delicate botanicals to a hot‑process batch?
It’s a bit risky. Heat can degrade essential oils and some plant extracts, causing color loss or scent fade. If you want that vibrant lavender or chamomile aroma, it’s safer to keep them in a cold‑process run. If you still want the extra heat, add the botanicals after the soap has cooled to room temperature or use heat‑stable clays.
3. Which method cures faster and why does that matter?
Hot‑process soap typically needs 2‑4 weeks to soften, while cold‑process bars may take 4‑6 weeks. The shorter cure is handy when you want a product ready for shipping or for a last‑minute gift. Longer cure times allow the pH to drop more evenly, reducing potential skin irritation and producing a gentler bar overall.
4. What should I keep in mind if I want a soap that holds its scent?
In hot‑process soap, the fragrance can lock in better because the soap is denser and the oils are more tightly bound. Cold‑process bars release scent more readily but can lose aroma if stored in a warm, humid area. For a long‑lasting fragrance, consider a hot‑process batch and wrap the finished bars in breathable pouches.
5. How does superfatting differ between the two processes?
With hot‑process, you can add extra oils after the reaction, giving you precise control over the final moisture level. Cold‑process superfat is built into the recipe from the start; you can’t tweak it on the fly. That means if you want a super‑moist bar, a hot‑process run gives you that flexibility.
6. Is one method safer for beginners than the other?
Cold‑process is often seen as more beginner‑friendly because it avoids sustained heat, so you’re less likely to scorch the mixture. Hot‑process requires a bit more attention to temperature and timing, but with a reliable thermometer and a low‑heat setting, it can still be approachable. The key is to follow the recipe closely and keep your workspace well‑ventilated.
Glossary of Soap‑Making Terms
Ever stumble over a word like “saponification” and think you’re in a chemistry class? Let’s break it down, no jargon, just plain talk.
Cold Process
When you mix lye and oils at room temperature and let the reaction sit in a mold for weeks, that’s the cold‑process way. The soap keeps most of its glycerin, so it’s softer and kinder to skin.
Hot Process
Here the mixture is cooked on low heat, which speeds up the reaction. You’re usually done in a couple of hours, but the bars stay firmer and hold scent longer.
Saponification
Think of it as the soap’s birth. Lye plus oil equals soap plus glycerin. The timing of this step determines texture and how much glycerin ends up in the final bar.
Superfat
Extra oils added beyond the saponification amount. They give a moisturizing boost, but you can only tweak it in hot‑process runs because the cold‑process recipe is set from the start.
Trace
That moment when a drop of soap drips back into the mix and leaves a line before it sinks. It shows the soap has reached the right consistency to pour.
Glycerin
A natural humectant that pulls moisture into the skin. The more glycerin you keep, the softer the bar stays for a long time.
Got questions about how one term fits into your batch? Drop a note or swing by Etowah Mills—we’ve got a stack of demos and a friendly face ready to chat. Happy soap‑making!
Keep this list handy next time you’re mixing; a quick glance can save you from a batch gone wrong.
Conclusion
So, after all the science and the stories, what’s the real takeaway? If you’re looking for a bar that feels like a spa day in a jar, go cold. If you need something that stays solid on a travel bag or a holiday gift box, hot is the way to go.
Remember, it’s not a battle of good vs bad—just a match between texture and use‑case. Cold process keeps more glycerin, giving a silky lather that’s gentle on skin. Hot process lets you add extra oils after the reaction, so you can tweak moisture and firmness without messing up the whole batch.
Think about your next project. Want to wow a client with a luxe, fragrant bar that melts in a moment? Cold is your friend. Want to ship a bulk batch that won’t crumble? Hot saves time and gives you a stronger shape.
And if you’re still stuck, reach out at the local Etowah Mills stand or drop us a note online. We love swapping ideas over coffee—or over a batch of freshly made soap.
Bottom line: pick the process that matches your goal, not the trend. Both methods are natural, cruelty‑free, and rooted in the same chemistry today.
0 comments