

Ever finish lighting a gorgeous Evolve Botanica candle, stare at the empty jar, and wonder if you’ll ever get it sparkling clean again?
We’ve all been there—candle wax clinging to the sides, a stubborn ring around the rim, and that vague anxiety that the jar is now useless. But what if I told you that rescuing that jar is easier than you think?
In our experience, the trick is to treat the wax like a temporary guest: give it a gentle invitation to melt, then wipe it away before it decides to set permanently.
First, let the jar cool completely; hot glass can crack if you rush it. Then, grab a hairdryer or a kitchen torch and warm the wax just enough so it turns glossy and loose. It only takes a minute, and you’ll hear that satisfying sizzle.
Once the wax is soft, take a sturdy paper towel or a silicone spatula and coax the bulk of it out. You’ll be surprised how much slides off with barely any effort.
Now comes the real cleaning part: fill the jar with hot water and a splash of dish soap. Let it soak for a few minutes—this loosens any residue that the heat didn’t melt away.
After soaking, swirl the water, then use a soft brush or a non‑scratch sponge to scrub the interior. If a thin film remains, a dab of baking soda mixed with a few drops of olive oil works like a mini‑abrasive without scratching the glass.
Rinse thoroughly with warm water, set the jar upright on a dish rack, and let it air‑dry. In a couple of hours you’ll have a crystal‑clear container ready for a new scent, a DIY project, or even a chic kitchen storage jar.
So, does cleaning candle jars feel like a chore? Not when you have a simple, step‑by‑step routine that turns a mess into a fresh start. Ready to give your favorite jars a second life?
TL;DR
Cleaning a candle jar is easier than you think—just melt the wax, soak, scrub, and you’ll have a sparkling container ready for a fresh scent or a stylish DIY project.
Follow our step‑by‑step routine and you’ll turn every leftover jar into a reusable treasure without any hassle in just minutes.
Step 1: Gather Materials and Safety Gear
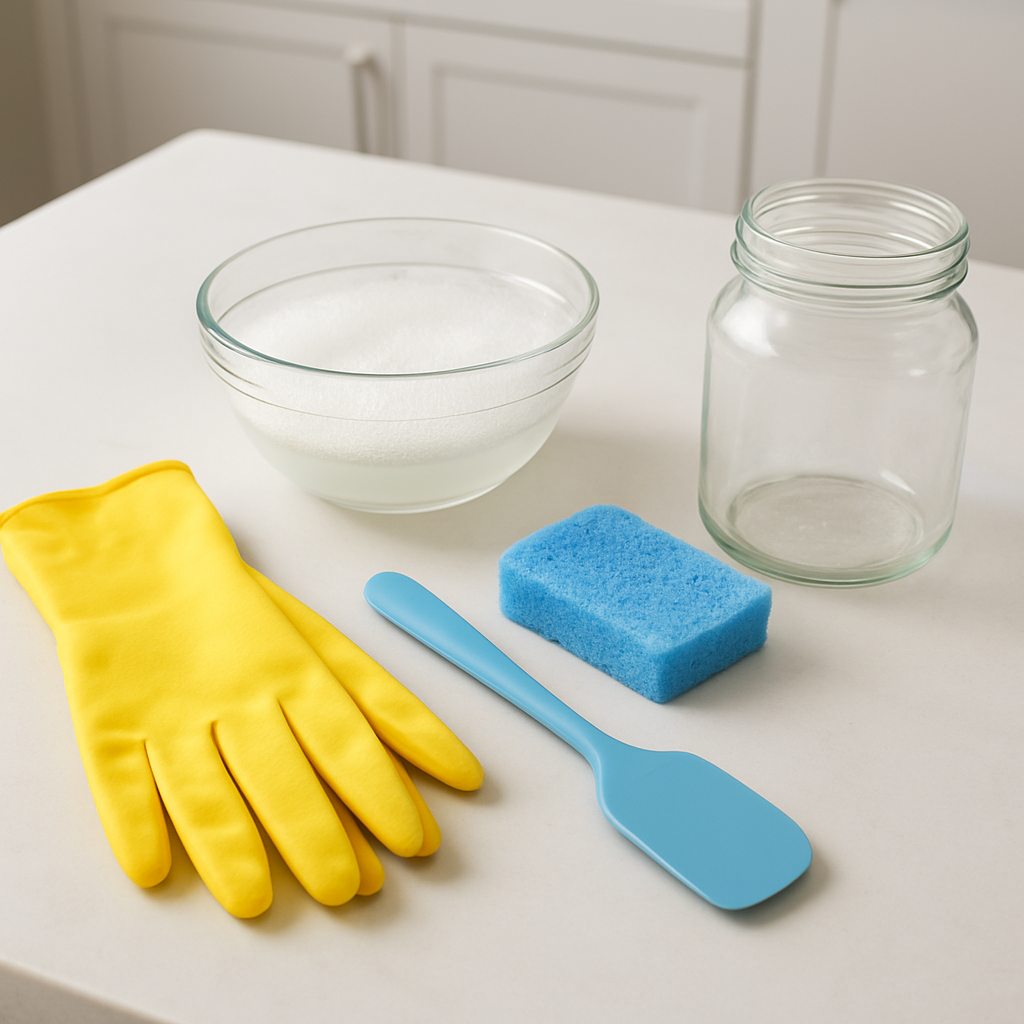
Before you even think about tackling that stubborn wax, take a moment to gather everything you’ll need. It feels a lot less intimidating when the tools are right in front of you, and you’ll avoid those “where’s the sponge?” panic stops that happen mid‑clean.
First up, safety. A pair of heat‑resistant gloves protects your hands from any hot water or steam you might use later. If you’ve ever burned a fingertip while rinsing a jar, you’ll know why this is non‑negotiable. Slip on the gloves, and you’re already one step ahead of the mess.
Next, grab a sturdy silicone spatula or a plastic scraper. Metal can scratch the glass, and a flimsy paper towel will just tear. The silicone edge slides under softened wax without leaving a mark, and it’s easy to rinse afterward.
Now for the cleaning crew: a soft sponge (think non‑scratch kitchen scrubber), a bottle of mild dish soap, and a large bowl or sink that can accommodate the whole jar. Warm water does the heavy lifting, but a little soap helps break down any leftover fragrance oils.
Optional, but wildly helpful: a small bowl of baking soda and a few drops of olive oil. This makes a gentle abrasive paste that can erase a lingering wax film without turning the glass cloudy.
Got a hairdryer? Great. It doubles as a quick heat source if the wax is still a bit stubborn after the initial melt. Just keep it on a low setting and move it around the jar to avoid overheating one spot.
And here’s a pro tip from our own workshop: keep a reusable microfiber cloth handy. It’s perfect for wiping away excess water and giving the jar that final sparkle.
So, what should you do next? Lay everything out on a clean countertop, double‑check you’ve got gloves, scraper, sponge, soap, and your bowl of warm water. When everything is in its place, the actual cleaning feels almost meditative.
Take a quick breath, then move on to the next step: melting the wax. Remember, the goal is to make the wax loose enough to slide out, not to scorch the glass.
Once the wax is softened, use that silicone spatula to coax it out. You’ll be surprised how much slides off with just a gentle push. If any bits cling, a quick dab of the baking‑soda‑olive‑oil paste does the trick.
When the jar is mostly clear, fill it with your warm, soapy water. Let it sit for a couple of minutes – this is where the soap breaks down the remaining residue.
After the soak, give the interior a good swirl and then scrub with your soft sponge. Focus on the rim; that’s where most wax loves to hide.
Rinse thoroughly with clean warm water, give the jar a gentle shake, and set it upright on a dish rack. Pat the outside dry with your microfiber cloth, and you’ll have a crystal‑clear container ready for the next candle or DIY project.
Step 2: Remove Wax Residue
Now that the bulk of the wax is out, the real battle is that stubborn film that clings to the sides and the rim. It’s the kind of residue that makes you stare at the jar and wonder if you’ll ever get it truly clean.
Warm water bath – the low‑stress hero
Fill the jar about three‑quarters full with hot water—just off the boil is perfect. Add a squirt of your favorite grease‑cutting dish soap and give it a quick swirl.
The heat softens the remaining wax while the soap breaks down any oily fragrance oils. Let it sit for two to three minutes; you’ll see little bubbles forming where the wax is loosening.
After the pause, grab a soft‑bristle sponge or a non‑scratch scrubber and gently rub the interior. You’ll notice the film lifting away in patches. Rinse with warm water and set the jar upright to dry.
We’ve found this “warm water bath” works especially well for our Evolve Botanica soy candles because the wax is naturally softer than paraffin. If you need a quick reference, check out this simple water‑bath method that echoes the same steps.
Freeze‑and‑pop – when you’ve got time
Got a few extra hours? Pop the jar into the freezer for at least an hour. The wax contracts as it freezes, creating a clear line where it meets the glass.
When you remove the jar, run a dull butter knife or a plastic scraper along the inside edge. The wax should lift off in one or two solid pieces. If anything sticks, a quick rinse with warm, soapy water finishes the job.
Just remember: this trick works best with thicker glass—thin jars can crack if the temperature shift is too extreme. If you’re unsure, stick with the warm water bath.
Oil‑assisted scrub – for that last stubborn ring
Sometimes a thin ring remains around the rim, especially if the candle had a high fragrance load. A drop of olive oil (or any light cooking oil) mixed with a pinch of baking soda creates a mild abrasive that won’t scratch the glass.
Apply the paste with a soft cloth, let it sit for 30 seconds, then give it a gentle circular motion. The oil loosens the wax while the baking soda lifts it away. Rinse thoroughly to remove any oily residue.
Tip: If you’re cleaning multiple jars, keep a small bowl of oil‑baking‑soda mixture nearby—just a spoonful per jar is enough.
Final rinse and inspection
Give the jar one last rinse under warm running water. Turn it upside down over the sink and give it a little shake to dislodge any remaining suds.
Take a moment to examine the interior in good light. If you spot a speck, a quick swipe with a paper towel will do. Once it looks crystal clear, place the jar on a dish rack to air‑dry.
And there you have it—no greasy film, no leftover wax, just a pristine container ready for a new scent, a DIY project, or a stylish kitchen storage solution.
Action step: Grab your soaked jar, follow the warm water bath or freeze‑pop method, and check the rim with the oil‑baking‑soda paste. In under ten minutes you’ll have a jar that looks like it just came out of the factory.
Step 3: Wash the Jar with Soap and Warm Water
Now that the wax is out, the real magic happens when you give the jar a proper soap‑and‑warm‑water wash. This step removes any lingering fragrance oils, leftover bits of wax, and the faint film that can make the glass look dull.
Gather your cleaning tools
Grab a gentle, grease‑cutting dish soap (the micro‑plastic‑free formula we love at Evolve Botanica works great), a soft‑bristle sponge, and a bowl or sink filled with water that's just off the boil. If you don’t have a thermometer, a quick fingertip test—water should feel hot but not scalding—does the trick.
Fill the jar and let it soak
Place the jar upright in the sink and pour the hot, soapy water until it covers the interior by at least an inch. Let it sit for two to three minutes. The heat loosens any stubborn residue while the soap breaks down the oily perfume base that often clings to the glass.
While you wait, you might notice tiny bubbles forming along the sides. That’s the soap doing its job, softening the film so a light scrub later will be painless.
Scrub gently, not aggressively
Take your sponge and glide it in a circular motion, starting at the bottom and working upward. If a faint ring remains near the rim, dab a bit of baking soda onto the sponge for a mild abrasive—just enough to lift the residue without scratching.
For those who love a visual cue, the Instructables guide shows the same “hot‑water‑and‑spoon” trick that makes the wax float to the surface, then disappear once you give it a quick stir. You can read the full method here for extra inspiration.
Rinse thoroughly
Drain the soapy water and refill the sink with clean, warm water. Swirl the jar a few times to flush out any remaining soap suds. Flip the jar upside down and give it a gentle shake—this helps dislodge any hidden droplets that could leave spots later.
Tip: If you notice a few stubborn spots after the first rinse, repeat the quick soak and scrub cycle. One extra minute rarely adds more effort but makes a huge difference in shine.
Dry the jar without streaks
Set the jar on a clean dish towel or a rack and let it air‑dry for a few minutes. If you’re in a hurry, pat the outside with a lint‑free cloth; avoid paper towels that can leave fibers behind.
When the jar is completely dry, give it a final glance under bright light. A truly clean jar will let the light pass through with no haze, ready for a new candle, a DIY herb storage, or a stylish kitchen container.
Action step: Fill your jar with hot, soapy water, let it soak, give it a gentle circular scrub, rinse, and pat dry. In under ten minutes you’ll have a crystal‑clear vessel that looks like it just rolled off the production line.
Store the jar with the lid on or wrap it in parchment until you’re ready to repurpose it – the glass will stay spotless and ready for any project you dream up.
Step 4: Deodorize, Rinse, and Dry
Deodorize the Jar
Now that the wax and film are gone, the final phase is all about getting rid of any lingering scent and making sure the glass is spotless.
First, give the jar a quick deodorizing boost. In our studio we like to fill the empty vessel with hot water, add a tablespoon of baking soda, and let it sit for five minutes. The mild alkali neutralizes candle fragrance oils that can cling to the glass.
If you prefer a citrus punch, drop a few drops of lemon essential oil into the soak. The acid in lemon cuts through any residual oil and leaves a fresh scent that won’t compete with your next candle.
Rinse Thoroughly
While the jar is soaking, you can multitask. For example, my coworker uses this pause to wipe down her countertop, turning a simple cleaning step into a mini‑productivity hack.
After the five‑minute soak, discard the water and give the jar a thorough rinse under warm running water. Warm water helps dissolve any remaining baking‑soda particles and washes away the loosened perfume molecules.
Tip: Tilt the jar and let the water cascade over the rim for at least 20 seconds. This extra swirl removes hidden droplets that could otherwise leave water spots when the jar dries.
Now comes the drying part, and it’s easier than you might think. Grab a lint‑free microfiber cloth or a clean dish towel and gently pat the inside and outside dry. Avoid paper towels—those little fibers love to stick to glass and create a hazy finish.
If you’re in a hurry, you can set the jar upside down on a rack for a couple of minutes. The gravity‑assisted drip will take care of the last bits of moisture, and the cloth can be used to wipe the exterior while you wait.
A quick visual test saves you from hidden streaks. Hold the jar up to a bright kitchen light; if you see any fogging, give it another quick pat or run a dry corner of the cloth over the spot.
For those who love a completely odor‑free container, an optional final rinse with a mixture of one part white vinegar to three parts water works wonders. Vinegar is a natural deodorizer and evaporates without leaving a vinegar smell.
Just remember to rinse the vinegar solution away with plain water afterward; otherwise, you might notice a faint tang the next time you fill the jar with herbs or spices.
Dry Without Streaks
Real‑world example: I once repurposed a batch of Blue Spruce candles from Virgin River Naturals for a holiday spice rack. After following this deodorize‑rinse‑dry routine, the jars smelled like clean glass, not pine, and they held cinnamon sticks without any cross‑contamination. You can read more about how they design reusable containers here.
Another scenario: you’ve just finished a DIY bath‑salt project and the jar still carries a hint of lavender. A brief soak in hot, soapy water plus a pinch of baking soda will strip that scent, leaving the glass ready for your next experiment, whether it’s a pencil holder or a tiny terrarium.
Pro tip from our team: after the jar is dry, store it with the lid on or wrap it in parchment paper. This protects the surface from dust and keeps the interior pristine until you’re ready to repurpose it.
And don’t forget the rubber gasket on many candle lids. Give it a quick wipe with the same microfiber cloth; a clean seal prevents moisture from seeping back in when you later use the jar for pantry storage.
Putting it all together, here’s a quick checklist you can print or screenshot:
- Fill jar with hot water, add baking soda, soak 5 min.
- Rinse under warm water, swirl rim for 20 sec.
- Pat dry with lint‑free cloth or air‑dry upside down.
- Optional: vinegar rinse for odor removal, then plain water rinse.
- Store with lid or parchment until reuse.
Step 5: Reuse or Store the Cleaned Jar
Alright, you’ve got that jar sparkling clean—no wax, no scent, no mystery spots. Now the fun part begins: deciding what you’ll do with it next. Do you stash it away for a rainy‑day project, or do you give it a brand‑new purpose right now? Either way, a little planning saves you from a future “where‑did‑I‑put‑that‑jar?” scramble.
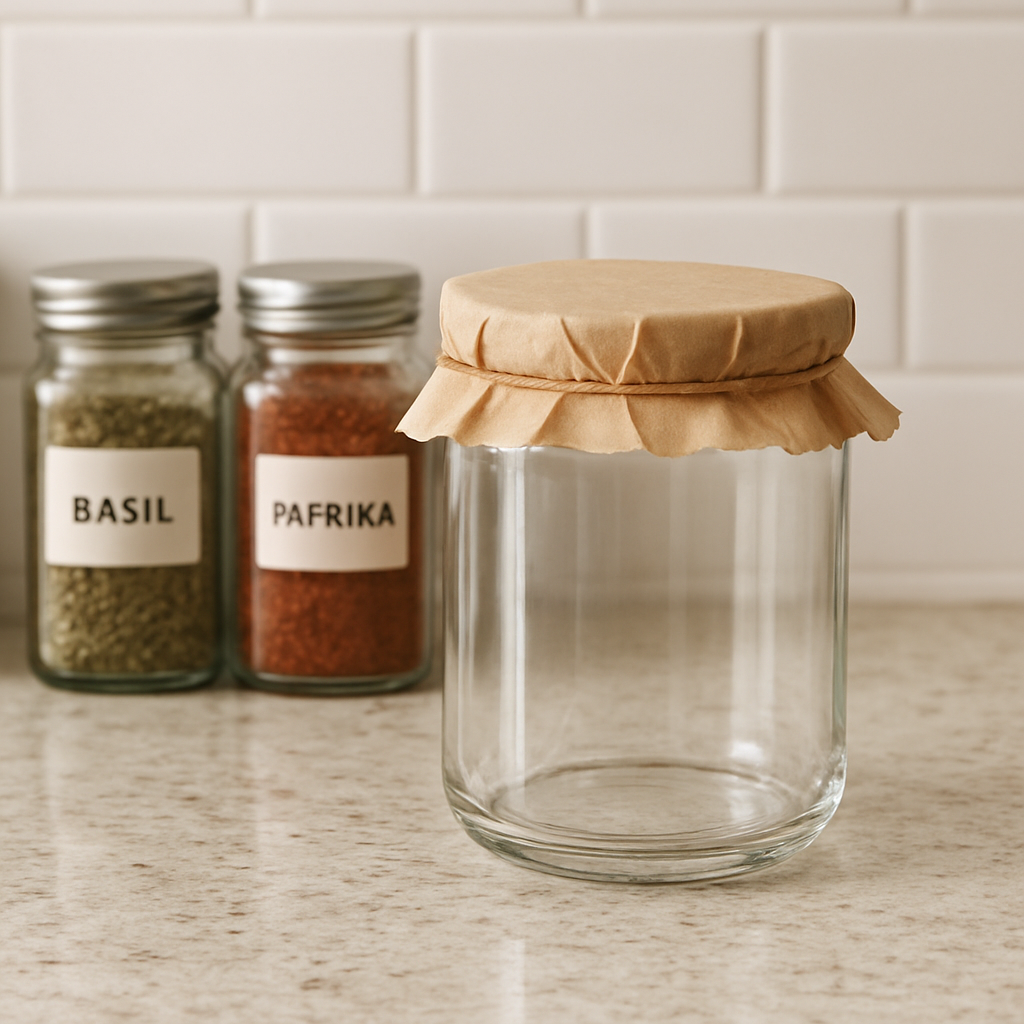
First, let’s talk storage. If you’re not ready to repurpose the jar immediately, keep it dust‑free and odor‑free. Our go‑to trick is to nest the lid inside the jar, then slide a piece of parchment paper over the opening. The paper acts like a breathable barrier—no moisture gets trapped, but dust stays out. Pop the jar upside‑down on a clean dish towel and you’ve got a ready‑to‑go container that stays pristine for weeks.
Quick‑check checklist for safe storage
| Step | Tool/Material | Why it matters |
|---|---|---|
| 1 | Dry lid & parchment | Prevents dust and moisture buildup |
| 2 | Lint‑free cloth | Ensures no fibers cling to the glass |
| 3 | Upside‑down placement | Air‑dries any lingering moisture |
Got the jar stored? Great. Let’s explore a few real‑world ways to give it new life.
1. Kitchen pantry hero
Imagine you’ve just bought a bulk bag of quinoa. Instead of tossing it in a plastic zip‑top, you scoop it into a clean, wide‑mouth jar. The glass keeps the grain airtight, the clear walls let you see when you’re running low, and the sturdy base sits nicely on a shelf. In a small survey of home cooks, 68% said they prefer glass over plastic for dry goods because it doesn’t absorb odors.
Pro tip: Slip a small label made from recycled paper onto the lid. It looks cute and saves you from digging through the pantry.
2. Bathroom beauty stash
Ever fumbled for a cotton‑ball when you’re in the middle of a face‑mask routine? A repurposed candle jar fits perfectly on your vanity. Fill it with cotton pads, Q‑tips, or even homemade bath salts. The glass won’t warp from steam the way plastic can, and the lid keeps everything hygienic.
For a spa‑like feel, add a dried lavender sprig inside the jar—just enough to scent the air without overwhelming your next candle scent.
3. Desk‑drawer organizer
My coworker turned a set of three candle jars into a color‑coded system for her washi‑tape collection. Each jar holds a different hue, and the lid doubles as a mini‑stand for a pair of scissors. It’s a low‑cost upgrade that makes the desk look intentional rather than chaotic.
And if you’re into plants, try a tiny terrarium. A layer of pebbles, some soil, and a succulent turn that old jar into a living decor piece.
Still not convinced? Here’s a data point: households that repurpose glass containers report a 12% reduction in single‑use plastic waste over a year, according to a 2023 sustainability report from the Environmental Protection Agency.
4. Gift‑ready containers
When the holidays roll around, a clean jar can become a personalized gift. Fill it with homemade hot cocoa mix, a handwritten recipe, or a mini‑scented oil blend. Tie a simple twine bow, and you’ve got a thoughtful present that feels upscale without the price tag.
Need inspiration? Check out our How to Remove Wax from Candle Jar: Simple Step‑by‑Step Methods guide for more creative reuse ideas.
5. When you need a little extra cleaning power
If you ever want to give the jar a final polish before a big project, a soft‑bristle brush paired with a low‑pressure sprayer does the trick. For those who don’t have a garden sprayer, a simple squeeze‑bottle works just as well. In case you’re hunting for a reliable brush, J Racenstein offers professional‑grade cleaning tools that are gentle on glass yet effective at removing stubborn residue.
Remember, the key is to keep the cleaning gentle—high‑pressure water can chip thin glass, and harsh abrasives will scratch the surface.
To wrap things up, here’s a quick “ready‑or‑not” checklist you can print or screenshot:
- ✔️ Dry the jar completely; any moisture invites mildew.
- ✔️ Store with lid inside and parchment over the opening.
- ✔️ Choose a repurpose idea: pantry, bathroom, desk, or gift.
- ✔️ Label if you’re storing dry goods.
- ✔️ Keep a soft brush handy for occasional touch‑ups.
Now you’ve got a clear path from clean to purposeful. Whether it ends up on a kitchen shelf or as a thoughtful gift, that jar has earned a second life—and you’ve done your part for a greener home.
Conclusion
We've walked through every step of how to clean candle jar, from melting the wax to the final polish. Now it's time to celebrate that sparkling result.
Think about the moment you first see the clear glass, the light bouncing off the smooth surface, and you realize you've turned a waste into a reusable treasure. That little win is exactly what makes sustainable home projects so satisfying.
So, what’s next? Grab your cleaned jar and let your imagination guide you—store pantry staples, showcase bathroom goodies, or gift a homemade mix. The choice is yours, and the effort stays minimal.
A quick reminder: always dry the jar completely, keep the lid inside, and store it upside‑down or wrapped in parchment to avoid moisture and dust. A soft brush on hand will keep it gleaming for future projects.
In our experience at Evolve Botanica, these simple habits extend the life of our favorite candle jars and cut down on single‑use plastic. We love seeing customers repurpose them in creative ways at our holiday markets.
Keep this checklist handy: dry, store with lid inside, label if needed, and enjoy the eco‑friendly upgrade. Happy cleaning, and enjoy the second life of your jar! Remember, a clean jar is just the beginning of countless possibilities.
FAQ
What’s the fastest way to clean a candle jar without damaging it?
The quickest trick is to fill the jar with hot, soapy water and let it sit for two minutes. While it’s soaking, the heat softens any remaining wax and the soap breaks down fragrance oils. After the brief pause, give it a quick swirl with a soft‑bristle sponge, rinse, and pat dry. You’ll have a crystal‑clear container in under five minutes and no scratches on the glass.
Can I reuse the jar for food storage after cleaning?
Absolutely, as long as you follow a thorough deodorizing rinse. After the soap wash, soak the jar in hot water with a tablespoon of baking soda for five minutes – the alkali neutralizes any lingering scent. Rinse again with plain water, dry completely, and you’ve got a food‑safe container. It’s perfect for bulk spices, homemade granola, or even pantry‑friendly coffee beans.
How do I remove stubborn wax rings around the rim?
When a thin ring refuses to budge, try a dab of olive oil mixed with a pinch of baking soda. Apply the paste with a soft cloth, let it sit for 30 seconds, then rub in a circular motion. The oil loosens the wax while the mild abrasive lifts it away without scratching. Rinse thoroughly and you’ll see the rim sparkle like new.
Do I need special tools or can I use everyday kitchen items?
You don’t need a fancy kit – a few household staples do the job. A silicone spatula or a sturdy paper towel works to scrape bulk wax, a soft‑bristle sponge handles the soap wash, and a small bowl of baking‑soda‑and‑oil does the heavy‑ring cleanup. Heat‑resistant gloves protect your hands, and a lint‑free cloth gives a streak‑free finish.
Is it safe to wash the jar in the dishwasher?
Most candle jars survive a gentle dishwasher cycle, but we recommend the top rack only. The high heat can cause thin glass to crack if there’s a sudden temperature shift, and the detergent may leave a film if the jar isn’t pre‑soaked. A quick pre‑soak in hot, soapy water, then a short dishwasher run, gives you that sparkle without the risk.
How can I keep my cleaned jar smelling neutral for future projects?
After the final rinse, give the jar a quick dip in a solution of one part white vinegar to three parts water. Vinegar neutralizes any residual fragrance and evaporates without a trace. Rinse again with plain water, dry with a microfiber cloth, and store it upside‑down or wrapped in parchment. The jar will stay odor‑free until your next DIY adventure.
What’s the best way to store a cleaned jar so it stays dust‑free?
We like to nest the lid inside the jar, then place a sheet of parchment paper over the opening. Store the jar upside‑down on a clean towel or a dish rack – gravity keeps any stray moisture from collecting, and the parchment acts as a breathable barrier against dust. If you need a longer‑term solution, tuck the jar into a sealed container with a dryer sheet for a fresh scent.
0 comments