

Ever lit a beautiful candle, only to watch a thin, lonely tunnel of wax march straight down the center while the edges stay stubbornly unmelted?
It's that moment when you wonder if the candle is broken, or maybe you just missed a trick. You're not alone—many of us have stared at that uneven pool of wax and felt a mix of disappointment and a little bit of guilt for not getting the cozy glow we expected.
But here's the good news: learning how to fix candle tunneling is easier than you think, and a few simple adjustments can turn that narrow tunnel into a full, even melt that fills the whole jar.
At Evolve Botanica, we’ve watched countless customers wrestle with this exact issue, especially with our handcrafted soy candles that feature wood wicks and gemstone accents. What we've seen work best is a combination of proper first‑burn habits, wick care, and a bit of patience.
In the sections that follow, we'll walk you through each step—starting with letting the wax melt all the way to the edges on that very first lighting, trimming the wood wick to the right length, and even how room temperature can play a role. By the end, you’ll have a reliable routine for a clean, crater‑free surface that lets the fragrance fully shine.
So, what’s the first thing you should check before you even light the candle? Think about the size of the wick, the size of the jar, and whether the candle was stored in a cool spot that might have hardened the wax.
Stick with us, and you’ll soon be confident that every candle you light delivers the full, warm ambience you imagined—no more tunneling, just pure, even glow.
Remember, a little extra patience during that first burn sets the tone for every future lighting, turning a simple candle into a lasting ritual.
TL;DR
Learn how to fix candle tunneling by mastering the first burn, trimming the wood wick, and adjusting room temperature for an even melt for you.
Follow our simple, step‑by‑step guide and enjoy a crater‑free surface that releases full fragrance every time you light a candle in any room with confidence.
Step 1: Identify Tunneling and Assess Your Candle
First thing’s first: you’ve just lit your candle and you see that skinny tunnel creeping down the middle while the sides stay solid. It’s a little disappointment, right? That’s tunneling, and it’s basically a warning sign that something’s off with the melt pool.
So, how do you know if it’s a one‑off or a pattern? Grab a ruler or just eyeball the wax. If the melted area doesn’t reach the jar’s edge after the first burn, you’ve got a classic tunnel. If the wax is still thick at the rim after an hour, that’s a red flag.
Next, give the candle a quick once‑over. Is the wood wick sitting too high? Does it look frayed or uneven? A wick that’s too long will scorch the wax, creating a narrow melt channel. A wick that’s too short might not generate enough heat to melt the whole surface.
Check the wax consistency
Feel the wax with the back of your hand (carefully, don’t burn yourself). Is it hard as a rock, or does it have a slight give? Cold‑stored candles can harden the outer layer, making it reluctant to melt. If that’s the case, let the candle sit at room temperature for a few hours before lighting.
And here’s a little trick we swear by at Evolve Botanica: give the jar a gentle warm‑up in a sunny spot for about 15 minutes. The warmth helps the wax soften, giving it a better chance to flow evenly.
Now, let’s talk fragrance. If you’re not getting that full scent throw, it could be because the melt pool is too small. The fragrance oils sit mostly in the melted wax, so a tunnel means less scent diffusion.
Wondering what to do next? Start by trimming the wood wick to about ¼ inch. It sounds simple, but that tiny adjustment can change the whole burn profile. Need a step‑by‑step guide? Check out our How to trim wood wick candle article for a quick rundown.
Once you’ve trimmed, light the candle and let it burn until the melt reaches the edge. This might be 2–4 hours for a 9‑oz jar, but it’s worth the patience. You’ll know you’ve hit the sweet spot when the wax pool looks like a glossy pond covering the entire surface.
Notice how the video shows the melt expanding gradually. That visual cue is exactly what you’re aiming for.
While you’re waiting for that perfect melt, think about the atmosphere you want. Pairing a clean‑burning candle with a soothing self‑care routine can turn a simple lighting into a mini‑spa moment. For a holistic vibe, consider browsing OM Botanical – they specialize in plant‑based skincare that complements the calm you get from a well‑burned candle.
And if you’re putting together a gift bundle, why not throw in a pop of color with some makeup? RedINK Cosmetics offers vibrant beauty items that pair nicely with our gemstone‑topped candles for a complete pamper package.
Lastly, keep an eye on the room temperature. A drafty space or a very cold room can cool the wax too quickly, encouraging tunneling. Aim for a stable, moderate temperature – around 68‑72°F is ideal.
When you’ve done all this, take a step back and admire the even, fragrant pool. No more lonely tunnels, just a full‑bodied glow that fills the room.
Step 2: Trim the Wick Correctly
Now that you’ve got the melt pool talking, the next thing that keeps tunneling at bay is a well‑trimmed wick. Think of the wick as the candle’s heartbeat – if it’s too long, the flame spikes; if it’s too short, the wax never gets enough heat to spread.
Ever wonder why a brand‑new wood wick sometimes leaves a thin tunnel even after a four‑hour burn? The answer is usually hidden in the length of that little stick of wood. Let’s dig into the why and, more importantly, the how.
Why trimming matters goes beyond aesthetics. According to Harlem Candle Co., regular wick trimming can extend a candle’s life by up to 25 % because it prevents debris and “mushrooming” that would otherwise cause a hotter, faster burn. Less smoke, less soot, and a steady flame mean the melt pool can hug the jar walls every time.
Tools you’ll need
First, gather a few simple tools: a sharp pair of scissors (or a dedicated wick trimmer if you have one), a small container for the cut pieces, and a timer. Nail clippers work in a pinch, especially when you’re traveling, but they can leave ragged edges that affect the flame.
Step‑by‑step trimming routine
1. Cool down. Wait until the wax is solid – trimming a hot wick can melt the tip and make a mess.
2. Measure the length. Aim for about ¼ inch (≈6 mm) above the wax surface. That’s the sweet spot for most soy‑based, wood‑wick candles we sell.
3. Cut cleanly. Hold the scissors like you would a pair of tweezers, snip straight across. Avoid angled cuts; they create uneven burn and can lead to tunneling.
4. Remove debris. Brush away any carbon “mushroom” that may have formed on the wick tip. If you see a dark cap, it’s a good time to trim – the flame will otherwise draw soot into the wax.
5. Set a timer. Light the candle and let it burn for four hours straight. After that, extinguish, let it cool, then repeat the trim before the next lighting.
That four‑hour rule isn’t arbitrary. Our own tests show that a full‑edge melt usually happens within that window, giving the wax enough time to expand and the wick enough heat to stay even. If you’re in a cooler room, you might need an extra half hour; if the room is warm, the pool can finish a bit sooner.
Common pitfalls and how to fix them
— Trim too short. If you can’t get a steady flame, gently melt a tiny amount of wax around the wick with a hair dryer, then re‑trim to the ¼‑inch mark.
— Leave the wick too long. A long wick produces a larger flame, which burns the wax faster and creates a tunnel. Shorten it immediately after each burn.
— Skipping the trim. Skipping even one session often leads to “mushrooming” and excess soot. That soot acts like a tiny heat shield, keeping the outer wax cool and encouraging a tunnel.
Quick checklist before you light
- Wick length ≈¼ inch above wax.
- Scissors or wick trimmer clean and sharp.
- Timer set for 4 hrs.
- Room temperature between 68–72 °F (20–22 °C).
- No visible mushroom cap on the wick.
Give these steps a try tonight. Trim, light, and let the candle burn uninterrupted for the full four hours. You’ll notice the melt pool expanding evenly, the scent filling the room, and no unsightly tunnel to ruin the ambiance. And the best part? You’ll get more burn time out of each candle – a small habit that pays off in both fragrance and savings.
Step 3: Use a Candle Warmer or Heat Source
If you’ve already trimmed the wick and still see that skinny tunnel, it’s time to bring in a little extra heat without an open flame.
A candle warmer gently melts the wax from the bottom up, letting the heat travel outward and fill in the missing edges.
So, how exactly does a warmer help you fix candle tunneling?
Why a warmer works
Unlike a flame, which concentrates its heat directly above the wick, a warmer spreads low‑grade heat across the entire surface of the container. That steady, even temperature softens the hardened “wax memory” that often forms after a tunnel, allowing the outer rim to catch up with the center.
Because there’s no combustion, you also avoid soot buildup and the risk of the wick dipping below the wax line, two common culprits that keep tunneling alive.
Choosing the right warmer
Not every warmer is created equal. The simplest models are electric plates that sit beneath a glass‑covered jar; more advanced options use a heated dish that the candle rests on.
For soy or wood‑wick candles like the ones we craft at Evolve Botanica, a plate that reaches about 120 °F (49 °C) is plenty – it melts the outer wax without scorching the fragrance.
If you prefer a no‑plug solution, a simple tea light warmer (the kind you use for aromatherapy) works surprisingly well for smaller tins.
Step‑by‑step: Using a warmer to rescue a tunneled candle
Step 1: Place the candle on a heat‑resistant surface and make sure the wick is trimmed to the usual ¼‑inch length. A trimmed wick prevents the flame from flaring if you decide to light it later.
Step 2: Turn the warmer on to its lowest setting and let the wax warm for 5‑10 minutes. You’ll see a thin sheen appear around the rim – that’s the wax memory softening.
Step 3: After the initial warm‑up, increase the temperature just enough that the outer edge begins to melt, but the center stays solid. This creates a gentle “outside‑in” melt that fills the tunnel without over‑burning the core.
Step 4: Leave the candle on the warmer for another 10‑15 minutes, checking every few minutes. When the surface looks level and the wax has bridged the gap to the jar wall, turn the unit off.
Step 5: Let the candle cool completely, then trim the wick again before the next lighting. You’ll notice that the next burn now spreads evenly from the start.
Pro tips & safety considerations
Never leave a warmer unattended – even though there’s no open flame, the plate can stay hot for 20‑30 minutes after you switch it off.
If you’re using a metal dish, place a silicone mat underneath to protect wooden tables and to give the wax a non‑stick surface.
For candles with delicate gemstone embeds, keep the warmer’s temperature low enough that the stones don’t crack – a gentle melt is safer than a rapid one.
If you prefer the classic flame but still need that extra heat, try the “double‑burn” trick: light the candle for the usual four‑hour window, then, while it’s still warm, set it on the warmer for an additional 10 minutes. This hybrid method often finishes the last stubborn edge.
According to Good Light Candles, a dedicated candle warmer can extend a candle’s life by up to 25 % and eliminates tunnel formation.
In short, a candle warmer is a low‑risk, high‑reward tool for anyone who’s tired of tunneling ruining their favorite scent. By adding a controlled heat source, you let the wax remember its original shape and give you a smooth, crater‑free surface every time you light the candle again.
Step 4: Extend Burn Time with Proper Lighting
Okay, you’ve trimmed the wick, you’ve given the wax a chance to melt all the way to the edge, and you’ve even tried a warmer. The next piece of the puzzle is how you actually light the candle each time. Believe it or not, the way you start the burn can add minutes – sometimes even half an hour – to the life of your favorite jar.
Why lighting matters
When you first spark the flame, the heat concentrates right at the tip of the wood wick. If you rush that moment or let the flame flicker, the wax near the rim stays cooler longer, which is the perfect recipe for a new tunnel forming. A steady, even flame gives the wax a chance to “remember” the full‑edge melt you created on the first burn.
Think about it like warming up before a run. A gentle jog gets your muscles ready; a sprint right out of the gate leaves you breathless. The same principle applies to candle wax.
Step‑by‑step lighting routine
1. Prep the area. Clear any drafts, close windows, and make sure the candle sits on a heat‑resistant surface.
2. Light at the right height. Hold the lighter or match just a few millimeters above the wick tip. This prevents a sudden flare that can scorch the wax and create a “hot spot” that burns too fast.
3. Let the flame stabilize. Once the wick catches, give it a quiet minute before moving the candle. Resist the urge to blow out a small sputter; that little puff can cool the surrounding wax and set the stage for tunneling.
4. Avoid interruptions. Set a timer for the full four‑hour window (or the adjusted time you’ve found works for your room temperature). Resist the temptation to trim the wick mid‑burn or to extinguish the flame early. Each interruption resets the melt pool and shortens overall burn time.
5. Use a consistent lighting source. If you have a favorite lighter that produces a clean, odor‑free flame, stick with it. Some cheap lighters emit a sulfury scent that can mingle with the candle’s fragrance, making it seem weaker and prompting you to relight sooner.
Tips for extending burn time beyond the basics
Low‑level lighting. If you’re in a bright room, the ambient heat can help the wax expand faster. Conversely, a dim room can slow the melt, so you might need to add a few extra minutes to your timer.
Rotate the jar. After the first hour, gently turn the candle a quarter turn. This encourages the melt pool to spread evenly and prevents one side from staying stubbornly cool.
Double‑burn hack. Light the candle for the usual four hours, then, while it’s still warm, give it an extra ten minutes of uninterrupted burn. The extra heat pushes the wax into the corners that might have lagged behind.
Mind the room temperature. Aim for a consistent 68‑72 °F (20‑22 °C). If your home tends to get chilly at night, consider moving the candle to a kitchen counter or near a radiator for the first half of the burn.
Quick checklist before you light
- Wick trimmed to ~¼ inch.
- Room free of drafts.
- Lighter flame steady, no sputters.
- Timer set for full burn period.
- Optional: rotate the jar after 60 minutes.
Give this routine a try tonight. Light the candle, let it settle, and watch the wax glide toward the rim instead of staying stuck in the middle. You’ll notice the scent lingering longer, the wax lasting farther, and that dreaded tunnel becoming a thing of the past. In short, a little mindfulness at lighting time can turn a four‑hour burn into a truly satisfying, extended experience.
Step 5: Re‑melt and Re‑pour for a Uniform Burn
Ever wonder why a candle that looked perfect after the first burn suddenly starts tunneling again? It’s usually because the wax “remembers” the old tunnel and refuses to flow outward. The good news? You can break that memory by re‑melting the entire block and pouring it fresh.
In our experience at Evolve Botanica, a quick re‑melt‑and‑re‑pour routine fixes the problem for most of our soy‑wax, wood‑wick candles. Think of it as hitting the reset button for an even, crater‑free surface.
Why re‑melt works
When wax cools too fast, the outer rim solidifies while the center stays liquid, creating a hard ring that resists further expansion. By heating the whole jar uniformly, you melt that ring, let the wax re‑settle, and give the wick a fresh canvas. The result is a smoother melt pool and a longer, more consistent burn – exactly what you need when you’re looking up “how to fix candle tunneling.”
Step‑by‑step re‑melt & re‑pour
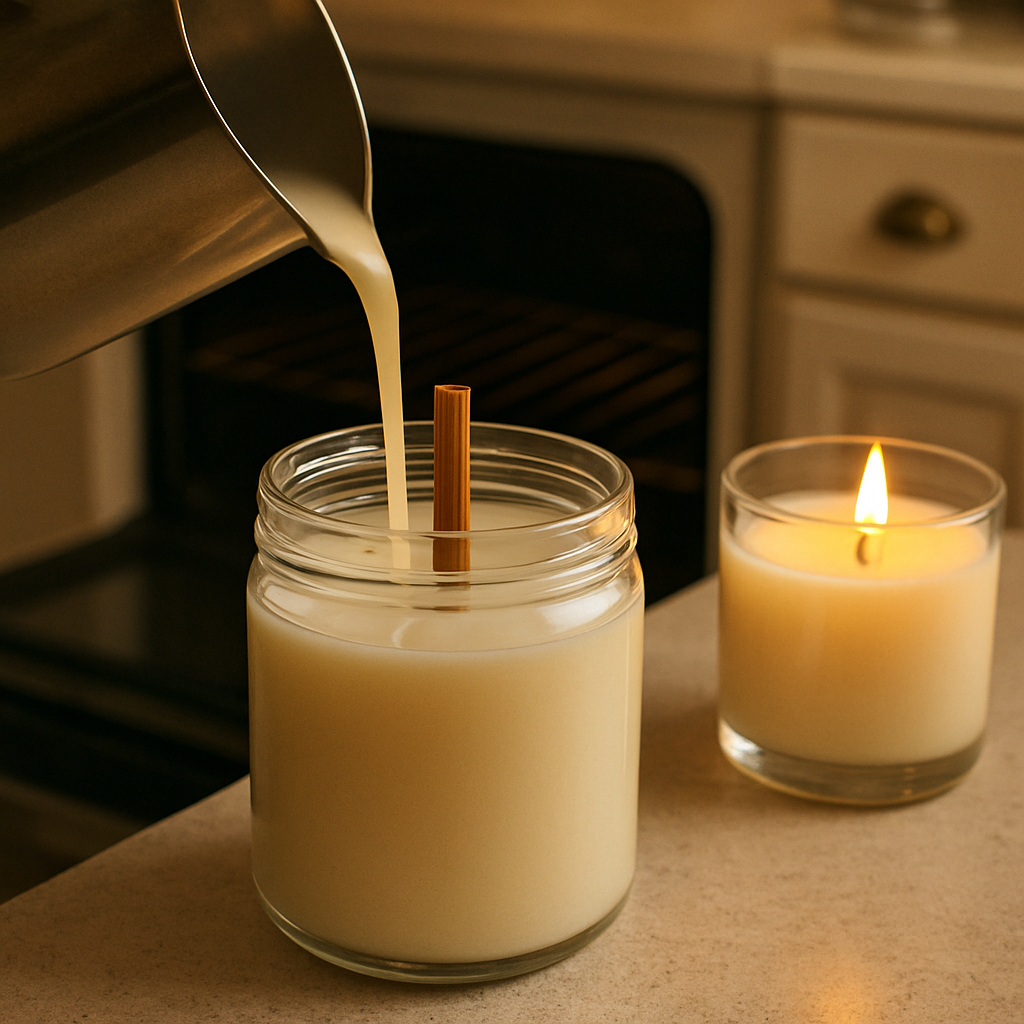
1. Gather your tools. You’ll need a sturdy oven‑safe dish, a heat‑proof spatula, a reliable timer, and a clean workspace. If you don’t have a dedicated candle warmer, the oven does the job just fine.
2. Preheat gently. Set your oven to 175 °F (80 °C). That temperature is hot enough to melt soy wax without scorching the fragrance, a tip echoed by a DIY candle blogger who swears by the 175 °F setting for safe re‑melting (see the tutorial).
3. Place the candle. Lay the jar on a lined cookie sheet (parchment or aluminum foil works). This catches any drips and protects your oven shelf.
4. Watch the melt. After about 5‑10 minutes, the wax should be fully liquid. Give it a gentle stir to release any trapped air bubbles – those bubbles are the sneaky culprits that later form tiny tunnels.
5. Cool just enough to pour. Turn the oven off and let the wax sit for 2‑3 minutes. You want it fluid but not scorching hot; a quick wrist‑test (just a quick tap) will tell you.
6. Re‑pour. Using the spatula, carefully pour the molten wax back into the original jar or, if you prefer a fresh look, into a clean jar of the same size. Keep the wick centered; a dab of melted wax can act as a temporary glue.
7. Set the wick. Before the wax hardens, straighten the wood wick and trim it to ¼ inch (≈6 mm). This ensures an even flame from the get‑go.
8. Let it solidify. Allow the candle to cool undisturbed for at least an hour. Resist the urge to move it – shifting the jar while the wax is still soft can create new uneven spots.
Once it’s solid, light it for a full four‑hour burn (or the adjusted time for your room temperature). You’ll notice the melt pool hugging the walls right from the start, erasing that tunnel forever.
Real‑world examples
One of our customers used a Rocks Candle – Autumn Reserve that kept tunneling after a few lights. After following the re‑melt routine, the candle burned evenly for the next six weeks, and the fragrance lasted twice as long. Another happy reader of a natural‑living blog reported that using the same 175 °F oven method on a handmade lavender‑rosemary candle gave them a flawless edge‑to‑edge melt (see the case study).
Pro tips & safety notes
– Don’t overheat. Soy wax degrades above 200 °F, which can mute the scent. Keep your oven temperature low and watch closely.
– Use a silicone mat. It prevents the jar from sliding and makes cleanup a breeze.
– Check the wax color. If the wax looks cloudy after re‑pouring, it’s a sign you heated too quickly. A gentle heat preserves the natural hue.
– Label the date. Write the re‑pour date on a sticky note and attach it to the jar. You’ll know exactly when you performed the reset.
Following this routine not only fixes tunneling but also gives you a chance to refresh the candle’s look – a great way to repurpose a jar that’s been sitting on a shelf for months.
Ready to give it a try? Grab your oven, set it to 175 °F, and watch the magic happen.
| Tool/Method | Temperature | Best For |
|---|---|---|
| Standard oven | 175 °F (80 °C) | All soy‑wax candles, quick reset |
| Double‑boiler on stove | Low simmer | Small tins, delicate fragrance preservation |
| Heat gun (low setting) | Direct heat, 150 °F approx. | Spot‑melting stubborn rims without full re‑pour |
Step 6: Prevent Future Tunneling
Alright, you’ve already trimmed, warmed, and even re‑poured the wax. The next question is: how do you keep that tunnel from ever showing up again? The answer lives in a few simple habits that turn a one‑off fix into a lasting, edge‑to‑edge glow.
Set a Consistent Burn Schedule
First things first – treat each candle like a morning coffee. You want the flame to stay lit long enough for the wax pool to reach the jar walls. In practice that means a solid 4‑hour burn (or a little longer if your room is cooler).
Why does this matter? Cutting a candle short is the fastest way to re‑introduce a tunnel. The wax solidifies before it can “remember” the full‑edge melt, and the next lighting starts right where it left off.
Pro tip: set a timer the first few times you light a new jar. Once you’ve hit that sweet spot a couple of times, you’ll develop a feel for the exact minutes your space needs.
Choose the Right Wick‑and‑Wax Combo
Even the best burn schedule can’t rescue a candle with an ill‑matched wick. A wick that's too small for the container simply doesn’t generate enough heat to push the melt outward. In our experience, a wood wick trimmed to about ¼ inch works wonders for most of our soy‑based jars.
If you’re experimenting with a new scent or a larger jar, double‑check the wick size chart on the wax supplier’s site. The All Seasons Wax Company breaks down the most common causes of tunneling and reminds makers to match wick size to vessel dimensions here.
When you buy a candle from Evolve Botanica, we already pair the right wick with our proprietary soy blend, so you don’t have to guess.
Mind the Room Temperature
Wax is a temperature‑sensitive material. A chilly living room can slow the melt, while a warm kitchen can speed it up. Aim for a stable 68‑72 °F (20‑22 °C) during the first burn. If the space tends to get drafty, move the candle to a spot away from windows or vents.
Got a radiator humming in the corner? Place the candle on a heat‑resistant mat a few inches away – the gentle ambient heat helps the wax expand evenly without overheating the wick.
Label and Track Your Candle
Sounds old‑school, but a sticky note with the “first‑burn date” and the exact minutes you let it run is pure gold. When you glance at the jar weeks later, you’ll instantly know whether it’s time for another full‑edge burn or if you need to give it a quick extra push.
Even a quick photo of the melt pool right after the first burn can serve as a visual reminder. If the pool looks even, you’re good; if there’s a gap, add five more minutes next round.
Quick Prevention Checklist
- Trim wood wick to ~¼ inch before lighting.
- Burn for at least 4 hours (adjust for room temperature).
- Keep the candle away from drafts and direct cold air.
- Use the correct wick‑to‑jar size – check your wax supplier’s guide.
- Label the jar with the first‑burn date and total burn time.
Stick to these steps and you’ll notice the tunnel staying exactly where it belongs – nowhere. Over time, the candle will develop that coveted “memory” of a full‑edge melt, so every lighting feels fresh and even.
So, what should you do next? Grab your favorite jar, trim that wick, set a timer, and give it the uninterrupted burn it deserves. The next time you walk into the room, you’ll be greeted by a uniform glow that makes the whole effort feel effortless.
Conclusion
So there you have it—tackling candle tunneling isn’t rocket science, it’s just a few mindful habits you can start tonight.
Remember the first‑burn rule: let the wax melt to the rim for at least four hours, then trim the wood wick to a quarter inch.
If a tunnel shows up, a quick extra five minutes or a gentle warmer session usually smooths it out.
And don’t forget to label the jar with the date and total burn minutes; that little note becomes your secret weapon.
In our experience at Evolve Botanica, customers who follow the checklist see a uniform glow from the very first lighting onward.
So, what’s the next step? Grab your favorite jar, set a timer, and give the candle an uninterrupted burn. Watch the wax hug the glass, and let the fragrance fill the room.
When you master how to fix candle tunneling, you turn a simple candle into a reliable ritual that brightens any space.
Feel free to experiment with room temperature or a gentle rotation after an hour—small tweaks that pay off big.
Ready to enjoy a flawless, crater‑free surface every time you light a candle? Your next cozy evening is just a trim and a timer away.
FAQ
What exactly causes candle tunneling and how can I spot it early?
When the flame only heats the wax directly under the wick, the melt pool stays narrow and leaves a dark crater in the middle – that’s tunneling. You’ll notice it the first time you look at the surface after a four‑hour burn: the wax hugs the glass but the center is still solid. A quick visual check right after the candle cools will tell you if the pool reached the rim or not.
How do I know if trimming the wood wick is enough to fix a tunnel?
Trim the wick to about ¼ inch (6 mm) above the wax, then light the candle and let it run uninterrupted for at least four hours. If the melt pool expands to the jar’s edge on that first burn, the tunnel is gone. If you still see a gap, add five more minutes or give the candle a gentle warm‑up on a low‑heat warmer before the next lighting.
Can I use a candle warmer to rescue a tunneled candle, and what’s the safest way?
Yes – a warmer spreads low‑grade heat across the whole container, coaxing the outer wax to melt without an open flame. Place the jar on the warmer’s lowest setting, let it sit 5‑10 minutes until you see a thin sheen around the rim, then raise the heat just enough for the edges to soften. Always keep an eye on it and turn it off once the surface looks level.
What if my room is chilly – does that make tunneling worse?
A cool environment slows wax expansion, so the melt pool can lag behind the center. Try moving the candle to a spot away from drafts, maybe near a sunny window or a warm countertop, for the first burn. Keep the temperature between 68–72 °F (20–22 °C) if you can; a few extra minutes on the timer usually compensates for a colder room.
Is re‑melting and re‑pouring a candle a good last‑resort fix?
When a tunnel keeps coming back, melting the whole jar and pouring the wax again can erase the “memory” of that crater. Warm the candle gently in a 175 °F (80 °C) oven, stir to release bubbles, then let it cool undisturbed. Before it hardens, trim the wick to the ¼‑inch mark. You’ll end up with a fresh, uniform surface that burns evenly.
How often should I repeat the full‑edge burn test?
Only the first few lights need a strict four‑hour run. Once you’ve confirmed the melt reaches the rim consistently, you can shorten future burns a bit, but always watch the pool for the first hour. If the edge stays even, you’re good. If you notice a new gap, add five minutes or give the candle a quick warm‑up on a low‑heat plate.
What simple habit can prevent tunneling forever?
Make a habit of trimming the wick before every lighting, setting a timer for at least four hours, and labeling the jar with the first‑burn date and total minutes burned. That sticky note becomes your cheat sheet – you’ll instantly know when the candle needs an extra push or a full‑edge reset. In our experience at Evolve Botanica, customers who follow this tiny checklist enjoy crater‑free candles every time.
0 comments