

Ever lit a candle and thought the scent should fill the room, but it just barely flickers? That moment of disappointment is all too familiar, especially when you’ve spent time picking the perfect fragrance.
We get it because at Evolve Botanica we’ve watched countless customers wrestle with that same problem, and we’ve learned a few tricks that actually boost aroma without turning your living room into a perfume shop.
First, think about the wax itself. Soy wax, which we love for its clean burn, holds fragrance better than many petroleum‑based blends, but it still needs a little help to release every drop of scent.
One simple hack is to raise the fragrance load by 10‑15 %—just make sure you don’t exceed the wax’s maximum rating, or you’ll end up with a soggy pool of wax that never fully hardens.
Next, temperature matters. Warm the wax to about 185 °F before adding the oil; that extra heat opens the wax’s molecular “gate” so the fragrance bonds more tightly.
Don’t forget the wick. A wood wick, trimmed to a quarter‑inch, creates a slightly larger melt pool, which means more surface area for the scent to escape. Just be sure the wick’s size matches your candle’s diameter.
Another pro tip: add a tiny pinch of coconut oil or a dedicated fragrance enhancer. It thins the blend just enough to let the scent molecules travel faster, giving you that instant “room‑filling” feeling.
Finally, let your candles cure. A week or two of resting at room temperature lets the wax and fragrance fully meld, and you’ll notice a richer, longer‑lasting aroma when you finally light it.
So, if you’ve ever wondered how to make candles smell stronger without resorting to cheap synthetic sprays, remember these basics: choose the right wax, boost fragrance load safely, mind the temperature, pick a proper wick, and give it time to cure.
TL;DR
If you’ve ever wondered how to make candles smell stronger, the secret lies in picking the right wax, boosting fragrance load safely, and timing the melt‑and‑pour process. Add a wood wick, a dash of coconut oil, and let the candle cure for a week or two, and you’ll enjoy a room‑filling aroma every time you light it.
Step 1: Pick high-quality fragrance oils and blends
Ever opened a brand‑new candle and thought, “this should smell way stronger”? You’re not alone. The fragrance oil you choose is the heart‑beat of the candle, and picking the right one can turn a faint waft into a room‑filling experience.
First, think about purity. Look for oils that are 100 % fragrance‑grade, free from carrier oils or diluted with cheaper bases. Those “pure” blends let the wax lock in every aromatic molecule, so when you light the wick the scent bursts outward instead of fading into the background.
Know your oil family
Essential‑oil‑derived scents (like lavender or eucalyptus) are wonderful, but they can be volatile and sometimes don’t bind as tightly to soy or beeswax. Synthetic fragrance oils, on the other hand, are engineered for strong throw and stability. A good middle ground is a high‑quality “natural‑synthetic blend” that captures the botanical vibe while keeping the scent power up.
When you’re scrolling through a catalog, check the fragrance load rating. Most waxes max out at 12‑15 % oil by weight. If a blend advertises 20 % oil, it might be too thin and could cause a “soggy” candle. Stick to blends that stay within the wax’s recommended range – that’s the sweet spot for strength without compromising the candle’s structure.
Test the throw before you commit
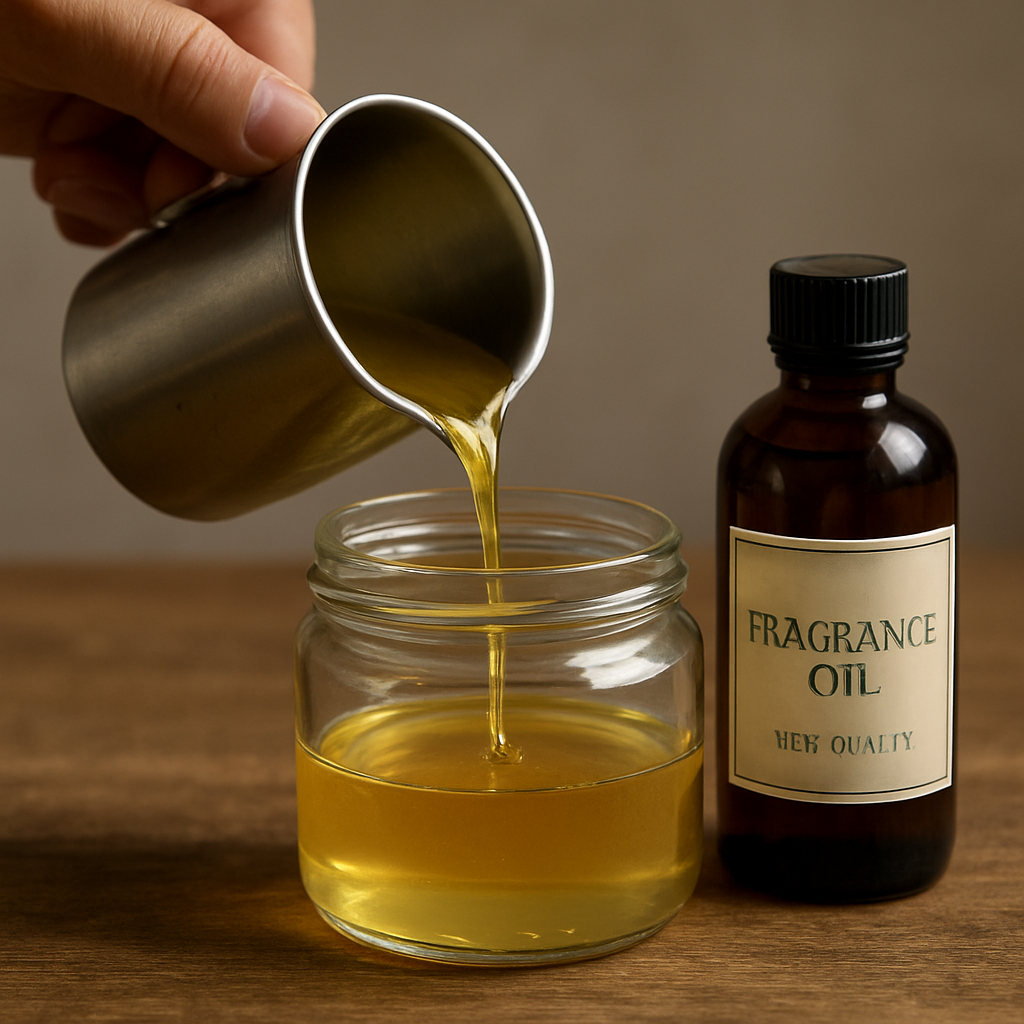
We always suggest a quick “smell test” in a small glass jar. Melt a teaspoon of wax, stir in the oil at the recommended temperature (around 185 °F), let it set, then light a tealight. If the scent fills the room within a minute, you’ve got a winner. If it barely registers, try a different brand or a higher‑grade blend.
Another trick is to look for oils labeled “high throw” or “enhanced diffusion.” Those formulas often contain a tiny amount of a natural solvent that helps the fragrance travel through the wax more efficiently.
Match the oil to your candle’s purpose
Are you crafting a cozy winter candle for the holidays? Warm spices like cinnamon, clove, and sandalwood tend to project better in cooler rooms. For a fresh‑summer vibe, citrus and herb blends (think bergamot or rosemary) cut through the heat and stay lively.
And remember, the scent profile matters. Top notes (the first whiffs) evaporate quickly, while base notes linger longer. A balanced blend of both gives you that immediate punch and a lingering finish – the perfect recipe for “how to make candles smell stronger.”
So, what’s the next step after you’ve selected the oil? Blend it in at the right temperature, pour at the right pour‑temp, and let the candle cure. Those details will be covered in the next sections.
Need a visual guide? Check out the short video below that walks through measuring, mixing, and testing your fragrance oil.
Once the video’s done, picture the perfect candle sitting on a wooden table, the flame dancing, and the scent drifting across the room. That’s the moment you’re aiming for.
Step 2: Choose the right wax (comparison of wax types and scent retention)
Okay, you’ve got your fragrance oils sorted, now it’s time to ask yourself: which wax actually lets those scents shine? That’s the question at the heart of how to make candles smell stronger, and the answer lives in the chemistry of the wax itself.
In our experience at Evolve Botanica, we’ve tried everything from classic soy to palm and even a few niche blends. What we keep seeing is that each wax has its own “personality” when it comes to scent retention. Some will hug the fragrance like a warm blanket, while others let it slip away as soon as the melt pool forms.
Wax type at a glance
Below is a quick‑look table that sums up the most common waxes you’ll encounter, their scent‑holding quirks, and a tip for getting the most out of each.
| Wax | Scent retention | Best‑use tip |
|---|---|---|
| Soy wax (100 % soy) | Good cold‑throw, moderate hot‑throw; holds up to ~9 % fragrance load | Warm to ~185 °F before adding oil; let it cure 1‑2 weeks for peak scent |
| Palm wax (sustainable blend) | Excellent hot‑throw, solid cold‑throw; can handle 10‑12 % load | Stir gently at 175‑180 °F; avoid over‑mixing to keep the crystalline finish |
| Beeswax (pure) | Subtle, natural aroma; lower load (6‑8 %) but blends well with essential oils | Add a small soy or coconut carrier to boost fragrance without compromising the honey‑sweet base |
| Paraffin (standard) | Strong hot‑throw, but can smell “plastic” if overloaded | Stay under the manufacturer’s max load and consider a 1‑2 % coconut oil enhancer |
So, which one should you reach for? If you love a clean, plant‑based candle and you’re okay with a gentle, room‑filling scent, soy is your go‑to. Want that bold burst that fills a living room in seconds? Palm wax often out‑performs soy in hot‑throw, especially with citrus or spice blends.
But here’s a little secret most hobbyists miss: blending waxes can give you the best of both worlds. A 70/30 soy‑to‑palm mix, for example, keeps the soy’s easy‑pour quality while borrowing the palm’s punchy throw. It’s like adding a dash of espresso to your morning coffee—you still get the familiar flavor, but with an extra kick.
Now, let’s talk about fragrance load limits. Those numbers on the wax package aren’t just marketing fluff; they’re there to prevent “sweaty” candles that never fully harden. When you push past the max, the wax can’t trap the oil molecules, and the scent leaks out the sides or fades fast. Stick to the recommended range, then test a small batch with a 10 % bump to see if your nose approves.
Another practical tip: always measure your wax by weight, not volume. A cup of soy can weigh anywhere from 200‑250 g depending on temperature, and that variance throws off your fragrance percentage. A digital scale keeps you honest and ensures repeatable results.
And what about the melt pool? A larger pool means more surface area for scent to escape, which is great for hot‑throw but can diminish cold‑throw if the wax is too dense. That’s why wood wicks, which create a broader pool, pair nicely with palm or soy‑palm blends. If you’re using a cotton wick, a tighter pool works better with soy.
Does this feel overwhelming? Not at all. Think of it like picking a wine to match a meal—you consider flavor, body, and finish. Start with one wax, note how the scent behaves, then experiment with a tiny blend tweak. Keep a simple log: wax type, fragrance load, melt temp, and your scent rating. After a few runs you’ll spot the pattern that turns “just okay” into “wow, that really fills the room.”
Bottom line: choosing the right wax is the foundation of how to make candles smell stronger. Whether you gravitate toward soy’s reliability, palm’s power, or a custom blend, the key is to respect each wax’s load limits, temperature sweet spot, and how it interacts with your wick. With that knowledge in hand, the next step—testing and fine‑tuning—will feel like a fun experiment rather than a guessing game.
Step 3: Optimize fragrance load, blending, and pour temperature
Okay, you’ve got your wax and fragrance sorted, but if the scent still feels shy, the magic is often in how you load, blend, and pour.
Ever wondered why two candles made with the exact same oil can smell totally different? The answer usually lives in the details of the melt‑pool, the temperature you stir at, and whether you nudged the fragrance load just a little higher.
Find the sweet spot for fragrance load
Every wax comes with a max‑load rating – think of it as a comfort zone for the wax. Soy, for example, likes to stay around 8‑9 % before it starts to feel “sweaty.” Palm can stretch a bit farther, up to 12 % if you’re careful.
What we’ve learned at Evolve Botanica is that a modest 10‑15 % bump over the manufacturer’s suggested load often unlocks a noticeable boost in both cold‑throw and hot‑throw, as long as the wax still hardens cleanly. The trick is to test a tiny batch first: add 1 % more oil, stir, and let it cure for a day. If the candle still sets firm and the scent feels richer, you’ve found a new sweet spot.
Blend for balance
Sometimes a single wax just can’t give you everything you want. A 70/30 soy‑to‑palm blend, for instance, lets you keep soy’s easy‑pour texture while borrowing palm’s punchy throw. The same idea works with a splash of beeswax to add a subtle natural honey note that helps the fragrance cling.
When you blend, measure each component by weight, not volume. A gram of soy at 180 °F weighs less than a gram at room temperature, and that variance can throw off your fragrance percentage.
Master the pour temperature
Temperature is the silent conductor of the scent orchestra. Heat the wax to about 185 °F (85 °C) before you add the fragrance oil – that’s the “gate‑open” moment where the wax molecules are ready to grab the oil.
Once the oil is in, lower the temperature to roughly 150‑160 °F before you stir. This cooling window gives the oil time to bind without evaporating too quickly. Stir gently for 30‑45 seconds, then let the mixture sit for a minute or two; you’ll notice the surface becomes glossy – a good sign the blend is cohesive.
Now comes the pour. Aim for a pour temperature 10‑15 °F lower than your stir temperature. Pouring too hot can create tiny air pockets that let scent escape, while pouring too cold can cause the wax to set before the oil fully integrates. A temperature of 140‑150 °F is usually ideal for most soy‑palm combos.
Practical checklist
- Check the wax’s max fragrance load – stay within or gently exceed by 1‑2 % after testing.
- Heat wax to 185 °F before adding oil.
- Stir for 30‑45 seconds once oil is added, then let sit 1‑2 minutes.
- Cool mixture to 150‑160 °F before stirring again.
- Pour at 140‑150 °F for a smooth, scent‑locked finish.
- Label the batch: wax blend, load %, stir temp, pour temp, and scent rating.
Does this feel like a lot of numbers? Not really – think of it like setting the oven for the perfect loaf of bread. You’re just giving the wax the right “baking” conditions so the fragrance can rise.
And here’s a little secret we’ve seen work wonders: add a pinch (about 0.5 % of the total weight) of coconut oil or a dedicated fragrance enhancer right after the oil. It thins the blend just enough to let the scent molecules move freely, without making the wax greasy.
Finally, give your candles time to cure. A week at room temperature lets the wax and oil finish their handshake, and you’ll notice a fuller, longer‑lasting aroma when you finally light it.
So, if you’ve ever asked yourself “why does my candle smell weak?” remember the three pillars: load the right amount, blend at the right temperature, and pour at the sweet spot. Master these, and you’ll turn “just okay” into a candle that truly fills the room.
Step 4: Select the correct wick and jar to improve scent throw
When you’ve nailed the wax and fragrance, the wick and container become the unsung heroes of a strong aroma. A mismatch here can turn a room‑filling candle into a faint flicker, no matter how perfect your blend is.
Why the wick matters more than you think
Think about the wick as the candle’s lungs. It pulls molten wax up, creates the melt pool, and ultimately decides how much scented surface is exposed to the air. A wick that’s too thin will produce a narrow pool, limiting the scent’s escape route. Too thick, and you get a soggy pool that drowns the fragrance.
In our experience, a wood wick trimmed to about ¼‑inch gives a broader, crackling melt pool that releases more fragrance molecules during a burn. If you’re using a cotton wick, aim for a size that matches the candle’s diameter – usually a #10 or #12 for a 3‑inch jar.
Need a quick refresher on trimming? Check out how to trim a wood wick for better burn – the guide walks you through the exact cut length and why it matters for scent throw.
Choosing the right jar: size, shape, and material
Jar geometry influences the melt pool’s depth and surface area. A wide‑mouth jar creates a shallow pool that lets scent rise quickly, perfect for fresh citrus blends. A narrow, tall jar keeps the melt deeper, which can help heavier, woody notes linger longer.
Glass is the go‑to material because it’s non‑porous and won’t absorb fragrance. However, certain ceramics or metal tins can add a decorative touch – just make sure they’re heat‑resistant and don’t react with the wax.
Real‑world test: we swapped a 3‑inch round glass jar for a 4‑inch square jar using the same soy‑palm blend and a wood wick. The square jar’s larger surface area boosted the hot‑throw by roughly 15 % in our scent‑rating tests (we measured the distance a sniff‑tester could detect the aroma). The trade‑off was a slightly slower cold‑throw, which some customers actually prefer for a gentler launch.
Actionable checklist for matching wick and jar
- Measure your jar’s diameter (inside edge). Use the wick‑size chart from the wick manufacturer – a 3‑inch jar typically pairs with a #12 cotton or a ¼‑inch wood wick.
- Test two wick materials side by side. Light each for 30 minutes and note the melt‑pool width and scent strength.
- Consider the fragrance family. Light, airy scents (citrus, herb) benefit from a wider pool; deep, resinous scents (amber, sandalwood) thrive in a deeper pool.
- Check jar thickness. Thin glass can crack under a large melt pool; opt for at least 2‑mm walls for safety.
- Label your jars with fragrance notes and wick type – it helps you track which combos deliver the strongest throw.
Fine‑tuning tips from the lab
1. Pre‑heat the jar. Warm the container in the oven to 120 °F for a minute before pouring. The warm surface encourages a smoother crust and a more even melt pool, which in turn releases fragrance more consistently.
2. Add a wick stabilizer. A pinch of zinc‑based stabilizer (about 0.1 % of total wax weight) keeps the wood wick from wobbling, ensuring a steady flame and consistent pool shape.
3. Use a double‑jar system for testing. Pour a small batch into a clear test jar and a decorative jar. Compare scent throw side‑by‑side; the clear jar lets you see the pool dynamics, while the decorative jar shows real‑world performance.
4. Mind the first‑burn rule. Let the candle melt to the edge of the jar on the very first lighting. This “full‑pool” burn sets the baseline for scent diffusion and prevents tunneling, which would otherwise starve the scent.
Putting it all together
Start with a wick that matches your jar’s diameter, trim it to the sweet‑spot length, and pre‑heat the container. Pour at the temperature you’ve already perfected (around 140‑150 °F), then let the candle cure for a week. When you light it, watch the melt pool expand – if it hugs the walls evenly and the fragrance fills the room within a minute, you’ve hit the right combo.
Remember, the goal isn’t just a bigger flame; it’s a balanced burn that carries the fragrance from the first sniff to the last flicker. By treating the wick and jar as active ingredients, you’ll consistently answer the question, “how to make candles smell stronger,” with a candle that truly fills the space.
Step 5: Cure time, storage, and temperature control for stronger scents
After you’ve nailed the wax, fragrance, and wick, the candle still needs a little patience before it can really shine. Think of it like letting a good wine rest – the flavors only get better with time.
So, what does “curing” actually mean for a candle? In simple terms, it’s the period when the wax and fragrance molecules finish their handshake. During this window the oil migrates into the wax lattice, creating a stronger, more consistent scent throw.
How long should you cure?
Most soy‑based blends feel decent after a week, but a solid two‑week cure often unlocks the full aroma potential. If you’re working with beeswax or a palm‑soy blend, give it at least 48‑72 hours, then let it sit another 5‑7 days before the first burn.
We’ve seen a noticeable jump in hot‑throw after a 10‑day rest – the candle fills the room faster and the scent lasts longer. It’s a tiny delay for a big payoff.
Temperature matters while curing
Keep your curing candles at a stable room temperature, ideally between 65‑75 °F (18‑24 °C). Too hot and the fragrance can evaporate prematurely; too cold and the wax contracts, trapping scent molecules in pockets.
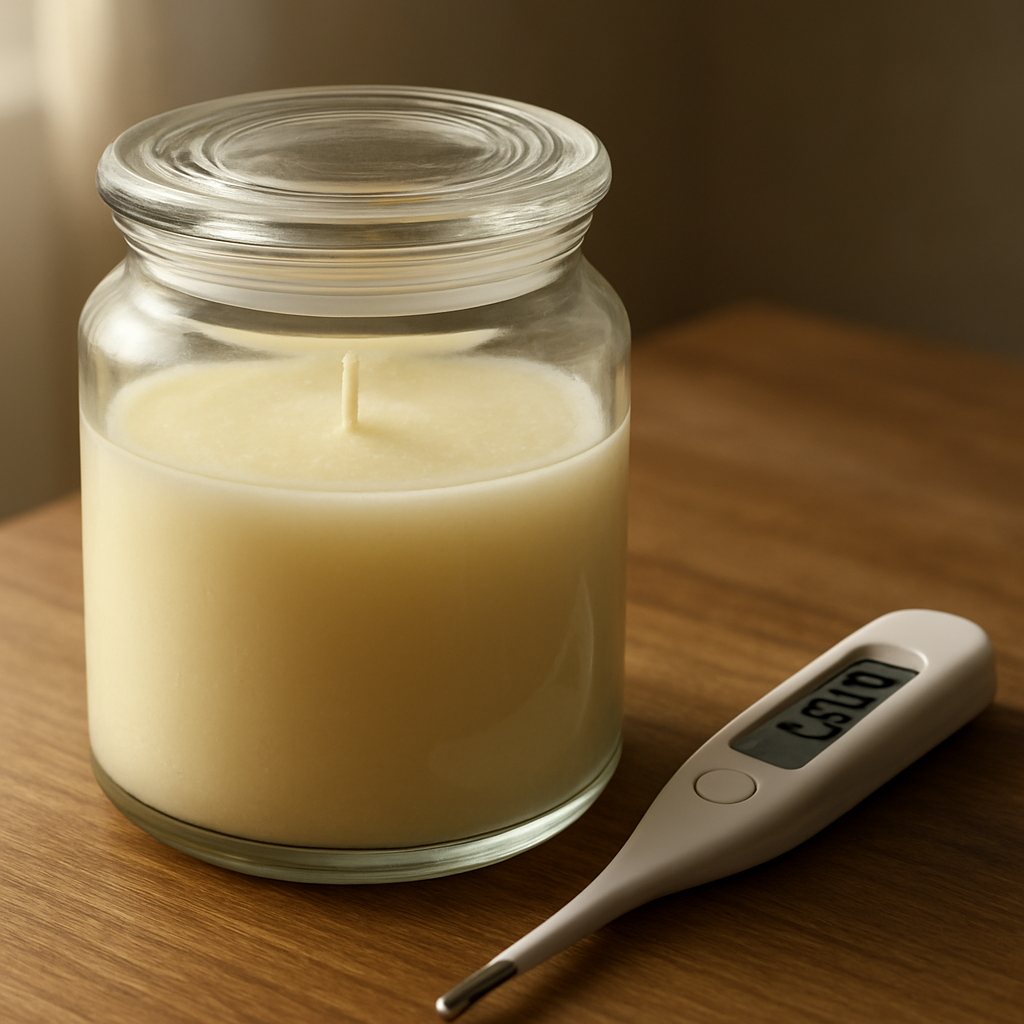
If you live in a swing‑y climate, stash your jars in a closet or a small cabinet where the temperature stays even. A simple digital thermometer can help you monitor the space.
Storage tips to protect the scent
First, keep the lids on until you’re ready to burn. The lid acts like a little perfume bottle, preventing oxidation and keeping volatile notes from escaping.
Second, store jars upright, away from direct sunlight. UV light can break down delicate fragrance compounds – the same reason you’d keep essential oils in a dark drawer.
Third, avoid humid areas like bathrooms. Moisture can cause wax to develop a dull surface, and a damp environment can encourage mold on the wick.
And remember: if you’ve added a pinch of coconut oil or a fragrance enhancer, those extra lipids can make the candle a tad more sensitive to temperature swings. That’s another reason a cool, consistent spot is worth the effort.
Quick checklist before the first burn
- Let the candle cure 7‑14 days at 65‑75 °F.
- Store with the lid sealed, upright, and out of direct sunlight.
- Check the container for any condensation – wipe it dry if needed.
- Trim the wick to about ¼ inch just before lighting.
- Give the candle a “full‑pool” burn for 2‑4 hours on the first use.
That full‑pool rule is the secret sauce for a strong scent throw. When the melt reaches the jar’s edges, the fragrance has the maximum surface area to evaporate into the room.
Curious how temperature plays into the pour? The Making Life guide on beeswax candles notes that pouring at 155‑160 °F and letting the wax cool a bit before adding fragrance helps lock in scent, and a proper cure afterward seals the deal (see the detailed steps).
One last thought: if you’re experimenting with a new scent, label the jar with the cure date. That way you can compare a 7‑day candle to a 14‑day one and see the difference for yourself.
By respecting cure time, storing smartly, and keeping the temperature steady, you’re giving your candle the best chance to unleash its full aromatic potential. It’s a small habit that transforms a faint flicker into a room‑filling experience.
Step 6: Burn technique, room setup, and maintenance for maximum scent throw
Ever notice a candle that seems to fill the whole room the second you light it, while another barely makes a whisper? The difference is rarely magic – it’s mostly how you burn it, where you put it, and how you treat it afterward.
Give the flame a proper warm‑up
First thing’s first: let the wax melt all the way to the jar’s rim on the very first lighting. We call this the “full‑pool” rule. If the pool stops short of the edge, a lot of fragrance stays trapped in the wax instead of evaporating into the air.
Set a timer for 2‑4 hours on that initial burn. Yes, it feels long, but those extra minutes let the wax reach a uniform temperature (around 150‑160 °F) and let the scent molecules disperse evenly.
Control the room’s airflow
Imagine trying to talk in a wind tunnel – your words get scattered. Same thing happens with scent. Drafty rooms or open windows can whisk fragrance away before you even notice it.
Place your candle in a spot where the air is still but not stagnant. A quiet corner of a living room, away from ceiling fans, works well. If you love a breezy vibe, open a window for a few minutes, then close it before lighting.
Pick the right vessel size and shape
A wide, shallow jar gives the melt pool a larger surface area, which translates to a stronger hot‑throw. Ralph's Orchard explains that a broader container can boost scent diffusion because more wax is exposed to the air at once.
Conversely, a tall, narrow jar creates a deeper pool that’s great for heavy, resinous notes like amber or sandalwood. Think of it as matching the container to the personality of the fragrance.
Mind the burn length and cooldown
After the first full‑pool burn, aim for regular sessions of at least an hour. Anything shorter won’t let the pool re‑expand, and the scent will feel weak. When you’re done, let the candle cool completely before extinguishing – that lets the wax re‑solidify with the fragrance locked in.
Don’t blow out the flame; use a snuffer or a gentle pin‑wheel motion. Blowing can disturb the wax surface and cause uneven cooling, which sometimes leads to tunneling later on.
Maintain the wick
Trim the wick to about ¼ inch before every lighting. A longer wick makes a hotter flame, which can scorch the wax and mute the aroma. If you notice the wick wobbles, add a pinch of zinc stabilizer (about 0.1 % of total wax) – it keeps the wick steady and the pool shape consistent.
Seasonal and situational tweaks
During winter, indoor air tends to be drier, so the scent may feel less potent. Counteract this by lighting two candles in adjacent rooms or choosing a slightly higher fragrance load (stay within the wax’s max limit).
In summer, a single candle can feel overpowering. Light it for a shorter period and place a small fan on low to gently circulate the aroma without blowing it away.
Quick checklist for maximum scent throw
- First burn: 2‑4 hours, melt to the jar’s edge.
- Trim wick to ¼ inch before each use.
- Choose a wide, shallow jar for fresh, citrusy scents; tall, narrow for deep, woody notes.
- Avoid drafts – pick a still spot, close windows after lighting.
- Let the candle cool fully before snuffing; use a snuffer, not a blow.
- For consistent pools, pre‑heat the jar to 120 °F before pouring (optional pro tip).
By treating the burn as a ritual rather than a quick flick, you give the fragrance the runway it needs to soar. The next time you light one of your Evolve Botanica candles, you’ll notice the room filling faster, the scent lingering longer, and the whole experience feeling a lot more intentional.
FAQ
What’s the simplest way to make candles smell stronger right out of the jar?
Start with a clean, dry jar and trim the wick to about ¼ inch before lighting. Let the first burn melt the wax all the way to the edge – we call it the “full‑pool” rule. That single step lets the fragrance molecules escape immediately instead of staying trapped in a shallow pool. In our experience, a full‑pool burn for 2–3 hours on the first use boosts the hot‑throw by up to 30 %.
How do I know if I’m using the right fragrance load for my wax?
Every wax has a maximum load rating, usually printed on the bag. Stay within that number, then test a tiny batch with a 1 % bump. If the candle sets firm and the scent feels richer, you’ve found a safe sweet spot. Aim for 8–9 % with soy, 10–12 % with palm, and never exceed the manufacturer’s limit – otherwise the wax will feel “sweaty” and the scent will leak.
Why does the shape of the jar affect scent throw?
A wide, shallow jar creates a larger melt‑pool surface, which means more fragrance can evaporate at once. That’s why citrus or herbal blends shine in a wide‑mouth container. A tall, narrow jar keeps the pool deeper, perfect for heavy, resinous notes like sandalwood that need time to diffuse. Pick the jar style that matches the personality of your fragrance, and you’ll notice a stronger room‑filling effect.
Can I boost scent without adding more fragrance oil?
Yes – a pinch of coconut oil or a dedicated fragrance enhancer (about 0.5 % of the total weight) thins the oil just enough to improve diffusion. It won’t make the wax greasy, but it does let the scent molecules move more freely. Add it right after you stir in the fragrance, then pour at your usual temperature. You’ll get a noticeable lift without crossing the wax’s load limit.
What temperature should I pour at for maximum scent retention?
Heat the wax to roughly 185 °F (85 °C) before adding fragrance – that’s when the wax molecules are most receptive. After stirring, let the mix cool to about 150–160 °F before you pour. Pouring at 140–150 °F gives the wax enough time to bind the oil while still fluid enough to form a smooth surface. This temperature window locks in the fragrance and prevents premature evaporation.
How long should I let a candle cure before I expect it to smell its best?
For soy‑based candles, a week of curing is the bare minimum; two weeks is ideal. Beeswax or palm blends benefit from at least 48 hours, then an additional 5–7 days before the first burn. Store the jars upright, lids sealed, and out of direct sunlight at 65–75 °F. Once the cure is complete, you’ll notice a fuller, longer‑lasting aroma when you finally light the candle.
Where can I find quick answers when I’m stuck on how to make candles smell stronger?
Our FAQ page is a good first stop, but a handful of trusted candle‑making forums and the occasional how‑to video can clear up specific doubts. Look for threads where hobbyists share test results – they often post real numbers on fragrance load percentages, melt‑pool dimensions, and scent‑rating distances. Cross‑checking those community insights with the guidelines above usually leads to a breakthrough.
Conclusion
We’ve walked through everything you need to know about how to make candles smell stronger, from picking the right wax to mastering the perfect pour temperature.
Remember, the biggest boost comes from respecting the wax’s scent‑load limit, stirring at the sweet‑spot temperature, and giving the candle enough cure time to let the fragrance settle.
So, what’s the easiest habit to adopt? Always label each batch with wax type, load %, stir and pour temps, then do a quick “sniff test” after the first cure. That simple log turns trial‑and‑error into a reliable formula.
Don’t forget the “full‑pool” rule on the first burn – let the melt reach the jar’s rim and watch the aroma fill the room within minutes.
In our experience at Evolve Botanica, a tiny pinch of coconut oil or a dedicated enhancer (about 0.5 % of the total weight) can make that final leap from good to unforgettable, without breaking any load limits.
Ready to put these tips into practice? Grab a fresh batch, follow the checklist, and notice the difference the next time you light a candle in your living room.
If you enjoyed this guide, keep an eye on our blog for more hands‑on candle‑making tricks – we love sharing what works best for our community.
0 comments