

Ever lit a candle on a cozy night, only to realize a bright spot of wax has soaked into your favorite shirt?
That moment—when you see the stubborn, glossy blotch and wonder if your beloved fabric is doomed—feels oddly personal, like a tiny disaster in an otherwise perfect evening.
We get it. At Evolve Botanica Co, we’ve seen countless customers bring in candle‑spilled linens, and we’ve learned a few tricks that actually work, without turning your clothes into a chemistry experiment.
First thing to remember: act quickly, but don’t panic. Wax hardens fast, yet it’s surprisingly forgiving once you give it a little heat. The goal is to melt the wax just enough to lift it off, then absorb the residue.
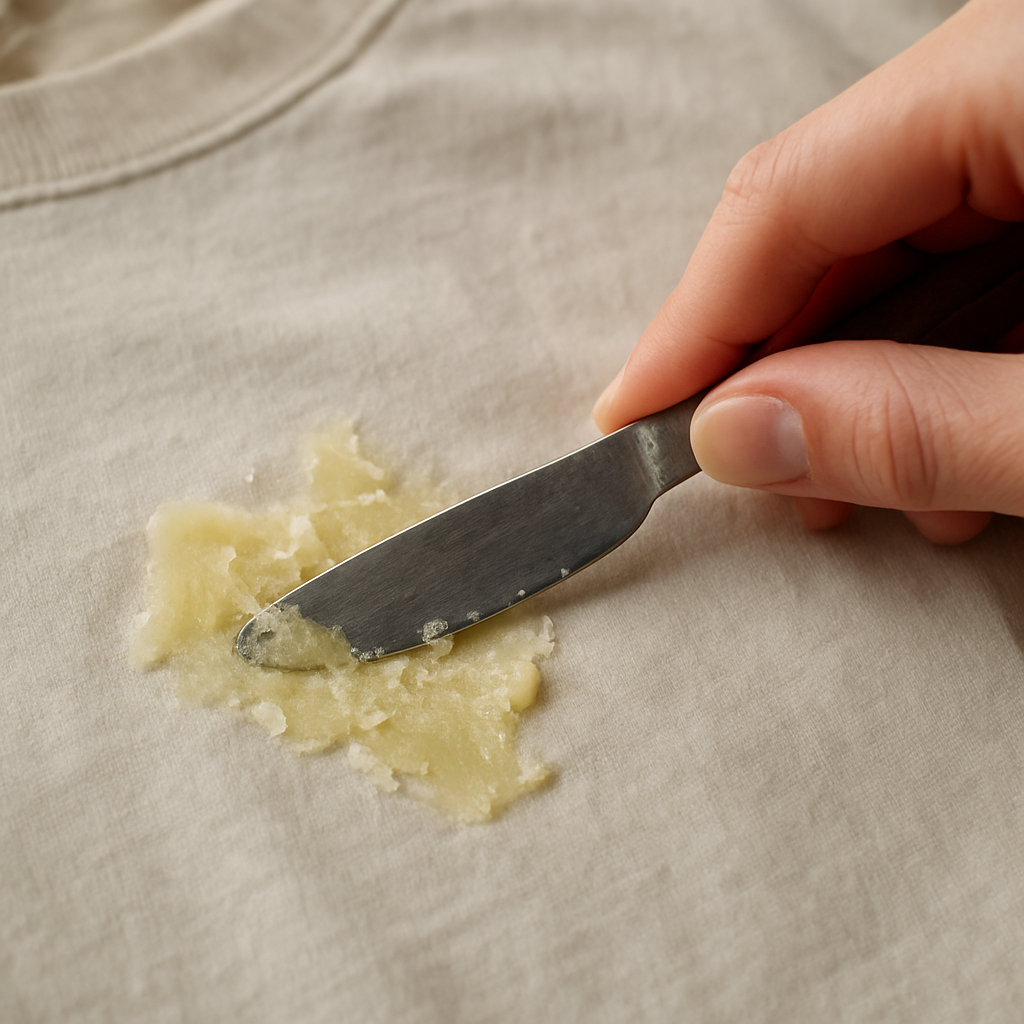
So, what’s the simplest method? Grab a dull butter knife or a spoon, and gently scrape off as much solid wax as you can. Don’t scrape too hard—just lift the bulk without tearing the fibers.
Next, place a few layers of paper towels or a brown paper bag over the remaining stain. Set your iron on a low to medium setting, no steam, and press for a few seconds. The heat will melt the wax, and the paper will soak it up like a sponge.
Check the paper frequently; when it gets dark, swap it for a fresh sheet. You’ll see the wax transferring from fabric to paper, leaving the cloth cleaner each time.
If a faint oily trace remains, a dab of dish soap mixed with warm water works wonders. Gently blot, then rinse the area with cool water. Let it air dry, and you’ll be surprised how little, if any, discoloration is left.
And what about delicate fabrics like silk or wool? For those, skip the iron and use a hairdryer on a low setting to soften the wax, then blot with a clean cloth. Follow with a gentle hand‑wash to avoid damage.
Now that you have a clear roadmap, you can face any candle mishap with confidence. No more fretting over ruined garments—just a few simple steps, and you’ll be back to enjoying the glow without the worry.
TL;DR
Got a wax stain? Quick, gentle steps—scrape excess, use a warm iron with paper, then dab with dish soap—to rescue your favorite fabric and a little patience.
Whether it’s cotton, silk, or wool, these simple tricks keep colors bright and fibers intact, so you can enjoy candlelit evenings without worry.
Step 1: Harden the Wax and Scrape It Off
First thing’s first – you’ve got that glossy wax spot and you’re probably wondering if you should just give up. Trust me, we’ve all stood there, staring at the stubborn blotch and feeling that tiny panic. The good news? The wax is actually on your side once you let it harden a bit.
Let the wax cool completely. It sounds counter‑intuitive, but a solid block is way easier to lift off than a gooey mess. If the wax is still warm, you can speed up the hardening by pressing a cold metal spoon or a bag of ice cubes against it for a minute. You’ll feel it firm up, and that’s the signal to move on to the next step.
Scrape without ripping
Grab a dull butter knife, a plastic spoon, or even a credit card – anything that isn’t sharp enough to cut the fabric. Gently slide the edge under the edge of the hardened wax and lift. Think of it like peeling a sticker off a window; you want to lift, not scrape aggressively. If you notice the fabric starting to fray, stop and try a different tool.
We’ve seen customers use a wooden spatula from our candle‑making kits with great success – it’s sturdy but soft enough to protect delicate fibers. The goal is to get as much bulk off as possible while keeping the cloth intact.
Once you’ve cleared the majority of the wax, you might still see a faint residue. That’s where a little heat and a paper barrier come in handy, but that’s a later step. Right now, focus on the solid scrape.
Need a deeper dive into the whole wax‑removal process? Check out our guide on How to Remove Wax from Candle Jar: Simple Step‑by‑Step Methods – it walks you through every stage, from hardening to polishing the fabric.
So, why does hardening matter? When wax is liquid, it seeps into the weave, making it trickier to lift. Once solid, the wax sits on top of the fibers, turning a chemical problem into a mechanical one. This simple shift can save you a lot of frustration, especially on silk or wool.
Here’s a quick checklist you can keep on the back of the fridge:
- Let wax cool – 1–2 minutes
- Apply a cold surface if needed
- Use a dull edge to lift
- Stop if fabric starts to fray
Does this feel doable? Absolutely. And if you’re curious about eco‑friendly ways to tackle the leftover stain, natural home‑care remedies offer vinegar or baking soda tricks that work wonders without harsh chemicals.
While you’re handling the fabric, your hands might get a bit waxy too. A gentle post‑cleaning skin routine can keep you comfortable – skin‑care after cleaning tips from Uncover Skincare suggest a light, fragrance‑free cleanser followed by a soothing moisturizer.
Ready to see the process in action? Below is a short video that walks you through the hardening and scraping stage, so you can follow along visually.
After the video, give the fabric a quick brush to shake off any tiny wax crumbs that might have fallen off during scraping. A soft lint roller works great for this, especially on darker fabrics where crumbs are harder to spot.
 .
.
Now that the bulk of the wax is gone, you’re set for the next phase – melting the remaining trace onto paper. Stay with us; the next step is surprisingly simple and won’t damage even the most delicate fibers.
Step 2: Apply Heat to Melt Residual Wax
Now that you've scraped away the bulk, it's time to coax the stubborn leftovers out with a little gentle heat.
The idea is simple: melt the wax just enough so it seeps into a clean absorbent surface, instead of sinking deeper into the fibers.
What you need is basically three things – a heat source, a protective barrier, and fresh paper or a cloth that will gulp up the liquid wax.
Most of us have an iron lying around, but a hair‑dryer, a heat gun, or even a warm kettle can do the trick if you don’t want to risk the iron’s weight on delicate fabrics.
Here’s a quick checklist before you turn on the heat:
- Set the iron to a low‑medium setting (no steam).
- Place a single layer of white paper towel or a brown paper bag over the stain.
- Press briefly – 5‑10 seconds is usually enough.
- Swap the paper as soon as it darkens; the wax will transfer onto it.
If you’re working with a cotton tee, the iron’s flat sole spreads heat evenly, and the paper acts like a sponge, pulling the melted wax away without scorching the threads.
For silk or wool, we prefer the hair‑dryer because the airflow is softer and you can keep the nozzle a few inches away, preventing any burn marks.
If you want to see the heat‑transfer technique in action, check out this quick demo video.
A real‑world scenario we’ve seen at our Etowah Mills pop‑up: a shopper knocked over a gingerbread‑spiced candle on a linen napkin. She lifted the big wax chunk, then used a handheld iron on the lowest setting and a clean kitchen towel. After three quick passes, the napkin was almost as good as new.
If the paper starts to look glossy, that’s your cue to swap it out – the darker the paper, the more wax it’s holding.
A tip many overlook: lightly mist the back side of the paper with warm water before you press. The moisture creates a tiny barrier that keeps the wax from seeping back into the fabric, especially on looser weaves like chambray.
What about stubborn oily rings that refuse to disappear after a few paper swaps? That’s when a dab of mild dish soap works like magic. Apply a few drops to a clean cloth, gently blot the area, then rinse with cool water. You’ll notice the wax residue loosening and the colour returning to its original hue.
A quick experiment you can try at home: place a small ice cube on the waxed spot for 10 seconds, then immediately press the iron. The cold shock contracts the fibers, making the wax surface more receptive to heat, and you often see a faster transfer onto the paper.
If you don’t have an iron, a handheld steamer set to the lowest temperature can do the same job – just be sure the steam isn’t too strong, otherwise you’ll introduce moisture that can stain the fabric.
One more pro tip from our team: after the wax is fully transferred, run a cool iron over the area for a few seconds. The cool metal helps set the fibers back into place, reducing any lingering curl or stiffness that heat sometimes leaves behind.
Step 3: Treat Stains with Cleaning Solutions
Now that the wax has been melted and lifted, you’re probably staring at a faint oily ring that refuses to vanish. That’s the part where the right cleaning solution makes all the difference.
First, give the fabric a quick rinse with cool water. Cold water helps solidify any remaining wax particles so they don’t spread while you work.
Next, grab a few drops of mild dish soap – the kind you use for dishes, not the heavy‑duty degreaser. Apply the soap to a clean, soft cloth and gently blot the stain. You’ll feel the wax loosening as the surfactants break down the oily residue.
But soap alone isn’t always enough, especially on cotton tees or linen napkins that have absorbed a thin film of wax. That’s when a dedicated pre‑treatment kicks in. We like to use a stain‑release liquid like Tide Ultra Stain Release Liquid. Spray or dab a small amount directly onto the spot, let it sit for about five minutes, then give it a light rub with a soft‑bristled toothbrush. The bristles work the product into the weave without tearing delicate fibers.
Does this feel a bit like a mini‑science experiment? It kind of is. You’re essentially emulsifying the wax oil so water can carry it away in the wash.
After the pre‑treatment, run the garment through a normal wash cycle. Use the hottest water temperature that the care label allows – warm water for synthetics, hot for sturdy cottons. Add your regular laundry detergent, but if the stain is stubborn, add a second splash of the stain‑release liquid to the detergent compartment.
Here’s a quick checklist you can keep on the back of your washing machine:
- Cool rinse to solidify residual wax.
- Dish soap blotting.
- Pre‑treat with stain‑release liquid (5‑minute dwell).
- Soft brush agitation.
- Wash on appropriate temperature with detergent.
- Air‑dry – avoid the dryer until you’re sure the stain is gone.
Why air‑dry? The dryer’s heat can set any leftover oil, turning a “just a little” spot into a permanent mark. If after the first wash the stain persists, repeat the pre‑treatment step before tossing it in again.
Now, a quick visual guide can help you see each move in action.
Notice how the video demonstrates the gentle brushing motion? That’s the sweet spot – you want enough friction to lift the wax, but not so much that you fuzz up a fine knit.
For fabrics like silk or wool, swap the dish‑soap step for a dab of a specialized wool‑safe cleaner. The same principle applies: you’re introducing a mild surfactant that won’t strip the natural oils the fibers need.
And if you’re ever in a pinch without a commercial stain‑release product, a mixture of one part white vinegar to two parts water works surprisingly well. Vinegar’s acidity helps break down the wax’s grip, while the water dilutes it enough to rinse clean.
Finally, give the garment a once‑over once it’s dry. Run your fingers over the area – if it feels smooth and the colour matches the surrounding fabric, you’ve succeeded. If you still sense a slight sheen, repeat the blot‑and‑brush routine once more.
Treating the leftover wax with the right cleaning solutions might feel like an extra step, but it’s the one that guarantees your favorite shirt, tablecloth, or tote comes out looking as fresh as the night you first lit the candle.
Step 4: Compare Common Wax‑Removal Products
Now that you’ve melted the wax and given it a good blot, the real decision begins: which product should you reach for next? The market is full of “miracle” cleaners, but not every one plays nice with delicate fabrics.
1. Straight‑up dish soap and warm water
Most of us have a mild dish soap hanging out in the sink, and that’s often enough for cotton tees or linen napkins. Just a few drops in lukewarm water creates a gentle surfactant that lifts the oily film without stripping colour.
Pros: cheap, readily available, safe on colourfast fabrics. Cons: may need several rounds on stubborn wax, not ideal for silk or wool.
2. White‑vinegar‑water blend
Mix one part white vinegar with two parts water and dab with a clean cloth. The mild acidity helps break the wax’s grip, especially when the residue is a bit greasy.
Pros: inexpensive, works on many synthetics, leaves no harsh chemical residue. Cons: a faint vinegar scent can linger if not rinsed well, can be too aggressive for very delicate fibers.
3. Commercial petroleum‑based spot removers
Products that list petroleum distillates, such as Goo Gone or similar cleaners, are designed to dissolve wax, grease, and adhesive. The University of Georgia’s extension guide notes they’re effective on wax stains when used according to label directions University of Georgia guide.
Pros: fast‑acting, works on heavy wax buildups, good for upholstery or outdoor fabrics. Cons: strong smell, can affect dyes, requires a thorough rinse and may need a test patch.
4. Specialty candle‑wax remover sprays
These are formulated specifically for candle wax on fabrics. They usually combine mild solvents with fabric‑safe conditioners. Because they’re niche, you’ll find them in craft stores or online.
Pros: balanced formulation, often safe on silk and wool, convenient spray bottle. Cons: pricier than household options, availability may be limited.
How to choose the right tool for your situation
Ask yourself three quick questions: Is the fabric delicate? How much wax is left? Do you have the product on hand? If you’re dealing with a cotton shirt and only a faint sheen, the dish‑soap method will probably do the trick. If the stain is stubborn on a synthetic outdoor cushion, a petroleum‑based spot remover can save you a repeat wash. And when you’re handling a cherished silk scarf, reach for a specialty spray or the vinegar blend, then follow with a gentle hand‑wash.
Before you pour any cleaner onto the garment, always do a spot test. Pick an inconspicuous seam or inside hem, dab a tiny amount, and wait a minute. If the colour stays true and the fabric doesn’t feel stiff, you’re good to go. For petroleum‑based products, work in a well‑ventilated area and wear gloves if the scent irritates you. And remember, a little goes a long way – over‑saturating can spread the wax deeper into the weave.
| Product type | Best for | Key notes |
|---|---|---|
| Dish soap + warm water | Cotton, linen, polyester | Cheap, repeat if needed, rinse well |
| Vinegar‑water mix | Synthetics, light‑weight blends | Acidic, rinse to remove scent |
| Petroleum‑based spot remover | Heavy wax, upholstery, outdoor fabrics | Test patch first, thorough rinse required |
| Candle‑wax remover spray | Silk, wool, delicate drapes | Costlier, spray evenly, follow care label |
Bottom line: you don’t need a whole cabinet of products to get rid of wax. Pick the option that matches the fabric’s fragility and the wax’s stubbornness, give it a few gentle minutes, then finish with a cool rinse. When the fabric feels smooth and the colour looks even, you’ve nailed the removal and can get back to enjoying that candle glow without a trace of wax today.
Step 5: Rinse, Launder, and Inspect
Now that the wax has been lifted off, the real test begins: getting every last trace out of the fibers. A proper rinse, a gentle wash, and a careful inspection are the three pillars that turn a “maybe‑clean” garment into a fresh‑as‑new favorite.
Rinse the residue
Start with cool water. Cold does two things – it solidifies any lingering wax particles so they don’t spread, and it protects delicate dyes from bleeding. Hold the stained area under a gently running faucet for about 30 seconds, letting the water flow from the back of the fabric toward the front. That direction helps push the wax out instead of pulling it deeper.
Do you ever wonder why you should avoid hot water right away? Hot can re‑melt the wax, letting it seep into the weave again. If you’re dealing with a synthetic blend, a brief splash of lukewarm water after the cool rinse is fine, but keep the temperature low.
Tip: For stubborn oily rings, dab a few drops of a mild dish soap onto the spot while the water is still running. The surfactants break up the remaining grease, making the rinse more effective.
Launder like a pro
Once the rinse feels thorough, toss the piece into the washing machine – or hand‑wash if the label says “hand wash only.” Use the warmest water the care label allows; cotton can handle a hot cycle, silk prefers cool or warm. Add your regular laundry detergent; if you have a stain‑release booster, now’s the time to add it.
Here’s a quick checklist you can keep on the side of the machine:
- Cool‑rinse first, then warm wash.
- Use a gentle cycle for delicate fabrics.
- Skip the fabric softener – it can trap wax oils.
- Do not overload the machine; the garment needs room to move.
We’ve seen a lot of customers bring in cotton tea towels that still have a faint sheen after one wash. Adding a second rinse cycle usually does the trick. And if you’re washing a favorite silk scarf, let it soak for five minutes in the detergent water before the gentle cycle – that extra soak gives the soap time to loosen the wax without agitating the fibers.
After the wash, resist the urge to pop the item straight into the dryer. Heat can set any residual oil, turning a removable stain into a permanent ghost. Instead, lay the garment flat on a clean towel or hang it to air‑dry in a well‑ventilated spot.
Inspect before you finish
When the fabric is dry, run your fingers over the previously stained area. Does it feel smooth? Does the colour match the surrounding material? If you notice a faint gloss or a darker patch, the wax isn’t fully out yet.
What to do next? Give the spot another quick pre‑treat: a dab of dish soap or a splash of white vinegar, followed by a short hand‑wash. Rinse thoroughly and let it dry again. Most of the time, a second pass removes the last whisper of wax.
One more pro tip from our Etowah Mills pop‑up: place a clean white cloth underneath the garment while it dries. If any lingering wax drips, the cloth will catch it, saving your other laundry.
Finally, give yourself a little celebration. You’ve turned a candle‑spill disaster into a clean piece of fabric, ready for another cozy evening. And remember, the next time you light a candle, a quick scrape and a paper‑bag press will keep this step from becoming a repeat performance.
Step 6: Prevent Future Wax Spills on Fabric
We've gotten the wax off, but the real win is stopping the next spill before it even happens. A little foresight can keep your favorite sweater, tablecloth, or holiday napkin looking pristine for years.
Pick the right spot
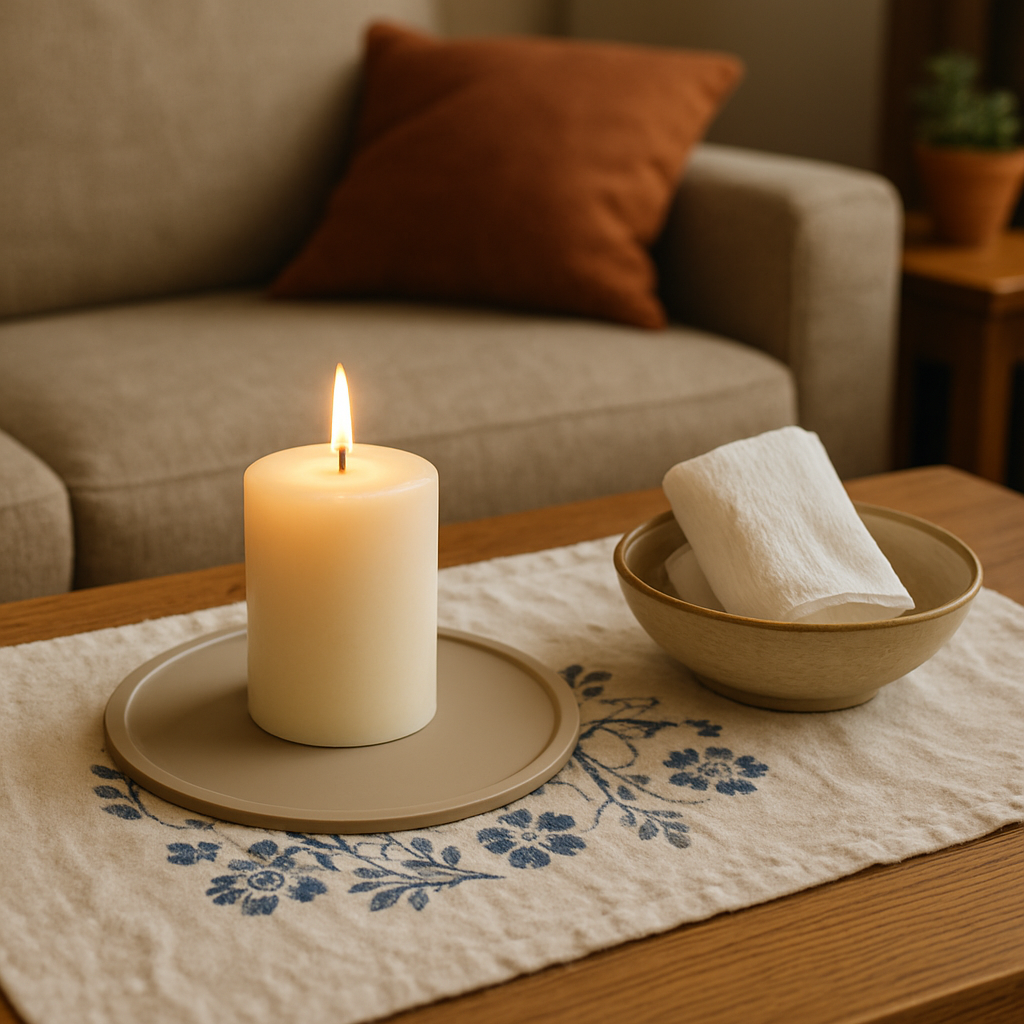
When you set a candle, think about where the wax might drip. A flat, heat‑resistant surface like a ceramic coaster or a silicone mat gives the wax a safe place to pool instead of sliding onto a nearby shirt.
Do you have a coffee table that doubles as a candle altar? Slip a piece of parchment paper underneath the candle. It’s cheap, washable, and it catches any wayward drips.
Use a barrier before you light
Even the most careful candle‑lover can’t predict a gust of wind or an accidental bump. A thin layer of wax‑proof fabric – think a clean kitchen towel or a decorative tea‑towel – creates a sacrificial barrier. If a spill occurs, you’ll only have to launder the towel, not the expensive dress.
We’ve seen this trick work wonders at our Etowah Mills pop‑up: a customer placed a vintage linen runner under a gingerbread‑spiced candle and the runner caught the stray wax, saving the rest of the tablecloth.
Choose candle containers wisely
Glass jars are beautiful, but the bottom can get warm enough to melt the wax faster than a tin holder. If you love the look of a jar, set it on a heat‑resistant trivet. For travel‑size candles, the metal tins are less likely to overheat, reducing the chance of a drip.
And if you love those gemstone‑topped candles we craft, remember the stone itself can act like a mini‑shelf – just make sure the stone sits on a stable base.
Mind the melt point
Every wax has a different melt temperature. Soy and beeswax melt lower than paraffin. If you notice a candle getting too soft before you’re ready to burn it, pop the wick out for a minute and let the wax solidify again. A quick chill in the fridge (just five minutes) can reset the wax without ruining the scent.
It might sound odd, but a short chill can actually extend the candle’s life because the wax contracts and the wick stays centered.
Keep a clean workspace
Before you light anything, wipe down the surface with a damp cloth. Dust or crumbs can cause uneven burning, which often leads to wax splatter. A tidy area also makes it easier to spot a drip before it spreads.
And if you’re lighting multiple candles for a dinner party, arrange them with a little space between each. That way, if one tipples over, the others stay untouched.
Quick‑fix kit for accidental spills
Even with the best prep, accidents happen. Keep a small “wax‑spill kit” handy: a few paper towels, a butter knife, and a dab of dish soap. When a drop lands on fabric, blot gently – don’t rub – and then follow the steps we covered earlier.
Having the kit within arm’s reach turns a panic moment into a calm, controlled fix.
Finally, make a habit of a quick post‑burn check. Once the candle cools, glance at the surrounding area. If you see a tiny wax bead, scoop it up with the butter knife before it hardens and sticks to fabric.
These small habits add up. By positioning a barrier, choosing the right container, and keeping a mini‑kit ready, you’ll spend less time scrubbing and more time enjoying the glow.
FAQ
How can I safely remove candle wax from a cotton shirt without damaging the fabric?
First, let the wax harden for a minute, then gently lift the bulk with a dull butter knife or a plastic spoon. Place a few layers of white paper towel over the spot and press a low‑heat iron for 5‑10 seconds. The wax will transfer to the paper. Finish by blotting any remaining oil with a dab of mild dish soap and cool water.
What’s the best method for delicate fabrics like silk or wool?
Skip the iron entirely. Use a low‑heat hair dryer to soften the wax just enough to roll it off with your fingertip or a soft cloth. After the bulk is gone, dab a tiny amount of wool‑safe cleaner or a few drops of gentle dish soap onto a clean cloth and blot the oily film. Rinse with cool water and let the piece air‑dry.
Can I use a hair dryer instead of an iron to melt wax?
Absolutely. A hair dryer on a low setting gives you precise control and reduces the risk of scorching fragile fibers. Hold the nozzle a few inches away, warm the wax until it loosens, then press a paper towel against it to soak up the melt. This method works well for synthetic blends and for spots that are hard to reach with an iron.
How do I treat the oily residue after the wax is lifted?
The residue is basically a thin layer of oil. Mix a few drops of mild dish soap with warm water, dab it onto the stain with a soft cloth, and gently rub in a circular motion. Rinse with cool water to remove soap, then repeat if the sheen persists. For stubborn spots, a 1:2 white‑vinegar‑to‑water solution can break down the oil further.
Is it okay to put the stained garment in the dryer after cleaning?
No. Heat from the dryer can set any leftover oil, turning a removable stain into a permanent ghost. After you’ve rinsed and laundered, let the item air‑dry completely. If the fabric still feels a little slick, give it another quick pre‑treat and wash before you ever think about using the dryer.
What quick‑fix items should I keep in a wax‑spill kit?
Keep a few paper towels, a dull butter knife or plastic spoon, a small dish‑soap bottle, and a spare white cloth or cotton pad. A mini spray bottle of diluted white vinegar is handy for oily rings. Store everything in a small zip‑top bag near your candle‑lighting area so you can act the moment a drop lands.
How can I prevent future candle wax spills on my furniture or clothing?
Start with a heat‑resistant barrier—think a silicone mat, a parchment sheet, or a decorative tea towel—under every candle. Choose containers that sit on a stable trivet, and avoid placing candles too close to fabrics. A quick post‑burn check helps you catch a stray bead before it hardens. These small habits keep your favorite pieces wax‑free without extra effort.
Conclusion
We've walked through every twist and turn of how to remove candle wax from fabric, from the first scrape to the final air‑dry.
If you ever find yourself staring at a stubborn oily ring, remember the simple hierarchy: harden → scrape → heat → clean → launder → inspect.
A quick tip we swear by at our Etowah Mills pop‑up is to keep a tiny wax‑spill kit on hand – a paper towel, a dull butter knife, and a spray bottle of diluted white vinegar. When a drop lands, blot first, then follow the steps we’ve just covered.
And don’t forget the dryer is your worst enemy after a wax rescue – let the garment air‑dry, give it a once‑over, and only then decide it’s ready for the next cozy candle night.
So, what’s the next move? Grab your kit, treat the stain before it sets, and you’ll keep your favorite shirts, table linens, and even that silk scarf looking fresh for every holiday gathering.
If you loved these tips, swing by Evolve Botanica Co this weekend – we’ll have our candle‑care station ready, plus plenty of handcrafted soaps to keep your hands soft after the cleanup.
Remember, a little preparation turns a potential disaster into a quick fix – and more time to enjoy the glow.
0 comments