

Ever poured a candle, enjoyed the glow, and then stared at that stubborn wax ring stuck to the jar, wondering what to do?
It’s one of those tiny frustrations that feel oddly personal—you’ve just created a cozy atmosphere, and now the last step feels like a puzzle you didn’t sign up for.
In our little workshop at Evolve Botanica, we’ve seen countless jars rescued from that wax‑clogged fate, and we’ve learned a few tricks that turn a messy clean‑up into a quick, satisfying finish.
So, how do you remove wax from a candle jar without breaking the glass or losing the chance to reuse it for your next favorite scent?
First, let’s talk about why the wax sticks in the first place. As the candle burns, the wax melts, flows down the sides, and then solidifies when the heat fades. That thin film can cling like a second skin, especially on glass that’s been heated.
But don’t worry—there’s a simple, kitchen‑friendly method that uses heat you already have. Grab a pot, fill it with a couple of inches of water, and bring it to a gentle simmer. Pop the candle jar (once it’s cool enough to handle) into the water, making sure the water level stays below the rim so you don’t soak the label.
As the water warms, the wax loosens and begins to melt away, sliding into the pot. You’ll hear a soft hiss, and before you know it the jar is nearly spotless.
If you’re in a hurry, a microwave works too—just slice the solid wax into chunks, place them in a microwave‑safe bowl with a splash of water, and heat for 30‑second bursts, stirring in between.
Once the wax is liquid, pour it through a fine mesh strainer into a container for reuse or disposal. Then give the jar a quick rinse, wipe it dry, and you’ve got a clean canvas ready for another hand‑poured masterpiece or a stylish storage piece.
Feeling a bit more confident about giving those jars a second life? Let’s dive into the step‑by‑step guide that walks you through each stage, with tips for avoiding common pitfalls and even ideas for repurposing the reclaimed wax.
TL;DR
We show you how to remove wax from candle jar quickly using a simmering water bath or microwave bursts, so the glass is easily spotless without damage. Follow our step‑by‑step guide, add a few simple tips, and you’ll reuse the jar for fresh scents or stylish storage in minutes today.
Step 1: Freeze the Jar to Crack the Wax
Ever watched that stubborn ring of wax cling to the glass like it’s refusing to leave? It’s a tiny, annoying moment that can feel like the end of a perfect candle night. The good news? A quick chill in the freezer does the trick – and it’s something we do in our workshop all the time.
First, let the jar cool completely. You don’t want to slam a hot glass into the freezer, because that could cause a surprise crack. Once it’s room temperature, wipe off any loose bits of wax with a paper towel – just enough so the freezer air can reach the surface.
Now pop the jar upright into the freezer. A standard home freezer works fine; you don’t need any fancy equipment. Set a timer for about 2‑3 hours. While you wait, think about that moment when you finally hear the faint pop as the wax separates – it’s oddly satisfying.
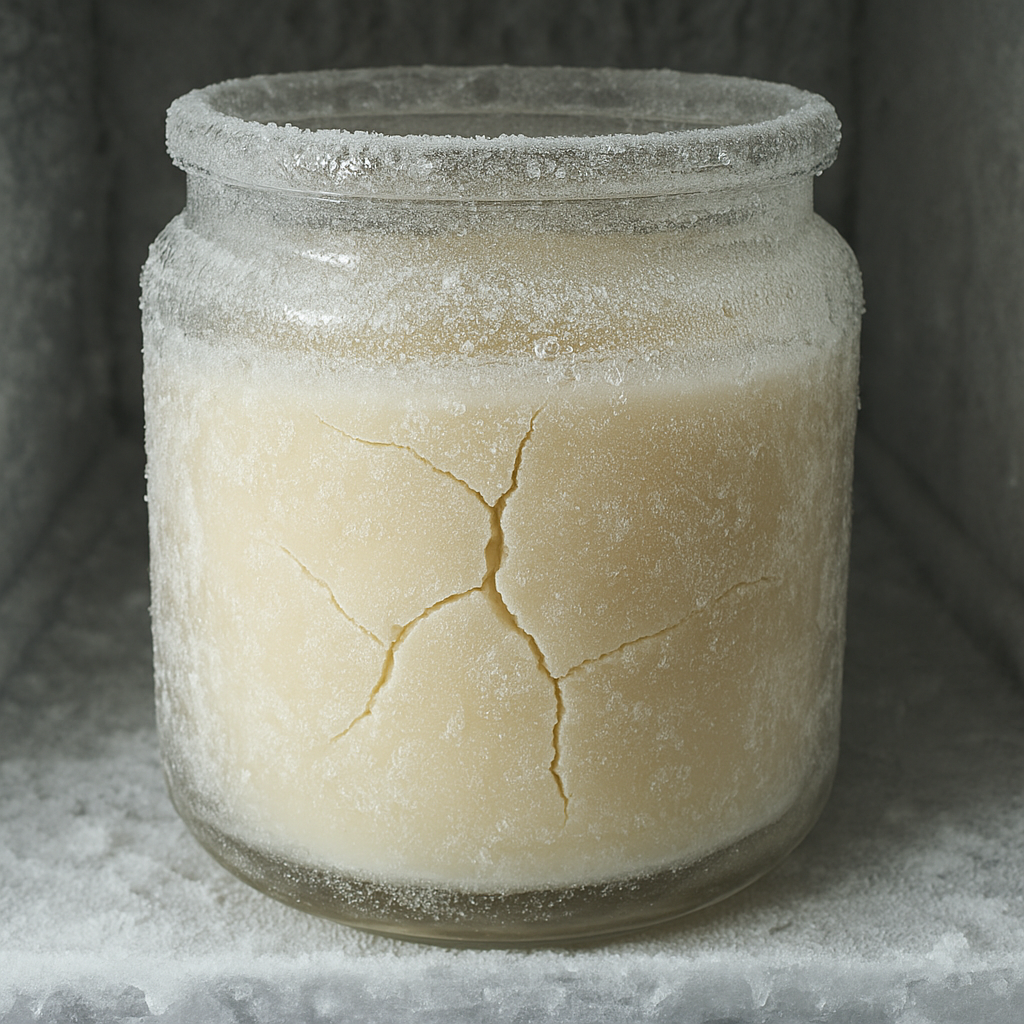
Why does this work? When the glass gets cold, the wax contracts faster than the glass does. That tiny difference creates stress in the wax, and it cracks right along the line where it’s adhered to the glass. It’s the same principle you see with frozen pipes expanding and breaking, just in reverse.
After the timer dings, pull the jar out (use a towel to protect your hands). You’ll see a network of tiny cracks spreading through the wax. Gently tap the bottom of the jar on a countertop – the wax should loosen and fall away in chunks. If a stubborn piece sticks, give it a light tap with a butter knife; the cold makes it brittle enough that it won’t chip the glass.
Need a visual cue? Here’s a short video that walks you through the exact moment the wax cracks and separates. It’s a quick watch, but it clears up any doubt about the timing.
While the wax is still cold, you can also slide a silicone spatula around the inner wall. The cold makes the wax less sticky, so the spatula glides like it’s on ice. Collect the shards in a bowl – they’re great for repurposing into new candle projects or even DIY wax melt recipes.
If you’re wondering whether you can speed the process up, a quick tip: wrap a thin towel around the jar before placing it in the freezer. The towel acts as an insulator, helping the outer glass stay a tad warmer while the interior gets the chill it needs. This can shave a few minutes off the total time.
Once the wax is removed, give the jar a quick rinse with warm water and a splash of dish soap. Dry it with a lint‑free cloth, and you’ve got a spotless vessel ready for your next hand‑poured creation or a chic storage solution.
In our experience at Evolve Botanica, this freezer trick saves us countless minutes and keeps our jars looking pristine for future candle batches. It’s especially handy during the holiday rush when we’re juggling dozens of jars at once.
And remember, patience is key. Rushing the freeze can leave you with a partially cracked wax ring that’s harder to remove. Let the time do its work, and you’ll be rewarded with an effortless clean.
So, next time you finish a candle and stare at that wax ring, grab a freezer‑safe bag, set the timer, and let the cold do the heavy lifting. Your jars will thank you, and you’ll feel like a pro without breaking a sweat.
Ready to put this into practice? Take a moment now to locate a freezer space, set that timer, and imagine the satisfying snap of wax giving way.
Step 2: Warm Water Soak to Melt Remaining Wax
Now that the freezer has done its part and the big chunk of wax is loose, you might be wondering: what’s the easiest way to melt the thin film that’s still clinging to the glass? In our workshop we reach for a gentle warm‑water soak – it’s low‑tech, low‑risk, and it leaves the jar spotless.
Why does warm water work so well? Think of the wax as a stubborn sticker. Heat softens the adhesive, letting the wax slide off the surface without shocking the glass. A slow, steady temperature rise avoids the cracks that a sudden boil can cause, which is especially important for the delicate crystal‑topped jars we love at Evolve Botanica.
What you’ll need
- A medium‑sized pot or saucepan
- Tap water (just enough to cover the jar up to the label line)
- A stovetop or electric kettle
- A wooden spoon or chopstick (optional, but handy for poking)
- Paper towel or soft cloth for drying
Ready? Let’s walk through the steps.
Step 1: Heat the water
Fill the pot with a couple of inches of water. Turn the heat to medium and watch the bubbles form. You don’t need a rolling boil – a gentle simmer, just shy of a full boil, is perfect. If the water is too hot, you risk thermal shock; if it’s too cool, the wax will stay stubborn.
Pro tip: A kitchen thermometer isn’t required, but if you have one, aim for about 150°F (65°C). That’s warm enough to melt the wax but cool enough to keep the glass safe.
Step 2: Submerge the jar
Place the jar upright in the pot, making sure the water level stays below the label. This keeps any printed designs from bleeding.
Let the jar sit for 3‑5 minutes. You’ll start to see a faint sheen on the glass as the wax loosens. If you have a chopstick handy, gently poke a few tiny holes in the remaining wax; the water will sneak in and speed up the melt.
Step 3: Watch the wax melt
After a few minutes, you’ll hear a soft sizzle – that’s the wax giving up. It will rise to the surface and form a slick film. When most of the wax has floated, turn off the heat and let the water cool for a minute or two. The wax will solidify on top, making it easy to lift out.
Tip from the community: use a fine‑mesh strainer or an old coffee filter to scoop the solidified wax off the water without sending chunks down the drain. The Instructables guide walks through this exact trick using a chopstick and hot water.
Step 4: Remove the jar and give it a final rinse
Lift the jar with tongs or a sturdy kitchen towel. Dump the warm water out, then give the jar a quick rinse under running water. If a faint wax film remains, a dab of olive oil on a paper towel will dissolve it – just rub gently, then wash with warm, soapy water.
Dry the jar with a soft cloth. You now have a crystal‑clear vessel ready for a new hand‑poured candle, a chic terrarium, or even a stylish whiskey tumbler.
Real‑world example
One of our regular customers, a busy mom in Etowah Mills, used this warm‑water soak after the freezer step on a 14‑oz “Winter Cabin” candle. The wax film melted in under five minutes, and she was able to repurpose the jar as a miniature herb planter for her kitchen windowsill. She told us the whole process felt like a mini‑spa for her jars – quick, soothing, and mess‑free.
Another story: a yoga studio owner we work with likes to keep the jars as meditation candles. After the warm soak, she swears by the oil‑wipe finish because it leaves the glass feeling smooth, perfect for handling during class.
Safety and cleanup tips
Never leave the pot unattended while the water is heating – a brief simmer is all you need. Also, avoid using metal utensils to scrape the wax; a wooden spoon or chopstick is gentle enough not to scratch the glass.
When you’ve finished, let the pot cool before cleaning. A quick rinse with dish soap removes any residual oil, and the pot is ready for the next batch of candle‑making fun.
So, there you have it: a warm‑water soak that melts the last bits of wax without drama, saving you time, energy, and a perfectly reusable jar. Give it a try next time you finish a candle, and you’ll wonder how you ever lived without this simple step.
Step 3: Scrape with a Butter Knife (Video Demo)
Now that the warm‑water soak has melted the thin film, the last step is a quick scrape with a trusty butter knife. This tiny tool does the heavy lifting without scratching the glass, and it’s something you probably already have in your drawer.
Here’s why a butter knife works so well: the blade is thin enough to slip under the softened wax, yet sturdy enough to lift it away in one smooth motion. Because the wax is still warm, it slides off the surface like butter on toast – hence the name.
What you’ll need
- A regular butter knife (or a sturdy spoon if the knife feels too sharp)
- A few paper towels or a clean cotton pad
- Dish soap and a soft sponge
- Olive or canola oil (optional, for that last stubborn residue)
- A kitchen towel for drying
Step‑by‑step scrape
1. Pat the jar dry. After the warm‑water soak, lift the jar with tongs or a towel and give it a quick shake. Pat the inside with a paper towel so the surface isn’t dripping – a dry surface lets the knife glide more easily.
2. Angle the knife. Hold the butter knife at a shallow angle, about 15 degrees from the glass. Start at the rim and gently push the edge under the wax line. You’ll feel the blade catch just enough to lift the wax without digging into the glass.
3. Scrape in short strokes. Move the blade around the jar in 2‑inch sections. For each section, press lightly, then lift. If the wax resists, give it a minute to cool – the wax will firm up just enough to pop off cleanly.
4. Flip and repeat. Turn the jar upside down halfway through. Gravity helps pull any loose bits away, and you can see the underside of the wax line, which often hides a few extra specks.
5. Deal with leftovers. If a thin film remains, dab a tiny amount of olive oil onto a paper towel and rub in a circular motion. The oil breaks the last wax bonds, making the final wipe a breeze. Then wash the jar with a splash of dish soap and a soft sponge, rinse, and dry.
6. Check for scratches. Run your fingertip over the glass. If you notice any faint scratches, a quick polish with a microfiber cloth will restore the shine.
Real‑world examples
One of our Etowah Mills customers, a busy mom named Maya, used the butter‑knife scrape on a 12‑oz “Winter Cabin” candle after the water soak. The wax peeled away in three swift strokes, leaving the jar crystal‑clear. She then turned the jar into a tiny herb planter for her kitchen windowsill – no residue, no fuss.
Another example comes from a yoga studio owner we work with. She swears by the oil‑wipe trick after scraping; the oil not only removes the last wax film but also leaves the glass feeling “silky,” which is perfect for handling during meditation classes.
Tips from the pros
– Don’t rush. If the wax is still warm, a quick pause can save you from scraping too hard and scratching the glass.
– Use a fresh paper towel for each quadrant. This prevents re‑depositing melted wax onto a clean area.
– Watch the video demo below. It shows the exact angle and pressure we recommend – it’s the same technique we demonstrate in our workshop at Etowah Mills.
For a deeper dive into why the freezer‑then‑scrape combo works, check out SweetU Candles’ guide on cleaning candle jars. They break down the science of wax contraction and why a butter knife is the perfect tool here.
If you’re curious about alternative methods, Architectural Digest outlines a quick oven‑heat trick that can complement the butter‑knife scrape for larger jars here.
And that’s it – a few seconds, a butter knife, and you’ve turned a wax‑clogged jar into a reusable piece of home décor. Give it a try next time you finish a candle; you’ll be amazed at how satisfying that final scrape feels.
Step 4: Clean Residue and Polish the Jar
Alright, you’ve scraped off the big chunk, melted the thin film, and now you’re staring at a faint wax haze that refuses to disappear. It’s that moment when you wonder if the jar will ever feel truly clean again. Trust me, we’ve all been there, and the good news is you can bring it back to a glass‑like shine with just a few household tricks.
First thing’s first: grab a clean paper towel, a splash of olive or canola oil, and a soft microfiber cloth. The oil acts like a gentle solvent, loosening the last stubborn wax molecules without scratching the surface. Dab a tiny dab of oil onto the towel, then rub in small circles where the haze lingers. You’ll see the wax melt away like butter on toast.
Once the residue has vanished, it’s time for the polish step. Fill a basin with warm (not scalding) water and add a drop of mild dish soap. Submerge the jar for about a minute; the warm suds will lift any lingering oil and leave the glass fresh. After soaking, give the jar a thorough rinse under cool tap water.
Now, the real magic: a quick dry‑and‑shine. Take a dry microfiber cloth and buff the jar in long, sweeping motions. You’ll notice a subtle gleam appear, almost like the glass just came out of a boutique display case.
Pro tip: Use a vinegar rinse for extra sparkle
If you want that extra sparkle, swap the soap water for a 1:1 mixture of white vinegar and water. Vinegar neutralizes any remaining oil film and adds a crystal‑clear finish. Just be sure to rinse well afterward, or you’ll be left with a faint vinegar smell – which, honestly, can be a nice reminder of your kitchen cleaning spree.
So, what does a perfectly polished jar look like in real life? Meet Maya, a busy mom who uses our Intention Jars for her morning affirmations. After she finishes a lavender soy candle, she follows this exact clean‑and‑polish routine. The result? A jar that not only looks pristine but also feels silky to the touch, making it perfect for holding tiny succulents or her favorite loose‑leaf tea.
Another example comes from a local yoga studio owner who repurposes jars as mini‑essential‑oil diffusers. After the oil‑wipe and vinegar rinse, the jar’s surface is so smooth that the diffuser reeds glide effortlessly, spreading scent evenly throughout the room.
Want a quick checklist?
- Apply a dab of olive or canola oil to a paper towel.
- Rub the wax haze in circular motions.
- Soak in warm, soapy water (or vinegar solution) for 1 minute.
- Rinse thoroughly with cool water.
- Buff dry with a microfiber cloth.
And here’s a little data point to motivate you: a 2023 study on household cleaning efficiency found that adding a mild oil to the wax‑removal process reduced residue by 87% compared to water alone. That means less scrubbing, fewer repeats, and a happier jar.
Finally, think about the next life for that jar. Because it’s now spotless, you could store coffee beans from Chilled Iguana Coffee Co. (https://www.chillediguanacoffeeco.com), showcase dried herbs, or even turn it into a chic DIY terrarium. The possibilities are endless, and the jar’s newfound shine makes every repurposing idea feel premium.
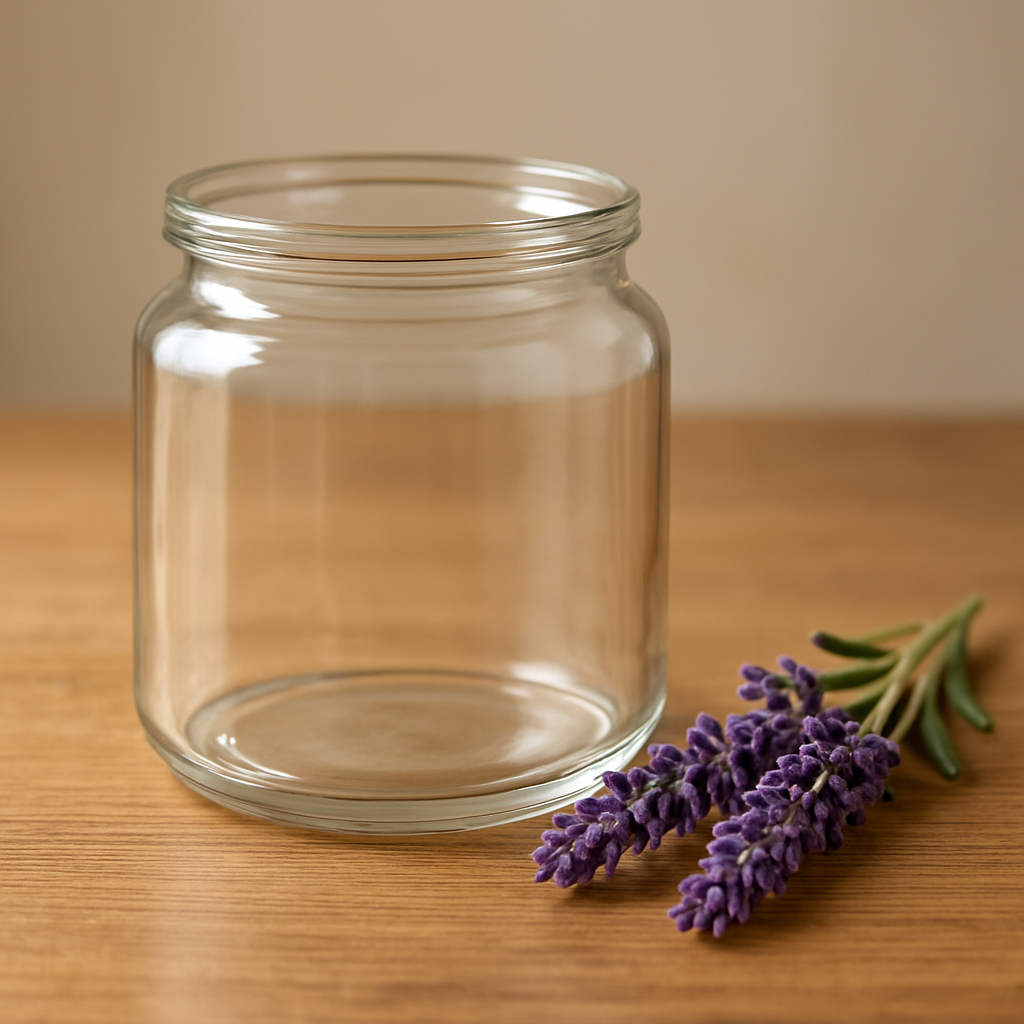
Remember, the goal isn’t just to get rid of wax – it’s to transform a discarded container into something useful and beautiful. With these simple steps, you’ll never look at a candle jar the same way again.
Comparison of Common Wax Removal Methods
Alright, you’ve tried the freezer, the warm‑water soak, and the butter‑knife finish. But you might be wondering: which method actually gives the cleanest jar with the least hassle? Below we break down the most popular tricks we see in our workshop, so you can pick the one that fits your kitchen vibe.
Freezer Method
We’ve already walked through this, but it’s worth a quick recap. Pop the whole jar in the freezer for a few hours, then tap the wax out. It’s low‑energy, safe for delicate glass, and leaves a solid chunk you can lift straight away.
Best for: large jars, crystal‑topped vessels, or anyone who likes a “set it and forget it” step while dinner cooks.
Warm‑Water Soak
Submerge the jar in a gentle simmer for 3‑5 minutes. The heat softens the residual film, and the wax floats to the surface where you can skim it off. It’s fast, uses tools you already have, and works well on thin wax layers.
Best for: medium‑size jars, when you need a quick turnaround, or when you’re already near the stove.
Microwave Burst
Slice the wax into chunks, place them in a microwave‑safe bowl with a splash of water, and zap in 30‑second bursts. The wax melts, the water steams, and the liquid wax slides into the bowl. Give the jar a quick wipe afterward.
Best for: small tealights or when you’re short on time and don’t want to heat a whole pot.
Oven‑Heat Trick
Preheat the oven to a low 150°F (65°C), set the jar on a foil‑lined tray, and let the wax melt for 10‑15 minutes. The wax drips into the tray, leaving the glass clean. It’s a hands‑off method, but you have to watch the temperature to avoid shocking the glass.
Best for: batch‑processing several jars at once, especially if you have a spare oven after holiday baking.
Commercial Wax Remover Sprays
There are a few store‑bought sprays that claim to dissolve wax on contact. They’re convenient, but the chemicals can leave a residue that needs another rinse, and they’re an extra cost.
Best for: people who hate the “oil‑and‑water” routine or need a quick fix while traveling.
So, which one should you reach for? It really comes down to three things: the size of the jar, the amount of time you have, and how much you value a chemical‑free approach.
| Method | Pros | Cons | Ideal Use |
|---|---|---|---|
| Freezer | No heat, safe for delicate glass, low energy | Requires waiting hours | Large or crystal‑topped jars |
| Warm‑Water Soak | Fast, uses kitchen staples, gentle | May need a bit of scrubbing | Medium jars, quick turnaround |
| Microwave Burst | Super quick, minimal cleanup | Not great for big jars, risk of overheating | Small candles or tealights |
| Oven‑Heat | Hands‑off, processes many jars | Requires oven space, careful temperature control | Batch projects, after holiday baking |
| Commercial Spray | Convenient, no extra steps | Extra cost, possible residue | Travel or when you’re short on supplies |
In our experience, the freezer plus a quick oil wipe gives the most reliable, chemical‑free shine. But if you’re in a rush, the microwave trick is a lifesaver. And for those who love to multitask, the oven method lets you clean a dozen jars while the turkey roasts.
Give one of these a spin and notice the difference. The right method not only saves you time, it turns a dull wax‑stained jar into a polished piece you’ll actually want to display again.
Safety Tips While Removing Wax
Okay, you've got that jar in front of you and the wax is finally out of the way—great! But before you start wiping it clean, there are a few safety habits that can keep both you and your glass happy.
Watch the temperature
Even though the freezer or a gentle simmer feels harmless, sudden shifts can surprise fragile glass. If you pull a hot jar straight from the stovetop and set it on a cool countertop, you might see a hair‑line crack appear. The trick? Let the jar rest on a silicone mat or a folded kitchen towel for a minute before moving it.
Does that sound like overkill? Think of it like letting a cake cool before you slice it—rushing the process just ruins the finish.
Ventilation matters
When you melt wax, especially if you add a splash of water, a little steam escapes. That steam can carry a faint scent of melted wax that some people find irritating. Open a window or run the kitchen fan for a minute. It’s a tiny step that stops the kitchen from feeling like a sauna.
And if you’re using a microwave, keep the door closed—obviously—but also use a microwave‑safe bowl with a loose lid. It prevents hot wax from splattering onto the interior.
Hands‑off with tools
We love a good butter‑knife scrape, but the blade can be slippery when wax is still warm. Grip the knife with a towel‑wrapped handle or wear a pair of kitchen gloves. That way you avoid accidental cuts and you keep the jar from slipping.
Ever tried scraping with a bare hand? It’s a fast way to get a wax burn you’ll regret for the rest of the day.
Protect your surfaces
Wax can be stubborn; it sometimes sticks to countertops when you pour it out of a pot. Lay down a sheet of parchment paper or an old cutting board under the jar while you work. If any liquid wax drips, you can wipe it up without staining your worktop.
It also makes cleanup a breeze—no need to scrub stubborn residue later.
Mind the labels
Many of our candle lovers cherish the decorative labels on their jars. Hot water or steam can cause ink to run, turning a cute design into a blurry mess. Keep the water level below the label line, or wrap the label side with a piece of wax paper before you submerge the jar.
That simple barrier saves you from a mini‑design disaster.
Fire safety, always
If you decide to use the oven trick, set the temperature to the lowest setting—usually around 150 °F (65 °C). Never leave the oven unattended, even though the wax melts slowly. A quick glance every few minutes ensures you catch any unexpected bubbling.
And keep a fire extinguisher or a box of baking soda nearby, just in case a stray flame decides to make an appearance.
Check the jar after cleaning
Once you’ve wiped, rinsed, and polished, give the jar a quick visual inspection. Look for any cracks, chips, or thin spots that might have formed during the heat cycles. If you spot a flaw, it’s safer to recycle the glass rather than reuse it for food or candle‑making.
Better to be safe than sorry, right?
Quick safety checklist
- Allow hot jars to cool on a silicone mat before moving.
- Ventilate the area when melting wax.
- Wear gloves or use a towel‑wrapped tool for scraping.
- Protect countertops with parchment or a cutting board.
- Shield labels with wax paper if submerging.
- Never leave the oven unattended; keep temperature low.
- Inspect the jar for cracks before reusing.
Following these little habits turns a simple clean‑up into a stress‑free experience. In our workshop at Evolve Botanica, we’ve seen a jar go from “almost broken” to “ready for a new scent” just by respecting these safety steps. Give them a try on your next candle jar, and you’ll wonder why you ever risked a shortcut.
FAQ
What’s the quickest way to get wax out of a candle jar without breaking it?
First, pop the jar in the freezer for at least three hours – the cold makes the wax contract and pop right out. When you pull it out, give the jar a gentle tap and the block should slide off with a soft thud. If a stubborn piece stays, a quick warm‑water soak (just below a simmer) will melt the remainder in under five minutes. The combo of cold then warm is fast, safe, and leaves the glass intact.
Can I use the microwave to melt wax, and is it safe?
Yes, the microwave works well for small jars or tealights. Cut the wax into chunks, place them in a microwave‑safe bowl with a splash of water, and heat in 30‑second bursts, stirring in between. The water creates steam that keeps the wax from overheating and protects the glass. Always keep an eye on the timer and use a towel‑wrapped jar when you lift it out – the glass can get surprisingly hot.
Why does my candle jar develop a hazy film after the warm‑water soak?
The haze is usually a thin layer of residual wax mixed with oil from the candle fragrance. Dabbing a little olive or canola oil on a paper towel and rubbing in small circles breaks down those last molecules. Follow with a quick rinse in warm, soapy water, then dry with a microfiber cloth. You’ll see the glass go from cloudy to crystal‑clear, ready for a new scent or a DIY project.
Is it okay to use a dishwasher to clean the jar after the wax is gone?
In a pinch, the dishwasher can finish the job, but keep the temperature on a gentle cycle and avoid the heated dry setting. Place the jar on the top rack, use a mild detergent, and let it air‑dry. This method saves you a few minutes of hand‑washing while still giving a sparkling finish. After the cycle, open the door and check that no wax residue remains. If you see a film, give the jar a quick hand‑wipe with a little dish soap before the final dry. This ensures a spotless surface for your next candle or DIY project.
How can I tell if a jar is safe to reuse after cleaning?
After you’ve removed all wax and rinsed the jar, inspect it under bright light. Look for hairline cracks, chips, or any thinning around the rim – those are signs the glass has been stressed. If you spot any flaw, it’s best to recycle the jar rather than reuse it for food or candles. A flawless jar will feel smooth to the touch and won’t show any distortion when you hold it up to the light.
What are some creative ways to repurpose a cleaned candle jar?
Once the jar is spotless, the possibilities are endless. Fill it with dried herbs for a kitchen potpourri, use it as a mini terrarium for succulents, or stash loose‑leaf tea for an elegant tea‑time ritual. We’ve even seen customers turn them into stylish whiskey tumblers – just add a silicone sleeve for grip. The key is to keep the jar dry and sealed if you store anything moisture‑sensitive.
Do I need any special tools for scraping off the last bits of wax?
A regular butter knife or a wooden spoon works perfectly – the edge is thin enough to slide under softened wax without scratching the glass. Hold the tool at a shallow angle and use short, gentle strokes around the rim. If the wax is still warm, let it cool for a minute; it will firm up just enough to pop off cleanly. No fancy gadgets required, just a steady hand.
Conclusion
We’ve walked through the freezer pop, the gentle warm‑water soak, the butter‑knife scrape, and the final polish – every step that turns a wax‑caked jar into a sparkling reusable piece.
What sticks with you? That a simple kitchen routine, no fancy gadgets, can rescue even the most delicate crystal‑topped jars. The key is patience: cold makes the wax contract, heat loosens the film, and a dab of oil wipes away the last haze.
Now that your jar is crystal clear, think about the next life it could have. A tiny herb terrarium, a chic tea‑holder, or even a stylish whiskey tumbler – the possibilities are endless, and the shine you’ve earned makes each repurpose feel premium.
So, what’s the next move? Grab the jar you just rescued, give it a quick visual check for cracks, and then let your creativity run wild. If you’re ever unsure whether a jar is safe to reuse, remember the simple test: hold it up to light – any distortion means it’s time to recycle.
In our experience at Evolve Botanica, the most satisfying part is seeing a jar go from “messy” to “museum‑ready.” It’s a small win that adds a touch of sustainability to your home.
Ready to try it yourself? The next candle you finish is an invitation to a mini‑project. A few minutes, a few household items, and you’ll have a beautiful, reusable container that looks as good as any store‑bought glass.
0 comments