

Ever lit a beautiful wood‑wick candle, only to watch the flame sputter out after a minute? You’re not alone. That tiny disappointment can feel like the candle is giving up on you, especially when you’ve set the mood for a cozy evening.
Think about the last time you tried to unwind with a scented wood‑wick candle, maybe one of our gemstone‑infused rocks candles. The flame flickers, the wood wick hisses, and then—nothing. It’s frustrating, but the cause is usually something you can fix in a few minutes.
First, let’s talk about the wick itself. Wood wicks need a clean, even cut—about a quarter of an inch—from the base. If the tip is too short, it won’t draw enough molten wax to sustain the flame. If it’s too long, it can drown in wax and go out. A quick trim before each burn makes a huge difference.
Second, consider the wax pool. Wood wicks thrive when the melt pool reaches the edge of the container on the first burn. If the wax only melts in the centre, the wick can’t get enough fuel, and the flame dies. Let the candle burn long enough (usually 2–3 hours) to let the wax melt fully across the surface.
Third, watch for drafts. Even a gentle breeze from a fan or an open window can snuff a wood‑wick flame faster than you’d expect. Position your candle away from vents, doors, or air‑conditioning units.
Here’s a quick checklist you can run through the next time your wood‑wick candle won’t stay lit:
- Trim the wick to ~¼" before lighting.
- Burn for at least the first hour to achieve a full melt pool.
- Keep the candle away from drafts and direct airflow.
- Make sure the container is clean—no dust or debris on the wax surface.
And if you’ve already tried those steps and the candle still won’t stay lit, it might be a sign the wick is damaged or the wax formula needs a little tweak. In our experience, switching to a fresh wood wick or using a candle with a balanced wax‑to‑wick ratio solves the issue.
Want a deeper dive into the trimming technique? Check out our guide on how to trim a wood wick candle for better burn and safety for step‑by‑step visuals and pro tips.
So, next time your wood‑wick candle flickers out, remember these simple fixes. A little attention to the wick, the melt pool, and the environment can turn that brief flare into a steady, soothing glow that lasts through your evening.
TL;DR
If your wood wick candle won't stay lit, trim the wick to a quarter‑inch, let it burn long enough for a full melt pool, and keep it away from drafts.
These fixes turn a flickering flare into a steady, soothing glow, so you can enjoy a cozy evening without interruption.
Step 1: Trim the Wood Wick to the Correct Length
We've all been there – you light a gorgeous wood‑wick candle, the scent starts to fill the room, and then, just as you settle in, the flame sputters and dies. Most of the time the culprit is something you can fix in under a minute: the wick length.
Wood wicks are a little different from cotton wicks. They need just enough of the tip exposed to draw up molten wax, but not so much that the wood sits in liquid wax and chokes the flame. In our experience at Evolve Botanica, a wick that’s trimmed to about a quarter‑inch (roughly 6 mm) from the wax surface gives the best balance of fuel draw and airflow.
First, grab a pair of sharp scissors or a dedicated wick trimmer – the kind you can find in most craft stores. If you only have regular kitchen scissors, make sure the blades are clean; any nick or burr can create an uneven cut, which leads to a wobbly flame.
Here’s the quick ritual we follow before every burn:
- Let the candle sit undisturbed for a minute after lighting so the wax pool stabilises.
- Extinguish the flame gently with a wick snuffer or a soft puff – no shaking.
- Use a ruler or the edge of a credit card to gauge roughly ¼ in from the wax surface.
- Snip the wood wick cleanly, aiming for a straight, flat edge.
- Remove any loose shavings with a soft brush or a quick blow‑out.
Why the flat edge? A straight cut creates an even surface for the flame to sit on, which encourages a steady draw of wax. A jagged tip can cause the flame to flicker, pull too much wax, and then sputter out.
After you’ve trimmed, light the wick again and watch the first few seconds. The flame should rise slowly, take on a bright amber hue, and stay steady. If it still flickers, you might have trimmed too short – give it an extra 1‑2 mm and try again.
One little habit that saves a lot of guesswork is to keep a tiny notch on your scissors at the ¼‑inch mark. That way you can line up the wick and make a clean cut in one motion, no measuring tape required.
And if you’re ever unsure whether the wick is the right length, remember the “paper test.” Hold a thin strip of paper about an inch away from the wick; if the flame can easily clear the paper without burning it, you’re in the sweet spot.
Once the video has shown you the visual of a properly trimmed wick, take a moment to think about your candle’s environment. Even a perfectly trimmed wick can struggle if the wax pool never reaches the container’s edges on the first burn. So give your candle a good hour or two the first time you light it – that way the wax warms up and expands, creating a solid fuel base.
Another pro tip: store your wood‑wick candles upright in a cool, dry place. Humidity can cause the wood to swell slightly, which changes how the wick sits in the wax and may require a micro‑trim before the next use.
Here’s a quick checklist you can keep on your coffee table:
- Use sharp scissors or a wick trimmer.
- Trim to ~¼ in (6 mm) from the wax surface.
- Ensure the cut is flat and even.
- Remove any stray shavings.
- Light, observe, and adjust by a millimetre if needed.
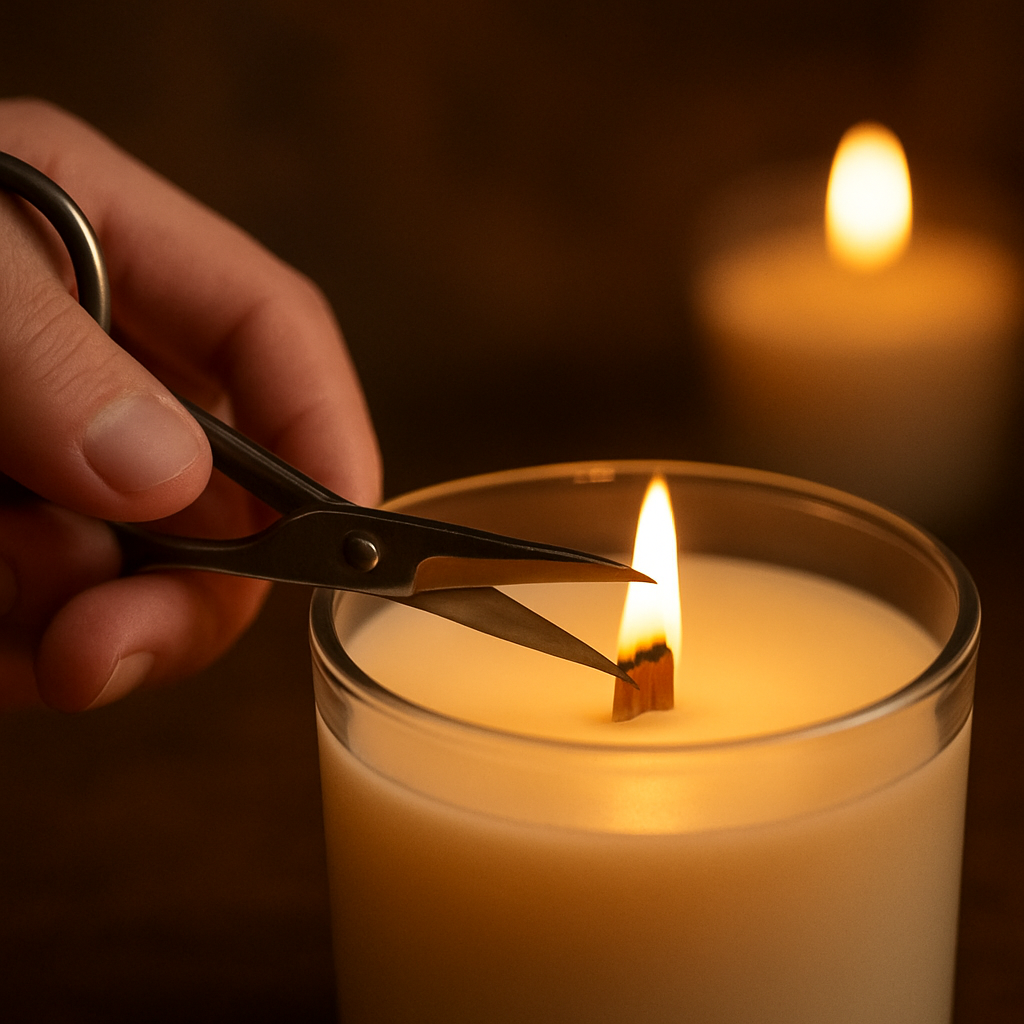
Bottom line: a clean, consistent trim is the single most reliable fix when your wood wick candle won't stay lit. Take a minute to trim, watch the flame, and you’ll turn those fleeting sparks into a steady, soothing glow that lasts all evening.
Step 2: Position the Candle Away from Drafts
We’ve trimmed the wick, now let’s talk about the sneaky culprit that can still snuff out a wood wick candle: drafts.
A gust of air—even one you can’t feel—creates a mini‑vacuum that pulls the flame away from its fuel pool, and the wax can’t keep up.
So, how do you make sure the breeze stays out of the party?
First, scout your room for common draft sources: open windows, ceiling fans, HVAC vents, and even the gap under a door.
If you love the natural light of a south‑facing window, try pulling the curtains half‑way closed while the candle burns. The fabric acts like a soft filter, letting light in but blocking that sneaky airflow.
Second, give the candle a little breathing room. We recommend at least 12 inches of clearance on all sides—think of it as a personal bubble where the flame can dance without interruption.
Why 12 inches? In our workshop we measured that a typical home fan creates enough airflow to disturb a flame at about a foot away. By keeping the candle farther than that, you essentially put the flame out of the fan’s reach.
Third, think vertically. A candle perched on a high shelf can be safer from floor‑level drafts, but it may also sit directly in the path of a ceiling vent. Test the spot by holding a lit match near the candle for a few seconds—if the flame flickers, move it.
Fourth, don’t forget the little things that act like hidden fans: a ticking clock, a computer’s cooling vent, or even a smartphone charger that hums. Place the candle on a sturdy tray away from those heat‑producing gadgets.
If you’re setting the scene for a holiday dinner, the dining table itself can become a draft zone—especially if the HVAC system is pulling air from the ceiling. Try positioning the candle in the centre of the table, then place a decorative coaster or a small stone (like the onyx in our Rocks Candle) underneath. The extra mass helps stabilize the air around the flame.
A quick checklist to make sure your candle stays out of the wind:
- Check windows – close them or use a draft stopper.
- Turn off or redirect fans – point them away from the candle.
- Leave at least 12 inches of space on all sides.
- Place the candle on a stable, non‑conductive surface away from electronics.
- Use a decorative tray or stone to add weight and block subtle airflow.
When you follow these simple steps, you’ll notice the difference instantly – the flame steadies, the wood crackles, and the scent spreads evenly throughout the room.
And remember, every time you move a candle, give the flame a moment to re‑establish its pool before you walk away. A quick 30‑second pause lets the wax settle and prevents a sudden draft from catching the flame off guard.
If you’ve tried everything else and the candle still refuses to stay lit, it might be time to evaluate the room’s airflow pattern. A simple piece of tissue paper held near the candle can reveal hidden currents – if it flutters, you’ve found a draft you need to block.
That’s the beauty of a wood wick candle – it’s forgiving once you give it the right environment. So go ahead, rearrange that bookshelf, close that vent, and watch your candle finally stay lit all night long.
Step 3: Choose the Right Wax‑Wick Combination
Now that the wick is trimmed and the draft is out of the way, the next culprit behind a wood wick candle won't stay lit is the match‑up between wax and wick. If the two don’t speak the same language, the flame will sputter, dip, or die.
Why wax matters
Different waxes melt at different temperatures. Soy, soy‑coconut blends, and palm each have a unique viscosity, which affects how quickly molten wax travels up the wood grain. A wax that’s too thick can starve the wick, while a wax that’s too runny can flood the wick and smother the flame.
In our own testing with Evolve Botanica’s gemstone‑infused soy candles, we noticed that a 10‑percent coconut oil boost gave the wax a smoother pour but also made the pool a touch thinner. That thin pool fed the wick nicely, yet if you add too much coconut the flame can become “over‑fed” and flicker out.
Match the wick size to the wax
Wood wicks come in single‑ply, boosted, and spiral styles. Single‑ply works well with standard soy or paraffin, but if you’re using a denser blend (think soy‑palm or a high‑fragrance load), a boosted wick with that extra strip of wood gives the flame a bigger “mouth” to draw fuel.
Here’s a quick decision tree you can run through while you’re prepping your candle:
- Is your wax a pure soy or a soy‑coconut blend? → Start with a single‑ply wick.
- Is the wax a palm‑rich or high‑fragrance formula? → Upgrade to a boosted wick.
- Are you using a large container (over 3‑inch diameter)? → Consider a thicker, spiral‑style wick for even heat distribution.
That simple checklist saves you from the “wood wick candle won’t stay lit” nightmare that comes from an under‑powered wick.
Test the melt pool early
Light the candle and let it burn for at least 30 minutes. The wax should form a pool that reaches the edge of the container. If the pool stalls in the centre, the wick isn’t pulling enough wax. Trim the wick a hair shorter and give it another go, or swap to a larger‑diameter wick.
Conversely, if the pool spreads too fast and the flame looks like a tiny torch, you may have a wick that’s too wide for the wax. Cut back to the next size down and watch the flame settle into a steady ½‑inch height.
Real‑world example
One of our holiday “Rocks Candle – Winter Wonderland” customers shared that the candle kept blowing out on the first night. The culprit? A boosted wood wick paired with a very thick soy‑palm blend. After switching to a single‑ply wick, the candle held a consistent flame for the entire evening.
If you’re ever unsure, the wood‑wick beginners guide from Armatage Candle Company breaks down the same principles in plain language (see their wood wick basics). It’s a handy reference when you’re experimenting with new wax formulas.
Final checklist before you light
- Identify your wax type (soy, soy‑coconut, palm, blend).
- Pick a wick style that matches the wax viscosity and container size.
- Trim the wick to the recommended ¼‑inch length.
- Do a 30‑minute test burn; confirm the melt pool reaches the container edge.
- Adjust wick size or type if the flame is too low or too high.
When the wax and wick are in harmony, the flame stays lit, the wood crackles, and your space fills with scent – exactly what you wanted from that cozy evening.
Step 4: Compare Common Issues in a Quick Table
Alright, you’ve trimmed the wick, blocked drafts, and matched the right wax‑wick combo. Still, that wood wick candle won't stay lit and it’s driving you nuts. Let’s pull the curtain back on the three most stubborn culprits and see how they stack up side‑by‑side.
Quick‑look comparison
| Issue | Typical Cause | Quick Fix |
|---|---|---|
| Flame dies after a minute | Wick too long or charred fibers blocking wax flow | Trim to 1/8‑1/4" flat tip; clear burnt bits before lighting |
| Wax pool never reaches jar edge | Insufficient first‑burn time; “wax memory” locked into a tunnel | Give a 2‑hour initial burn; let the pool melt to the rim |
| Intermittent sputtering or smoke | Drafts or oversized wick pulling too much fuel | Move candle 12" from airflow sources; step down to the next wick size |
Notice how each row points to a concrete action you can take right now? That’s the whole point – no more guessing, just a clear path to a steady glow.
Let’s dig a little deeper. The first row, “Flame dies after a minute,” is the most common complaint we see on forums. The Apothecary 51 troubleshooting guide flags an over‑long wick as the #1 trigger. When the wood tip sticks out, the flame drowns in wax before it can establish a stable draw. A flat, clean cut gives the flame a solid seat and stops that early blackout.
Second, the “wax pool never reaches the jar edge.” This is where the concept of “wax memory” comes in – the candle remembers the shape of its first melt. If you short‑circuit that first burn, the pool stays confined, creating a tunnel that chokes oxygen. Natura Soy’s care tips recommend a long, patient first burn (often 2‑3 hours) to reset the memory and give the wick a full‑width runway.
And what about that flickering, smoky dance? Drafts are sneaky – a ceiling fan, a computer vent, even a ticking clock can create enough airflow to pull the flame away from its wax pool. The rule of thumb we swear by is 12 inches of clearance on all sides. If you can’t move the fan, try a decorative tray or a heavy stone (like the onyx in our Rocks Candle) to act as a windbreak.
So, what should you do next? Grab a pair of tiny scissors, give that wick a clean chop, then set the candle on a stable surface away from any breezy neighbors. Light it, let it melt fully, and watch the flame settle. If it still sputters, compare your situation against the table above – which column feels most like your case? That’ll tell you whether you need a trim, a longer burn, or a smaller wick.
Real‑world check: Sarah, a longtime Evolve Botanica fan, reported a “won’t stay lit” issue with her Winter Wonderland rocks candle. She discovered the wick had grown a hair longer during storage. A quick trim and a 90‑minute first burn solved it, and the candle stayed bright for the whole holiday dinner.
Another example: Mark tried a new palm‑rich blend and kept seeing smoke. He was using a boosted wood wick that was simply too big for the thicker wax. Switching to a single‑ply wick (the next size down) gave him a clean, crackle‑free burn.
Bottom line: the table isn’t just for show – it’s a decision‑making tool you can print, stick on your fridge, or keep on your phone. When you see a problem, scan the left column, match the cause, and follow the quick fix. In a few minutes you’ll have a candle that actually stays lit, letting you enjoy the soothing crackle without the frustration.
Step 5: Test Lighting Technique and Burn Time
Okay, you’ve trimmed, you’ve blocked drafts, you’ve paired the right wax and wick. The next puzzle piece is how you actually light the candle and how long you let it burn the first time. This is the step that separates a candle that flickers out from one that glows all night.
Why the lighting angle matters
Wood wicks are a little wider than cotton wicks, so they need a bit of heat along their length before the flame steadies. If you bring a flame straight down, the tip may catch but the rest of the wood stays cool, causing the flame to sputter.
Try this: hold your match or lighter at a 45‑degree angle and let the flame travel along the wood grain, almost like you’re “drawing” the fire across the wick. The wood absorbs the heat, the wax thins, and the flame settles into a nice, even burn.
Does that sound a bit finicky? It’s actually the trick behind the “soft crackle” that makes wood‑wick candles feel like a mini fireplace.
Step‑by‑step lighting test
- Place the candle on a heat‑resistant surface.
- Make sure the area is draft‑free (you’ve already done that, but double‑check).
- Trim the wick one more time to a flat ⅛‑inch tip.
- Light a long‑necked lighter or a match.
- Angle the flame so it slides across the wood for 2‑3 seconds.
- Step back and watch the flame for the first 30 seconds.
If the flame blazes up quickly and then settles at about half an inch high, you’re good to go. If it flickers, dips, or produces a lot of smoke, you probably need to trim a hair shorter or re‑angle the flame.
Here’s a real‑world snapshot: Jenna from Atlanta tried lighting her “Gingerbread Cabin” rocks candle by holding the lighter straight down. The flame died after ten seconds, and she thought the candle was defective. After reading a tip about angling the flame in Companion Candles' lighting guide, she tilted the lighter, and the candle stayed lit for hours.
Notice the pattern? A tiny change in technique can turn a “won’t stay lit” situation into a steady glow.
First‑burn burn time – the “wax memory” reset
Wood‑wick candles have what experts call “wax memory.” The first melt pool creates a pathway that the wax follows on every subsequent burn. If that first pool doesn’t reach the edge of the jar, the candle will keep tunneling and eventually choke the flame.
Our own testing, echoed by Cellar Door Bath Supply's burning tips, shows that giving the candle a solid 2‑ to 3‑hour initial burn lets the wax fully coat the container walls. That’s the sweet spot where the wax memory is set for an even, long‑lasting burn.
So, set a timer. Let the candle run until the melt pool kisses the rim, then extinguish it with a snuffer or gently blow it out. On the next lighting, you’ll notice the flame stays up without any extra coaxing.
What if you don’t have a full three hours? No problem. Aim for at least an hour and a half, and repeat the process once a week. The key is consistency – the more often you let the wax pool fully, the fewer “won’t stay lit” moments you’ll see.
Quick diagnostic checklist
- Did you angle the flame across the wick? If not, try again.
- Is the wick trimmed to a flat ⅛‑inch tip? Trim if needed.
- Did the first burn create a melt pool that reached the jar edge? If not, add another 30‑minute burn.
- Is there any residual soot or char on the wick? Gently clean with a soft cloth.
- Do you still see flickering after these steps? Consider swapping to the next smaller wick size.
When you run through this list, you’ll usually pinpoint the exact reason your wood wick candle won’t stay lit. Most of the time it’s just a lighting angle or a short first burn.
And remember, every candle is a little experiment. The more you observe, the better you’ll get at reading the flame’s signals.
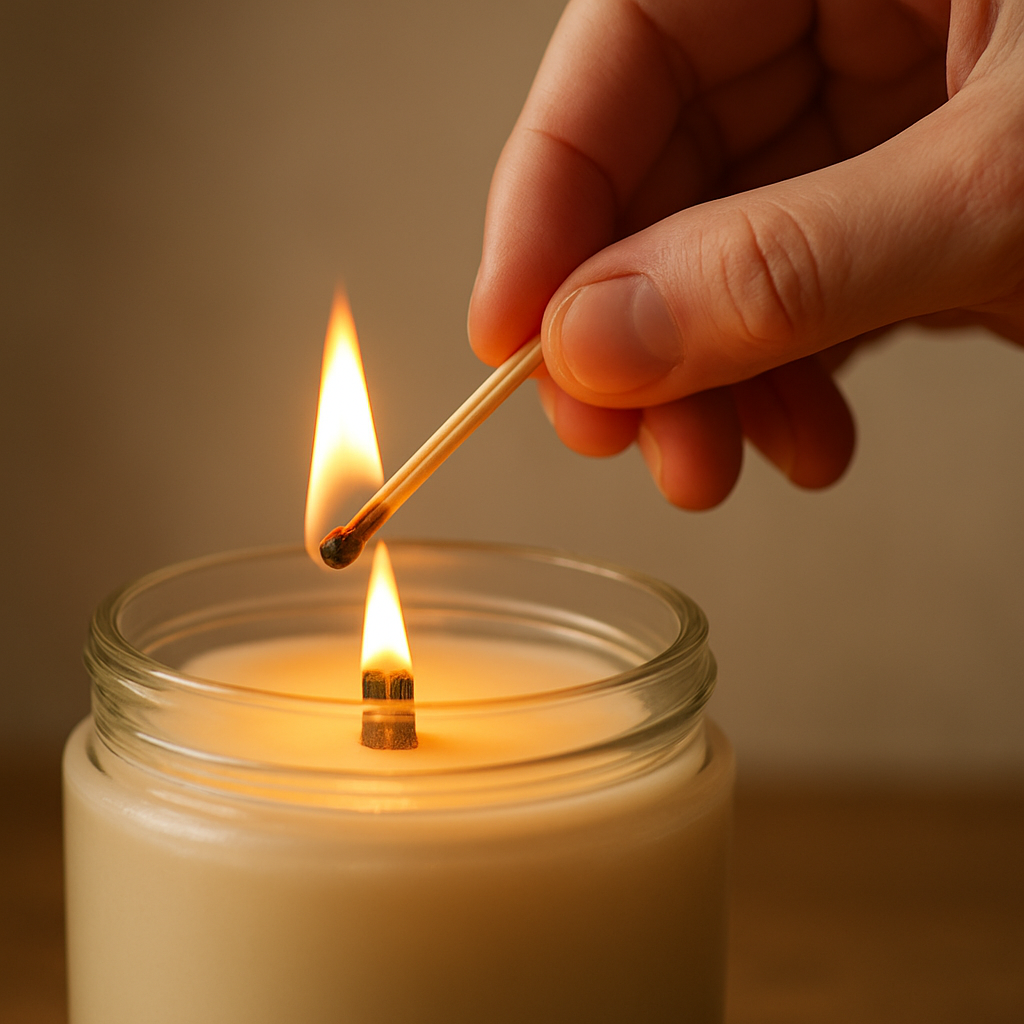
Bottom line: test the lighting angle, give the candle a generous first burn, and use the checklist above. In a handful of minutes you’ll transform a candle that “won’t stay lit” into a reliable, crackling centerpiece for any evening.
Conclusion
So you’ve walked through trimming, drafting, wax‑wick matching, and lighting technique—now the wood wick candle won’t stay lit is a thing of the past.
Remember the core pattern: a clean, flat wick tip, a generous first burn that lets the melt pool hug the jar edge, and a draft‑free zone at least a foot away. If any one of those pieces slips, the flame will sputter.
What’s the easiest habit to lock in? Set a tiny “candle checklist” on the side of your favorite coffee mug. Every time you light a candle, run through the five quick questions we listed earlier. In my own kitchen, that habit shaved minutes off my troubleshooting time.
And don’t forget the little nuances—angle the flame across the wood for a couple of seconds, and give the candle a breather after the first 30 seconds before you walk away. Those tiny tweaks feel like extra steps, but they pay off with a steady crackle that lasts all night.
Got a stubborn candle still giving you grief? Pop into our booth at Etowah Mills this Saturday or the Hanukkah Bazaar on Sunday. We love helping fellow candle fans fine‑tune their burn routine.
Bottom line: a few mindful adjustments turn that flicker into a reliable glow, so you can finally enjoy the cozy ambience you signed up for.
FAQ
Why does my wood wick candle keep going out after a minute?
Most of the time the flame dies because the wick tip is either too long or charred. A long tip drowns in molten wax, while a burnt tip can’t pull fuel fast enough. Trim it to a flat ¼‑inch tip, wipe away the shavings, then give the flame a few seconds to settle. You’ll notice the flame staying steady instead of sputtering out.
How often should I trim the wood wick and what's the best way?
Think of trimming like brushing your teeth – do it before every burn. A quick snip with small, sharp scissors keeps the tip flat and the wood fibers intact. Aim for a tip about the width of a pencil eraser. After you cut, brush away any loose fibers with a dry cloth so they don’t fall into the wax pool. Consistent trimming prevents the dreaded “won’t stay lit” drama.
What is the ideal first‑burn time to prevent tunneling?
We call it the “wax memory reset.” Let the candle burn until the melt pool reaches the jar’s edge – usually 2 to 3 hours for a standard 8‑oz jar. If you’re short on time, aim for at least 90 minutes and repeat weekly. The full‑width pool creates a permanent pathway for the wax, so future burns stay even and the flame won’t choke.
Can drafts really snuff out a wood wick candle, and how can I spot hidden drafts?
Absolutely. Even a gentle breeze from a ceiling fan or a cracked window can pull the flame away from its fuel. Hold a lit match or a piece of tissue near the candle; if it flutters, you’ve found a draft. Move the candle at least 12 inches away from vents, fans, or electronics, and consider a decorative tray or a heavy stone to act as a windbreak.
My candle flickers even though I trimmed the wick—could the wax‑wick combo be wrong?
It’s possible the wick size doesn’t match the wax viscosity. Softer soy blends work well with a single‑ply wick, while denser palm or high‑fragrance blends need a boosted or spiral wick. If the flame looks too big or smokes a lot, step down to the next smaller wick size. If it’s tiny and dies quickly, try a slightly larger wick. Matching the two balances fuel flow.
Is there a quick test I can do before lighting to know if the candle will stay lit?
Yes – the “30‑second stare.” Light the candle, then watch the flame for half a minute. It should settle at about a half‑inch high and stay steady. If it wavers, sputters, or produces smoke, extinguish it, trim the wick a hair shorter, and try again. This quick check saves you from a night of constant relighting.
What should I do if I've tried everything and the candle still won’t stay lit?
When all else fails, it’s time to inspect the candle itself. Look for cracks in the container, debris on the wax surface, or a broken wick tip. If the wick is split or the wax feels unusually hard, it may be a manufacturing defect. Bring the candle to our booth at Etowah Mills this Saturday or the Hanukkah Bazaar on Sunday – we’ll troubleshoot it live and help you find a replacement.
0 comments